#7 - A Complete Guide to Create a NFT DAO on Solana
Authors: @emersonliuuu, @ironaddicteddog
[Updated at 2022.4.28]
Overview
DAO (Decentralized Autonomous Organization)
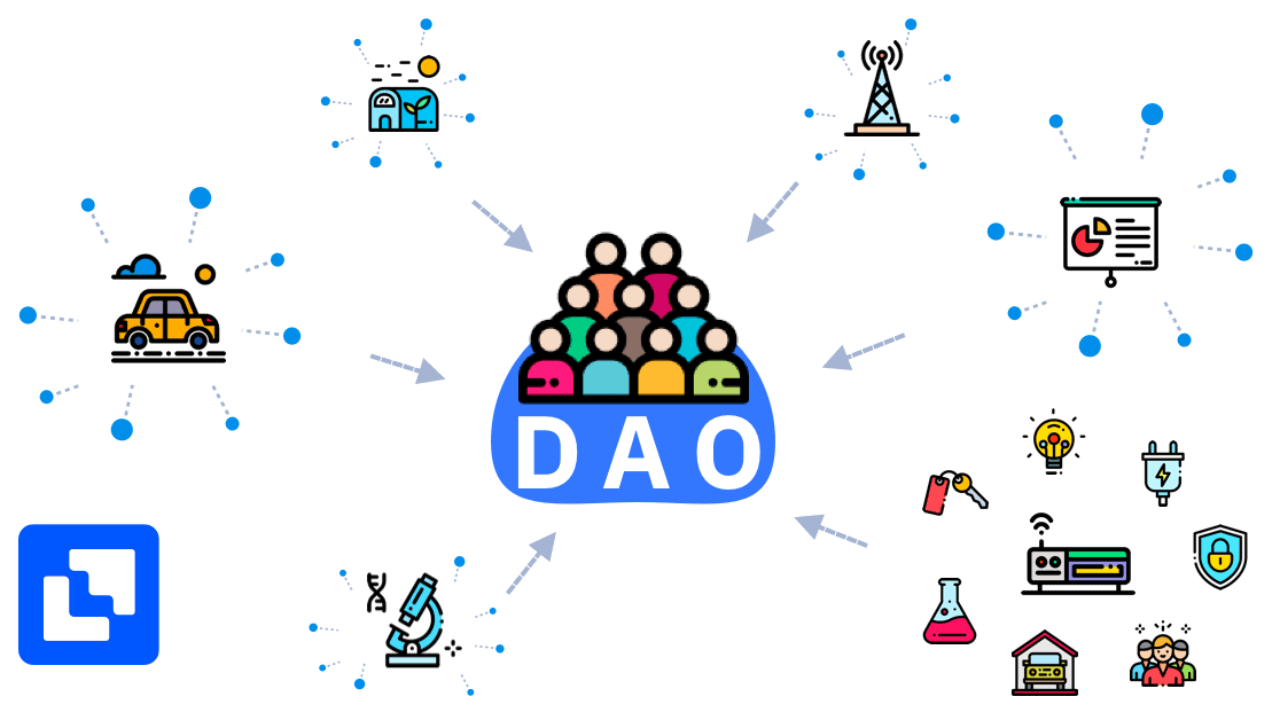
Image from internet
Some definition here...
An organization represented by rules encoded as a computer program that is transparent, controlled by the organization members and not influenced by a central government, in other words they are member-owned communities without centralized leadership. -- WIKIPIDIA
Featrues
anyone who meets the requirement can participate decision making process.
gather people with same goal together without geographic restrictions
governance treasury (can be crytocurrencies or NFTs) through program
How DAOs work
If you own above certain amount of governance token, you are able to create a proposal. But normally people will discuss the topic first in the community for a while instead of creating a proposal directly, this is because people need some time to understand the scope and relative solutions. After a proposal been created, anyone who owns any amount of governance token can join the vote process. Once the voting period ended, user can excecute the program which already define in proposal.
Example 1: Curve DAO
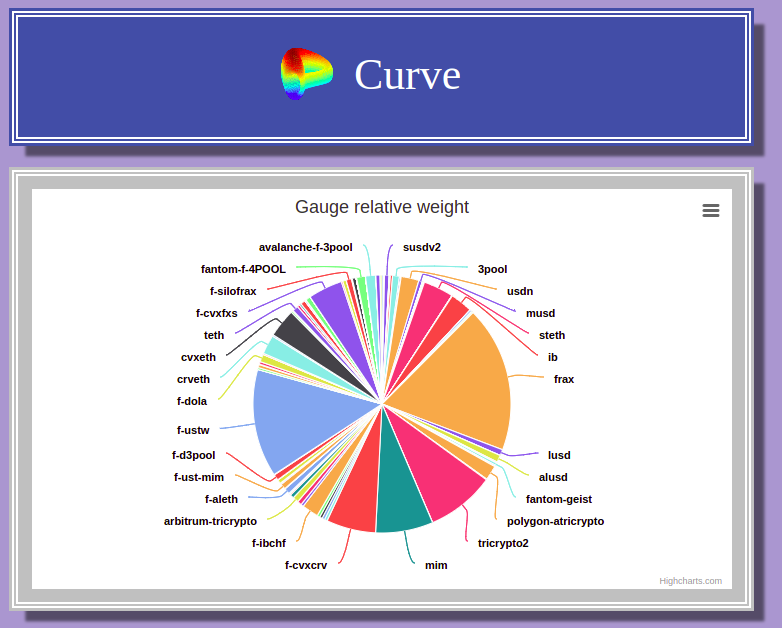
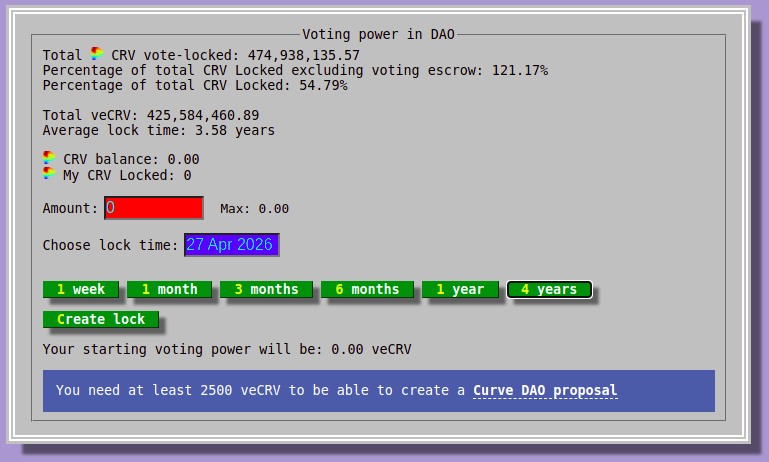
Curve Finance is a DEX concentrate on stalbe coin swaping which provide low slippage rate.
Example 2: Mango DAO
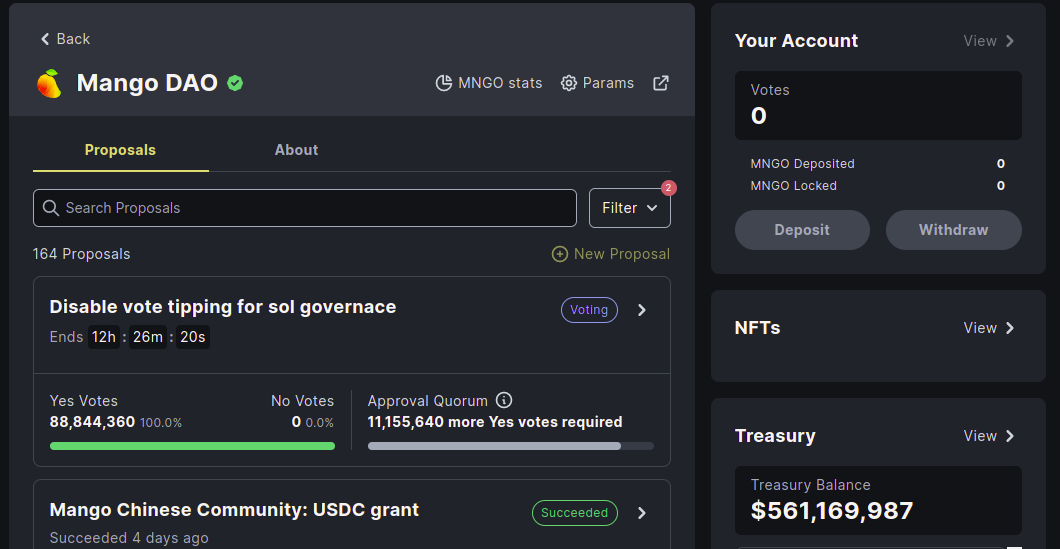
Proposal example: https://realms.today/dao/MNGO/proposal/GR3PFK68LqU4TZjTCTWUDYQsHZ9z4VDqa1ca75HbRCoy
Might discuss first: https://forum.mango.markets/t/grant-for-mango-chinese-community/520
Example 3: Serum
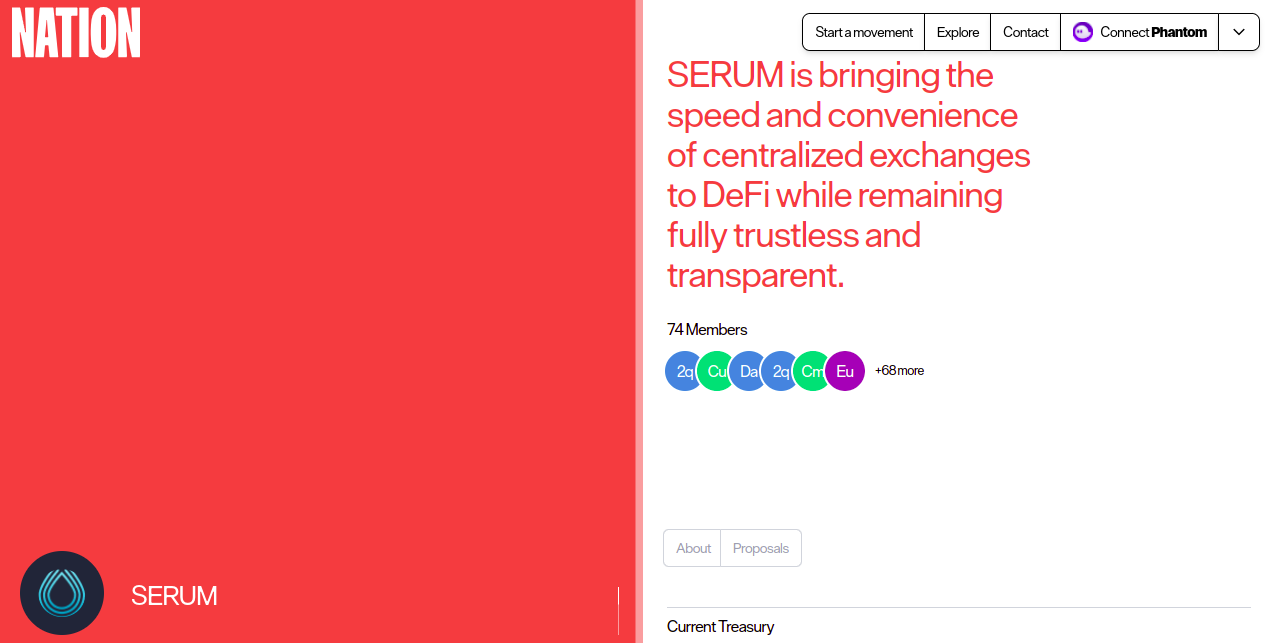
https://nation.io/dao/SERUM
learn more about DAO here
NFT DAO
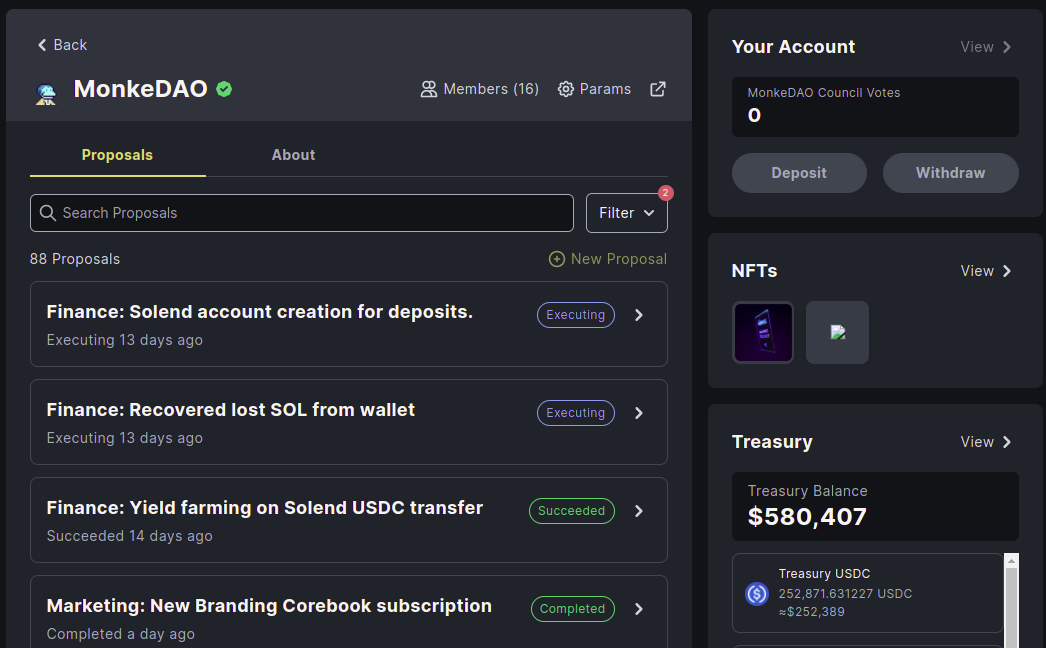
NFT as a pass for joining governance process. More NFT you own, more voting prower you have.
DAO tools
https://github.com/solana-labs/solana-program-library/tree/master/governance
https://github.com/solana-labs/governance-ui
Realms.today (support NFT DAO)
Governance structure
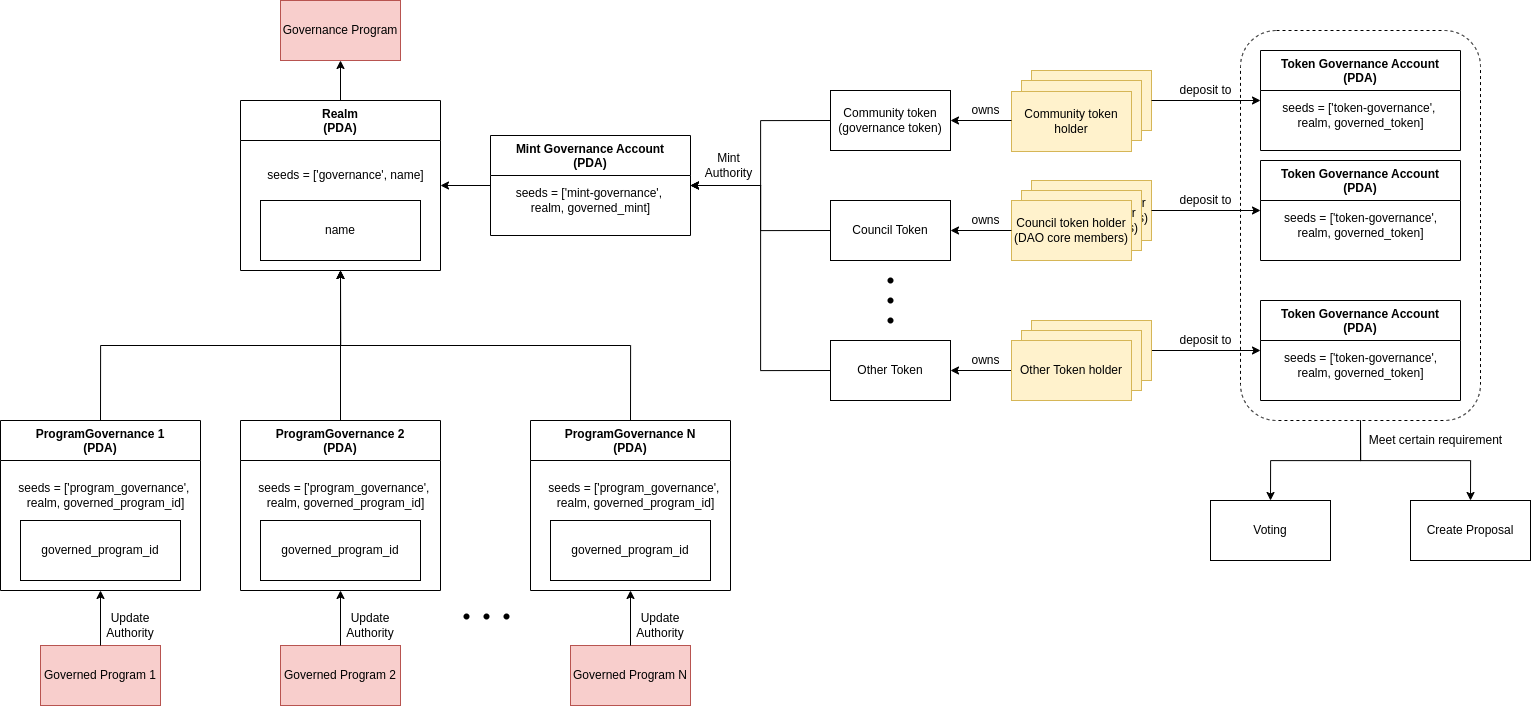
when creating a DAO, governance program will create a PDA with your DAO's name in the seed.
if there's a program (called programA) going to be governed by DAO, governance program will generate a PDA as update authority of programA.
people can deposit their token to DAO and they will have token governanceaccount which allow them to create a proposal or voting.
Proposal process
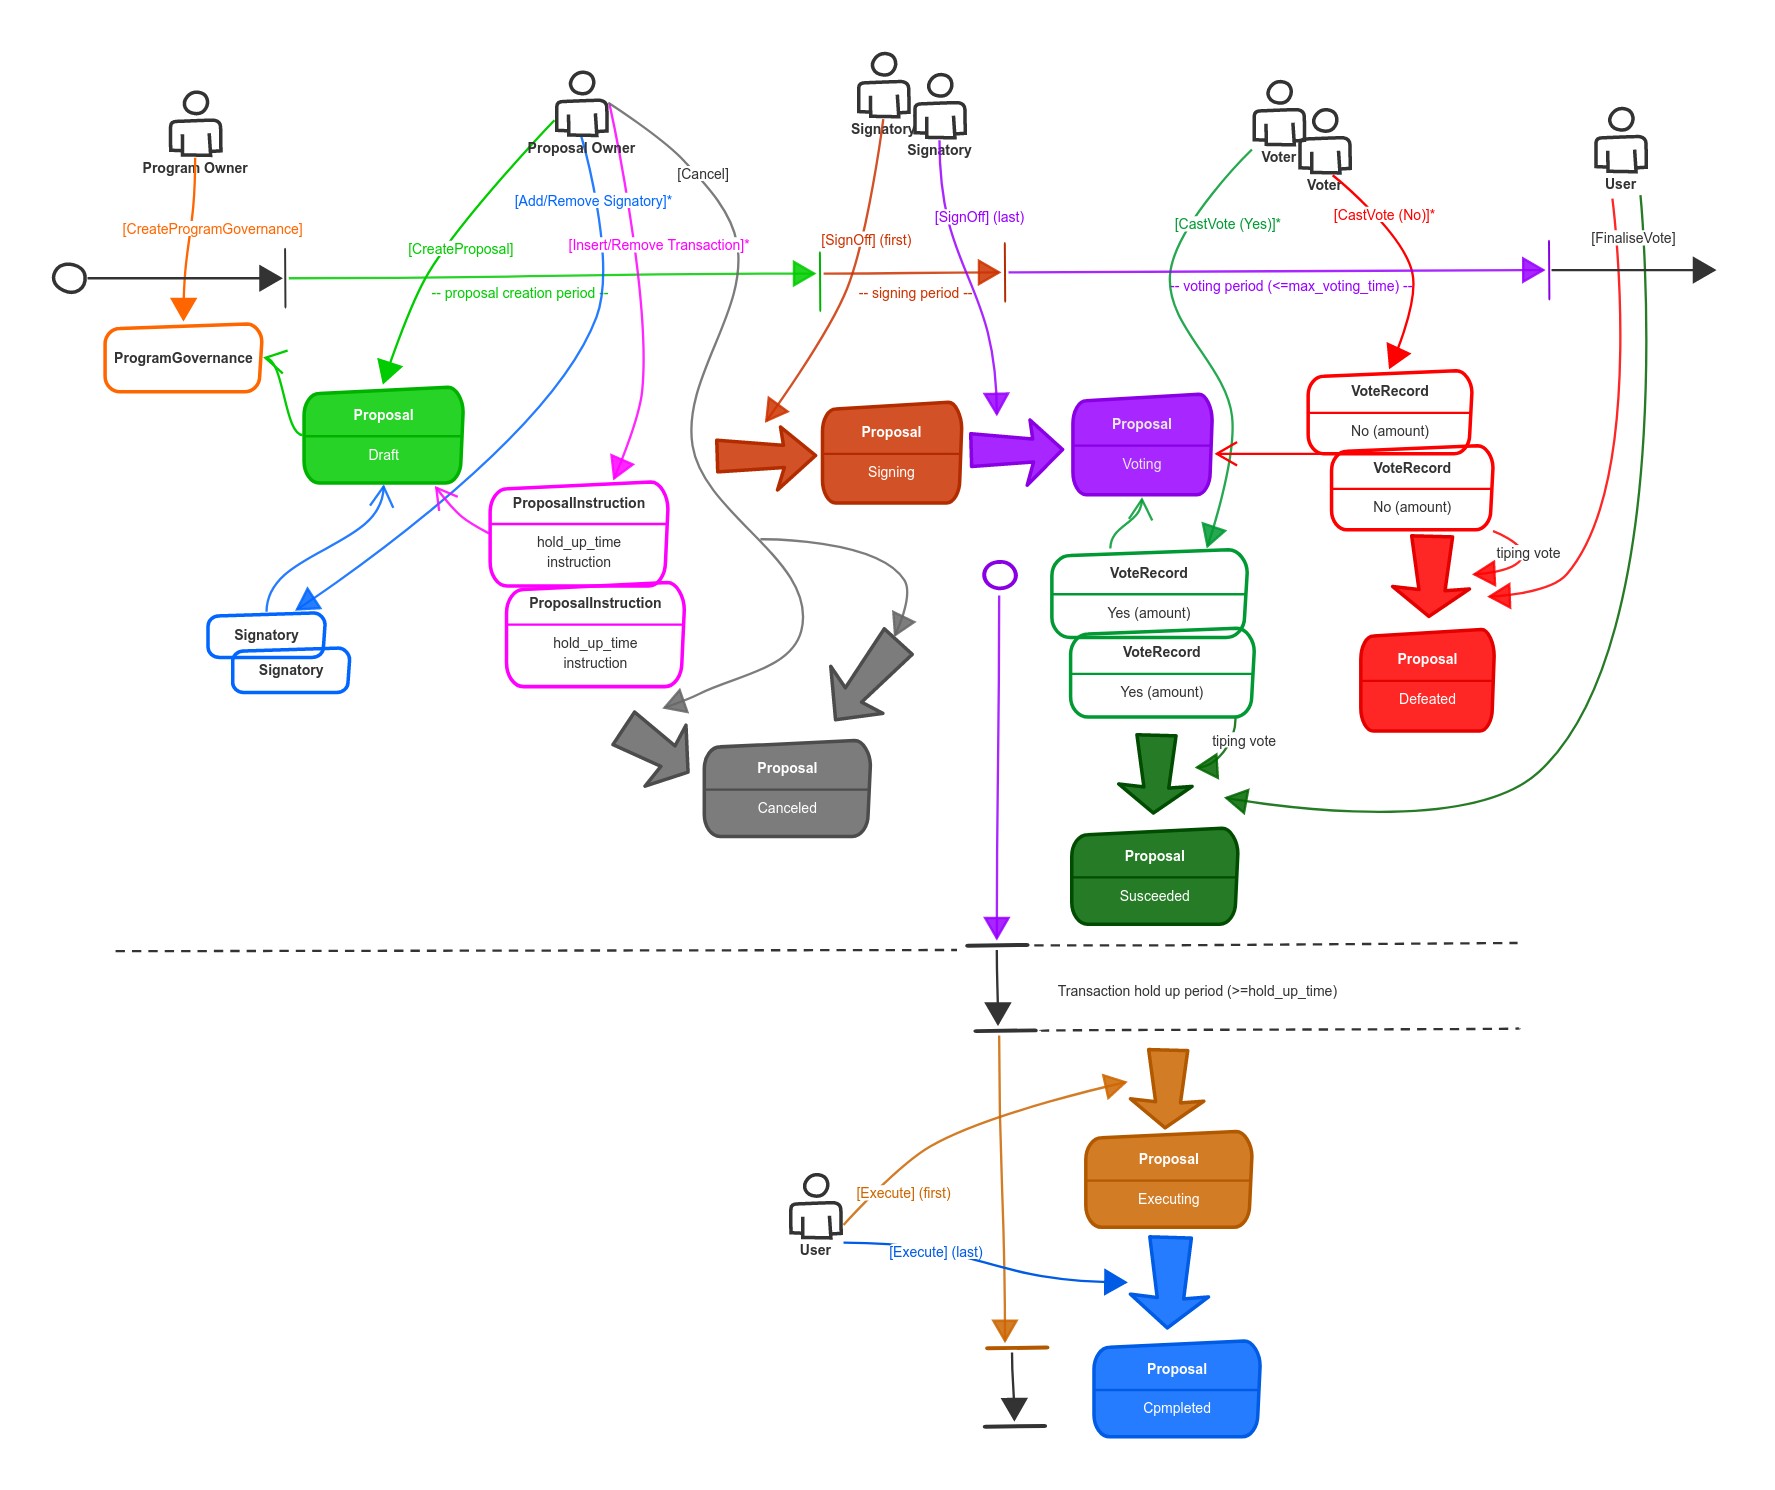
Image from spl-governance
[ proposal: - ] program owner create program governance
[ proposal: draft ] proposal owner create a proposal
add/remove signatory
Insert/remove transaction
cancel proposal
[ proposal: signing ] signatory agree this proposal or not
[ proposal: voting ] voter vote "Yes" or "No" to the proposal, every vote will generate a vote record.
[ proposal: finalizing ] user can finalize the proposal after voting period
if Yes > No [ proposal: succeeded ]
else [ proposal: defeated ]
(if succeeded) [ proposal: exicuting ] user can exicute proposal transaction after hold up period.
[ proposal: completed ]
Part 1: Setup
Mint NFTs
Before the creation of the DAO, let's mint some dummy NFTs and distribute them to different holders.
We will go through SolMeet #3 note to create and verify these NFTs and collection. Please refer to the note for more details.
Please make sure proxyman is up and running with correct config to view the NFT on mainnet-fork in your browser wallet. See here for more details.
Setup governance-ui
governance-uiWe will use a well-structured front-end UI maintained by Solana Lab through the entire example.
In the following sections, you will interact with the DAO via the UI that is running locally in your machine, with the correct RPC config
First, clone and build governance-ui:
Before we start, we have to config the RPC to our mainnet-fork. Replace part of utils/connection.ts with the following code snippet:
You can also use the explorer thats points to
https://rpc-mainnet-fork.epochs.studioto check the RPC status.
Finally, Let's run the DApp:
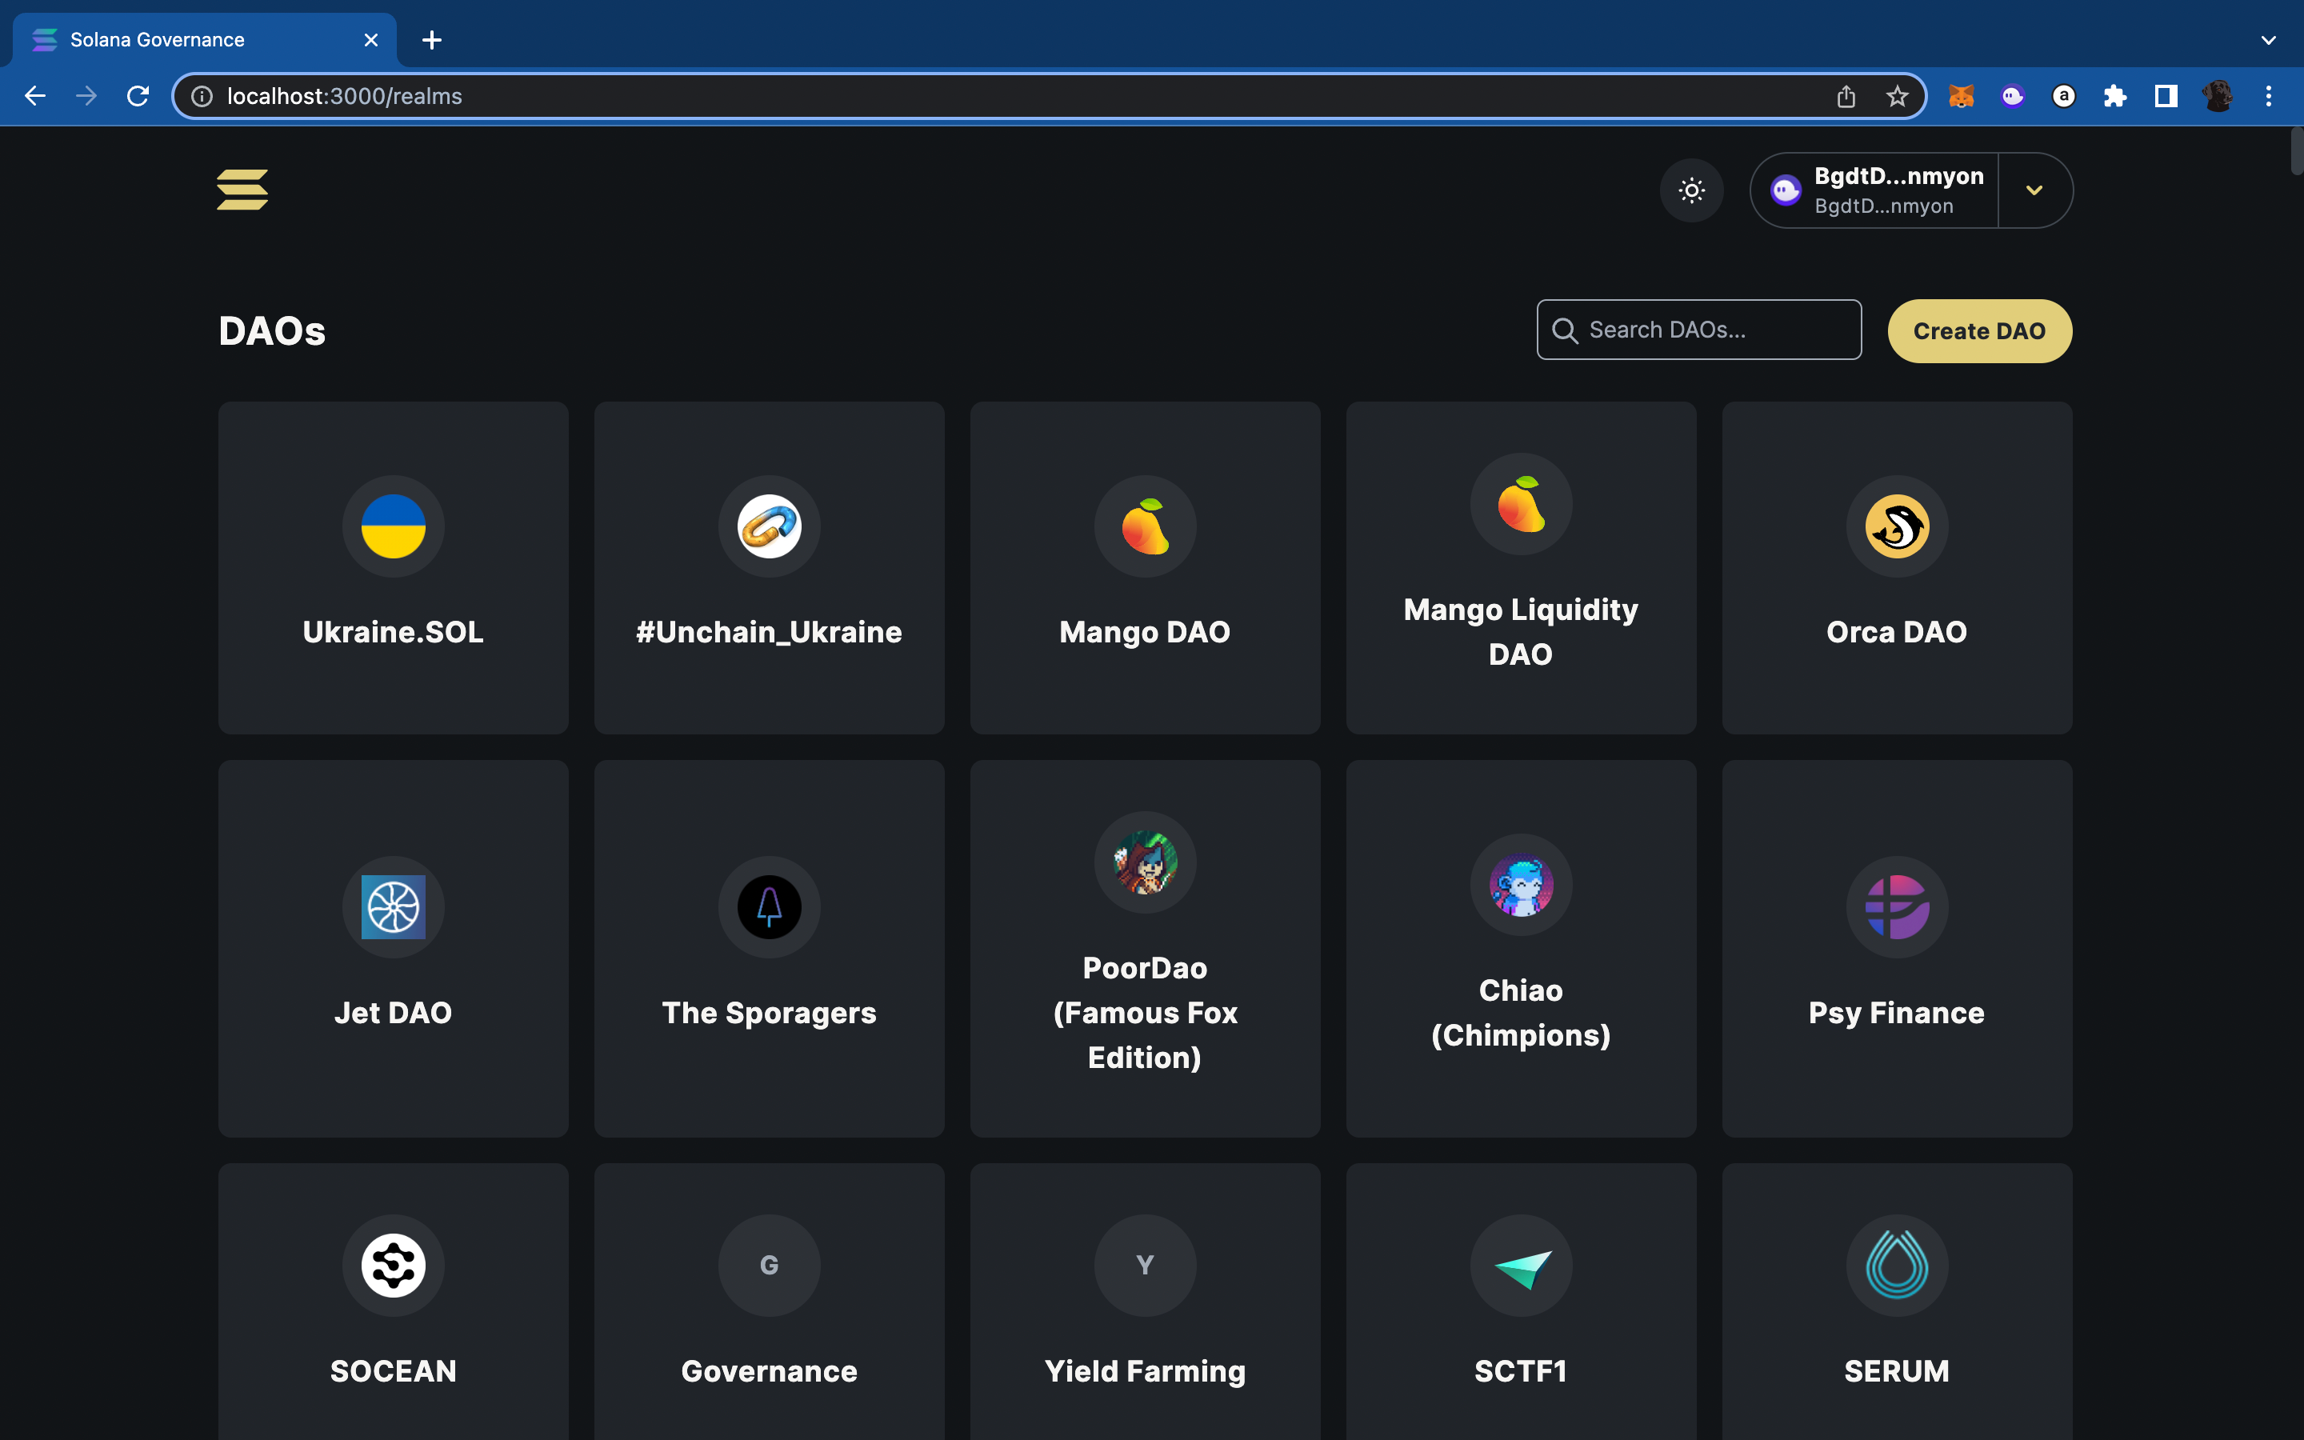
You should see the DAO list by visiting http://localhost:3000:
Part 2: Create a NFT DAO
Create a DAO
First, click Create DAO and select I want to create a bespoke DAO:
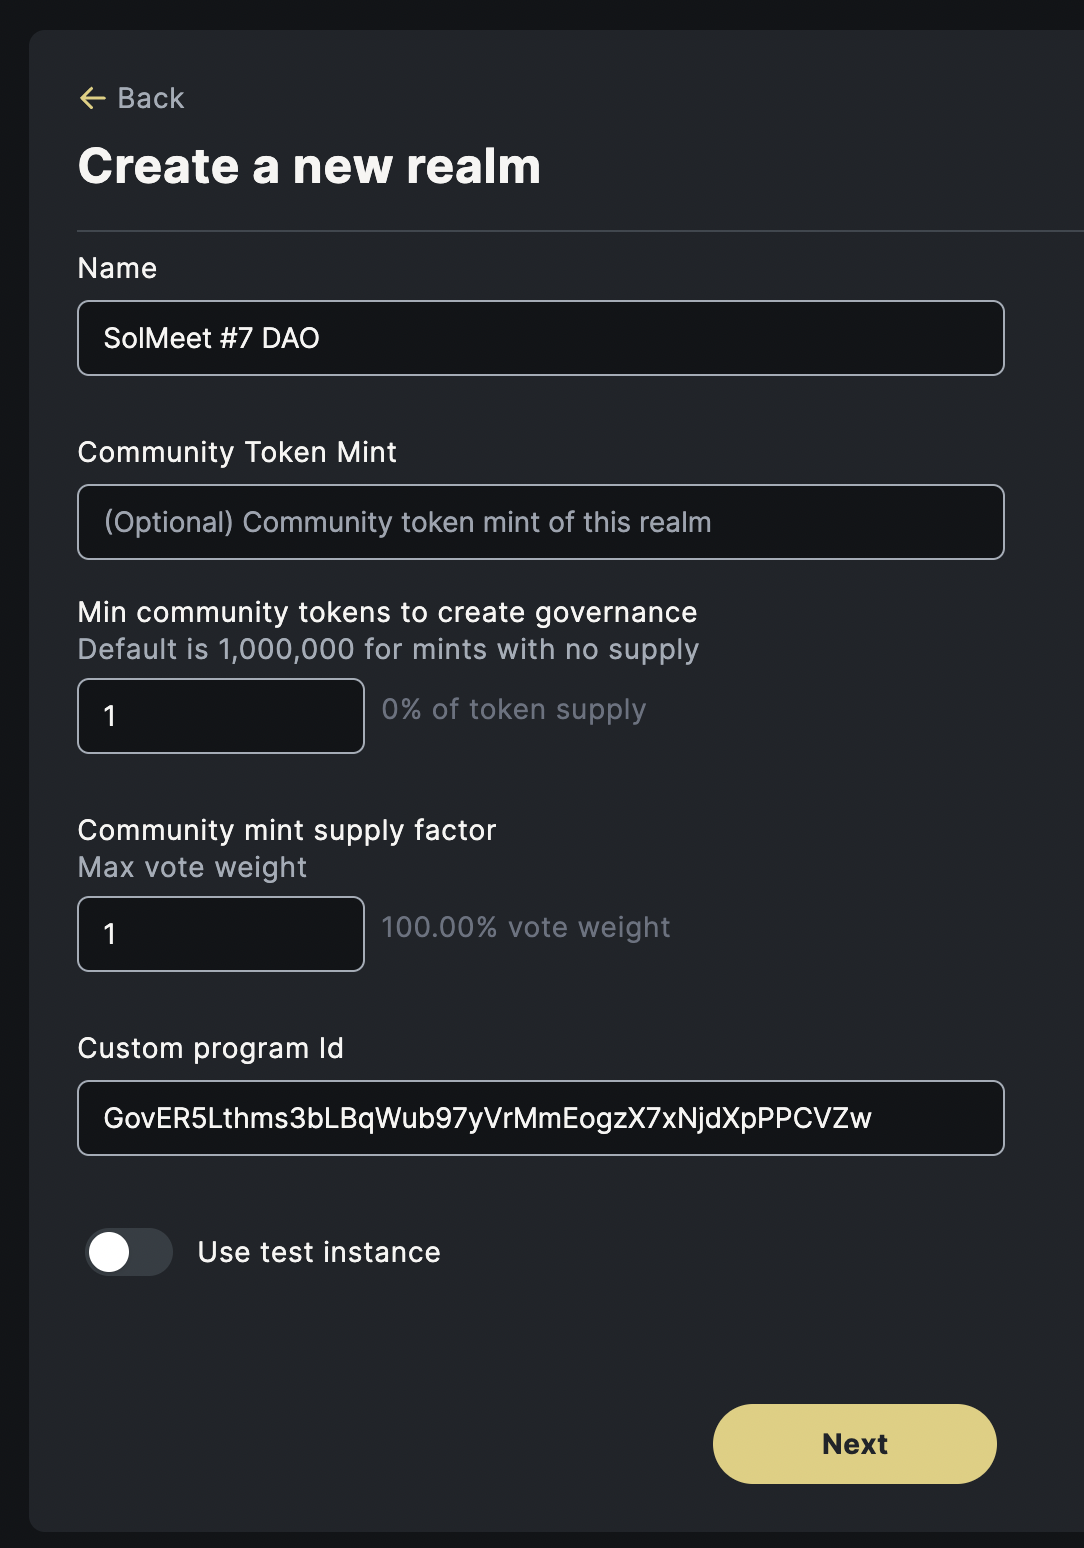
In Create a new realm:
Name: Choose your favorite name for the DAO
Min community tokens to create governance: Select
1to aollow users who has single NFT can create governance
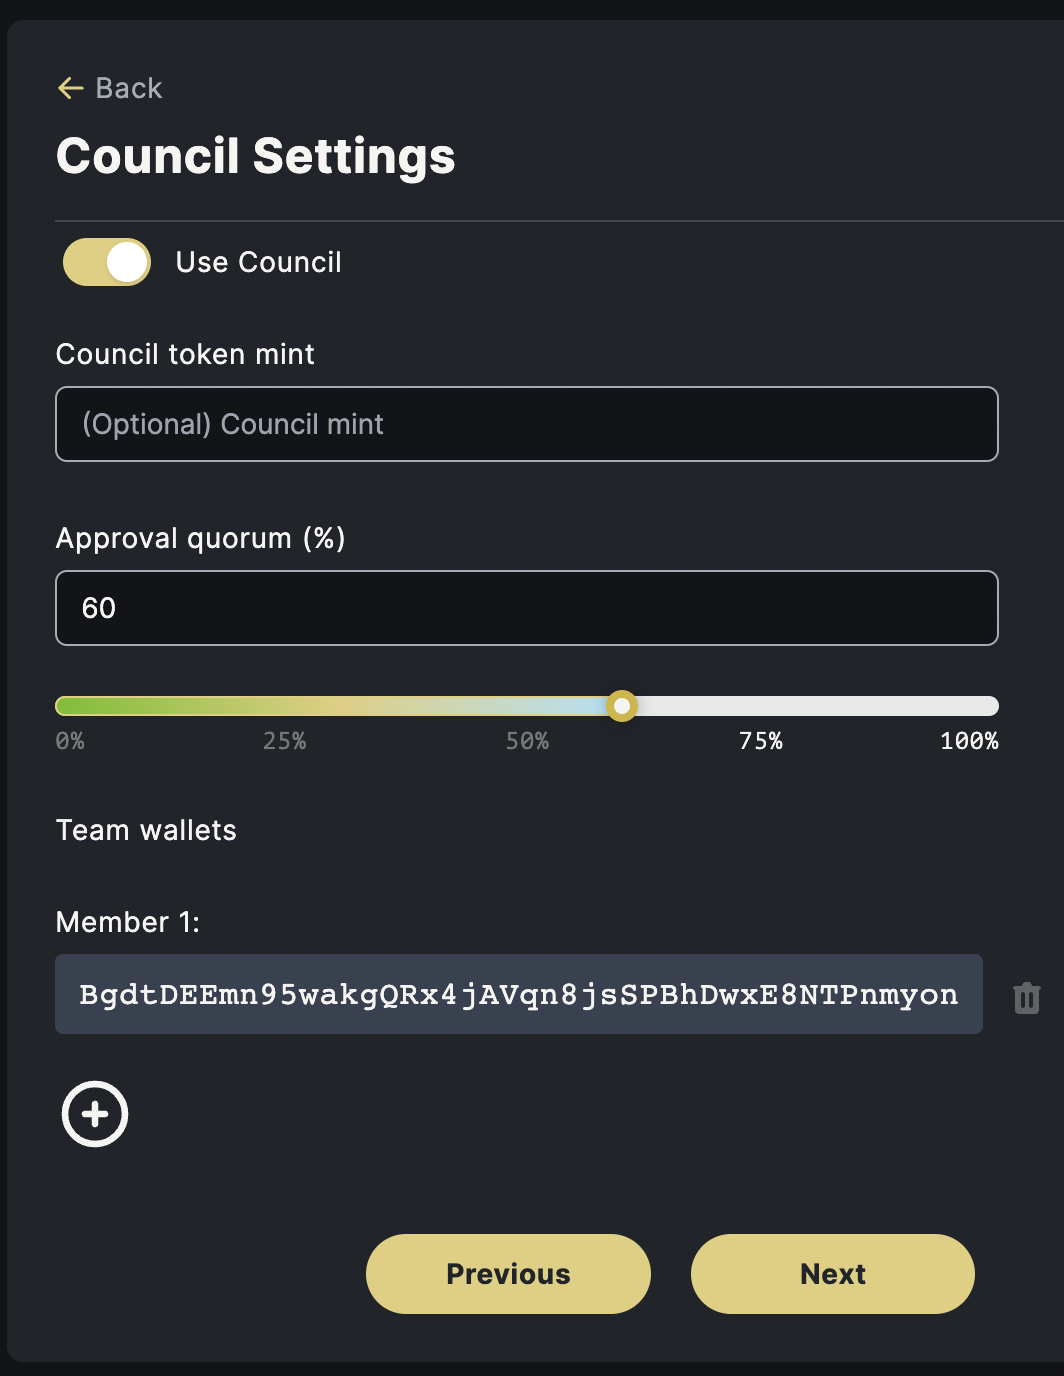
In Council Settings:
Approval quorum (%): Select your desired threshold for approval. Default is 60%.
Team wallets: Council member of the DAO. Default is the creator.
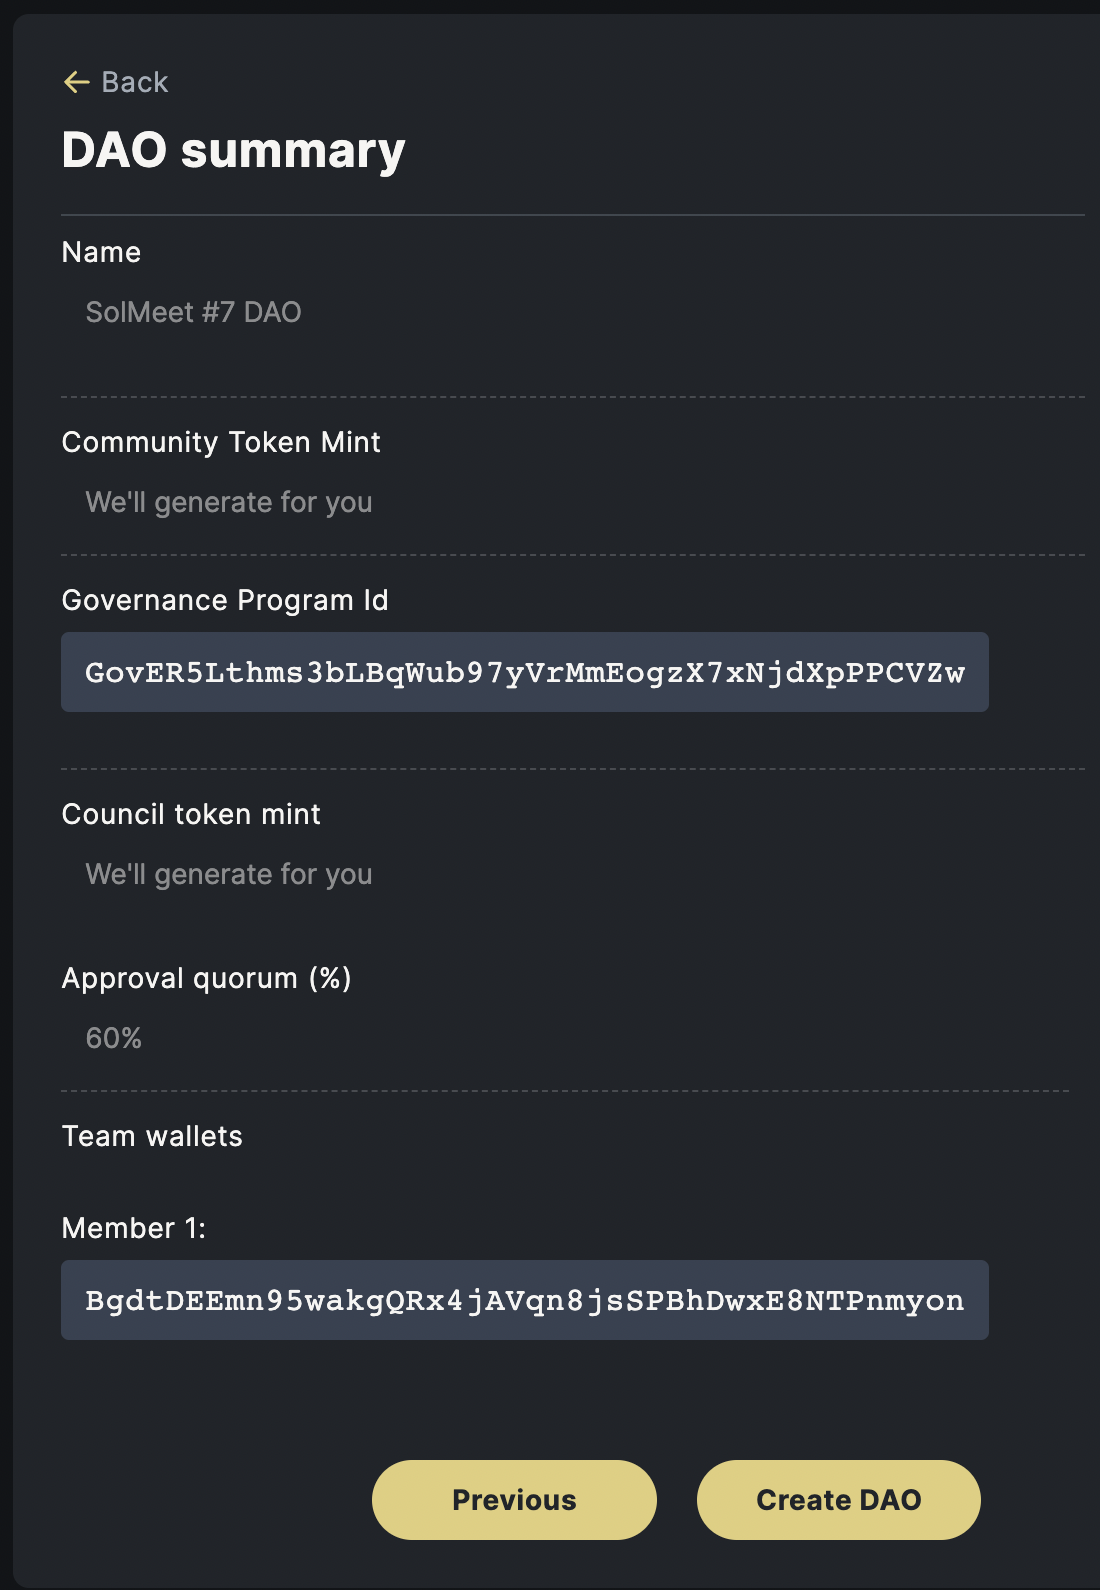
In DAO summary, confirm and click Create DAO.
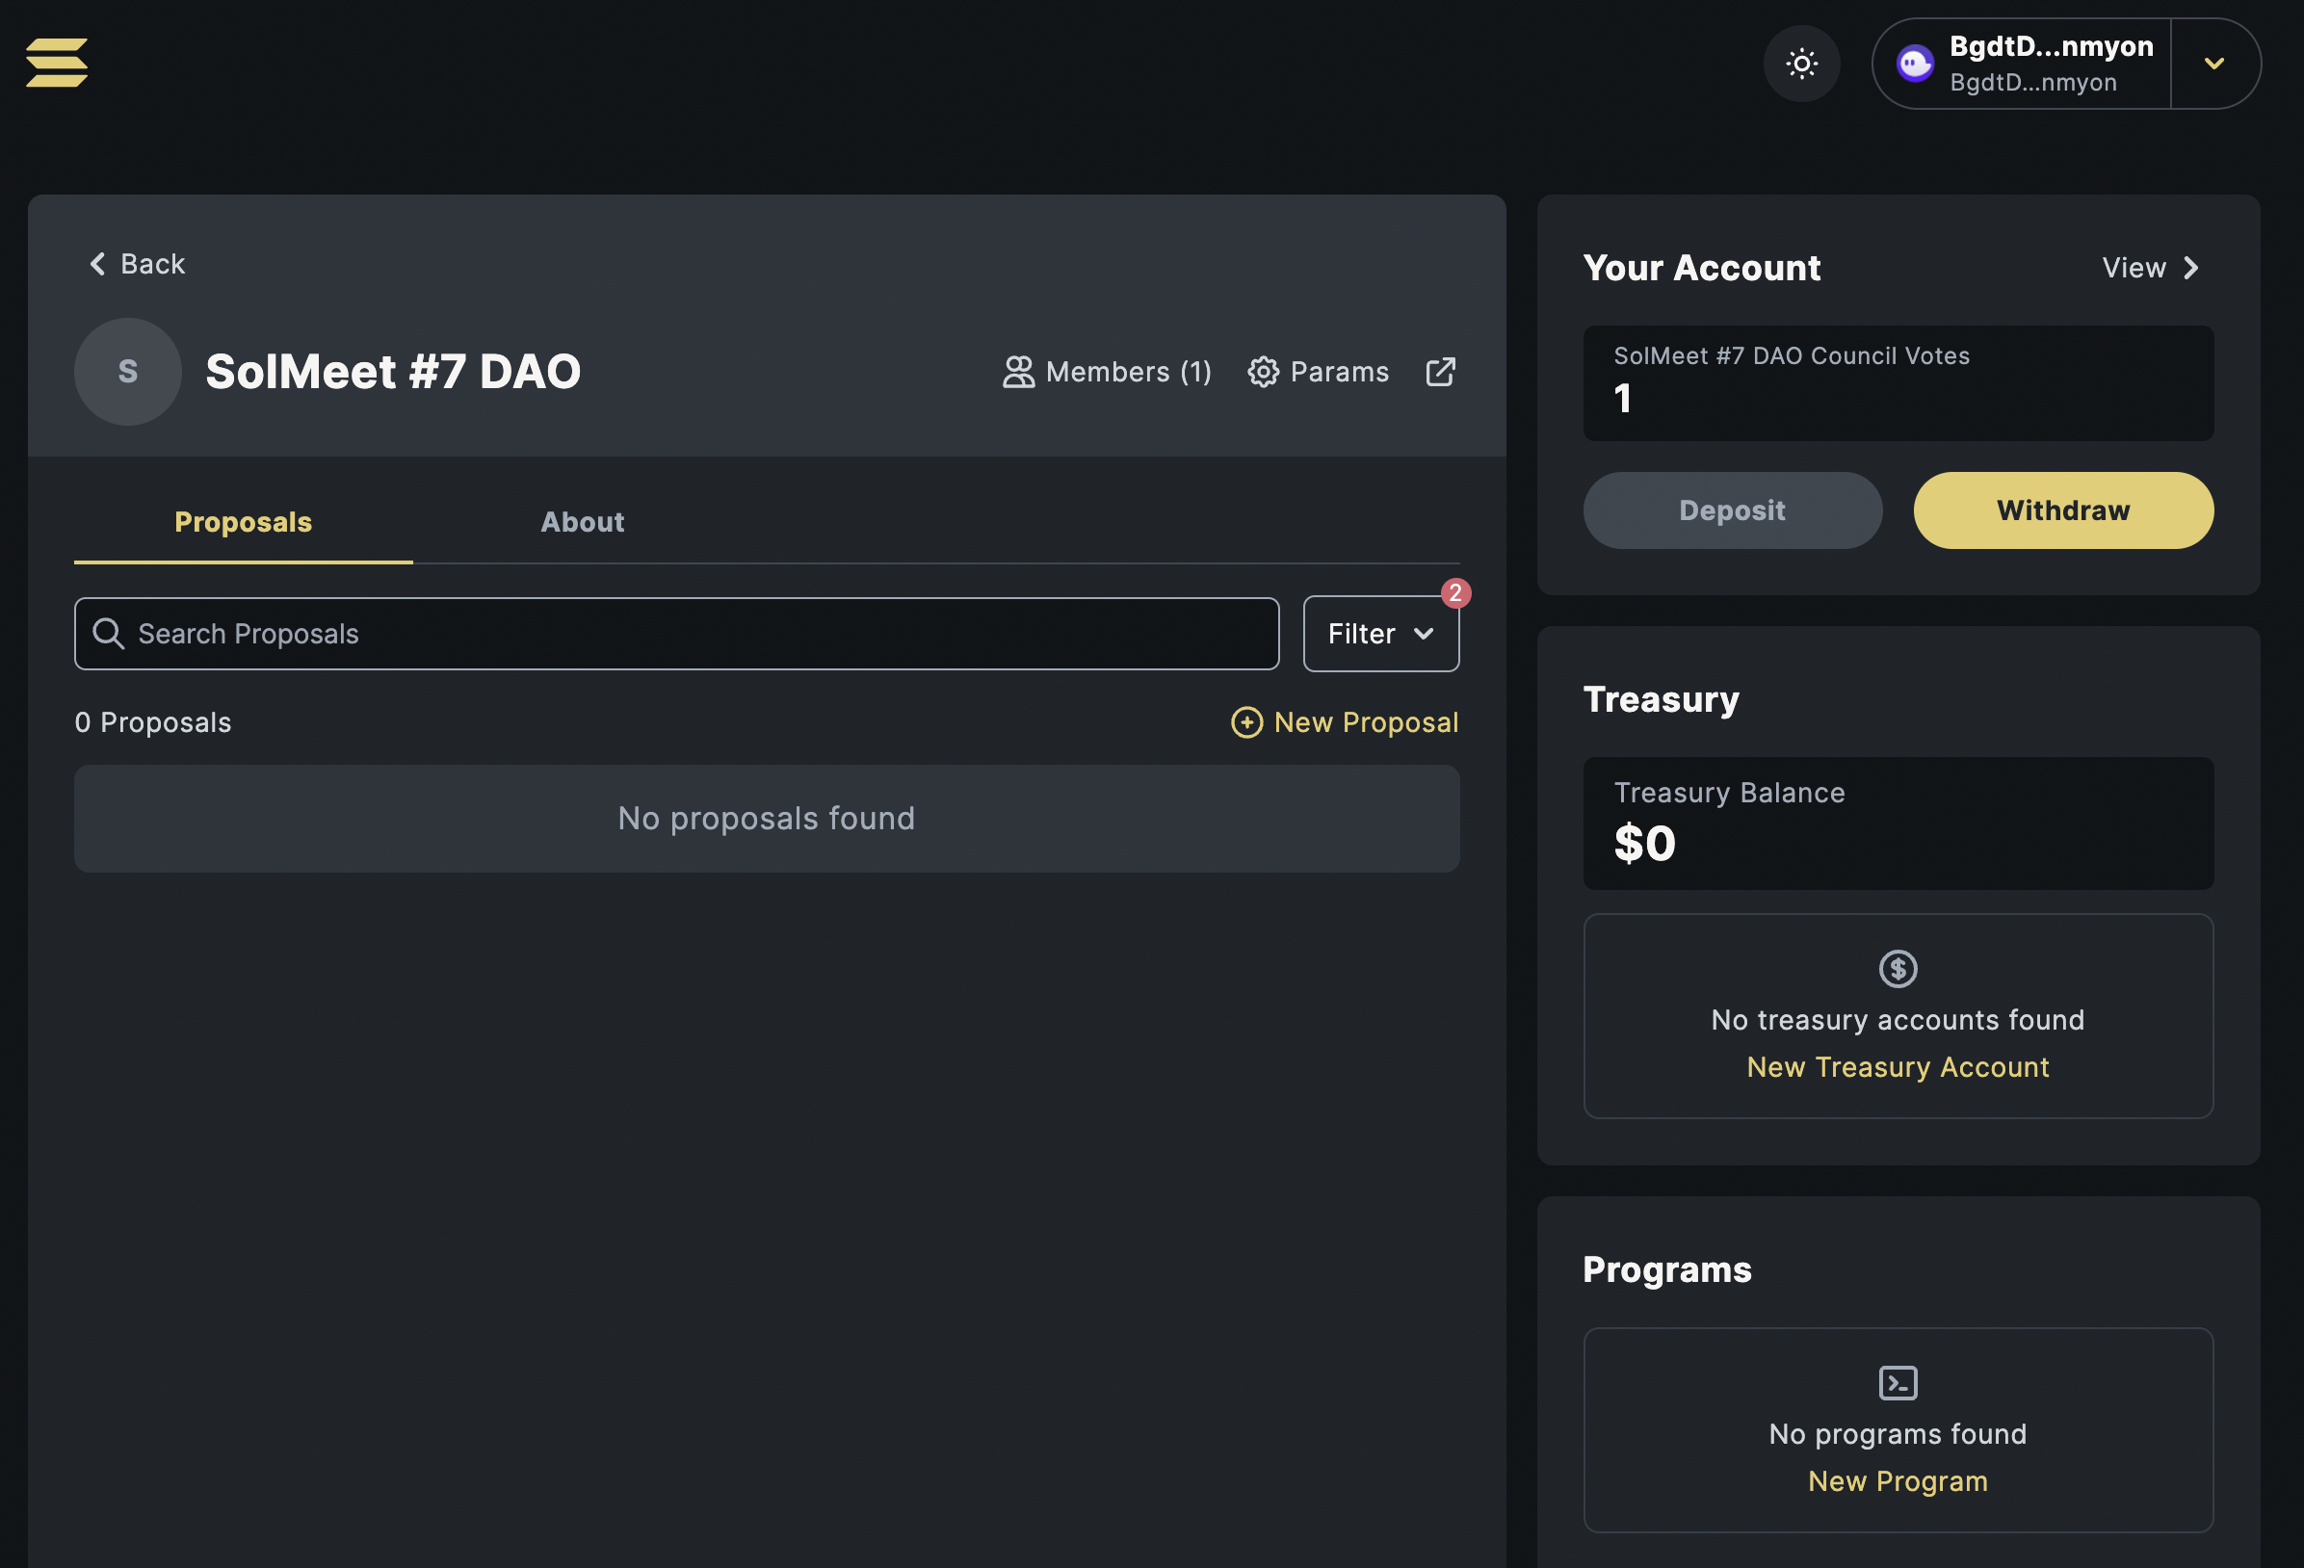
Nice! You should have the DAO ready at this moment.
Configure NFT Voting Plugin
These are 3 instructions to be done in this step:
Create NFT plugin registrar
Create NFT plugin max voter weight
Configure NFT plugin collection
Create NFT plugin registrar
Click New Proposal:
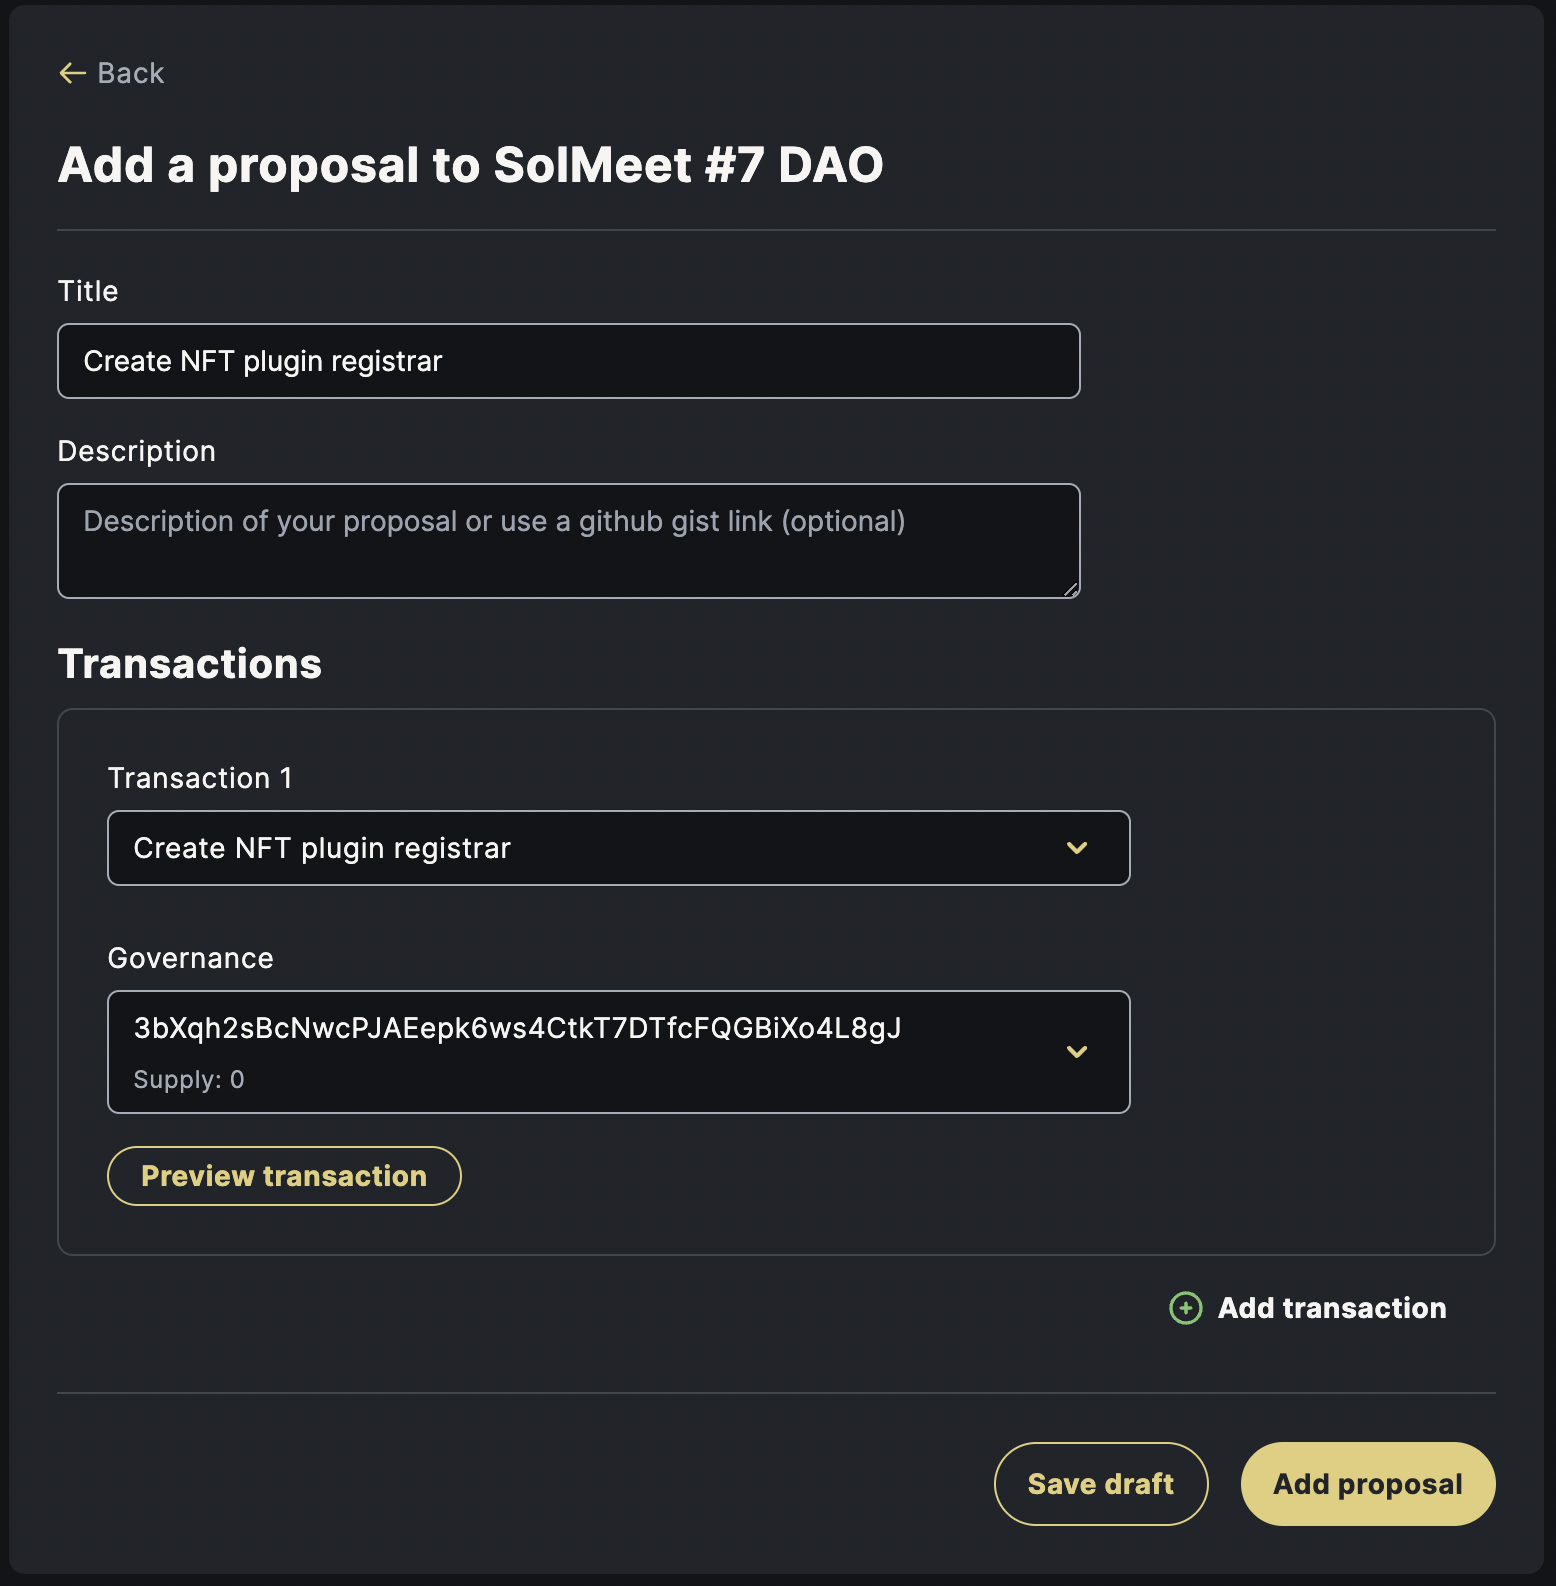
In Add a proposal:
Title: Use your favored name for the title of proposal
Transaction: Select Create NFT plugin registrar
Governance: Select the only acccount in the list
Then, click Add proposal, you should be able to see this page when the transaction is executed:
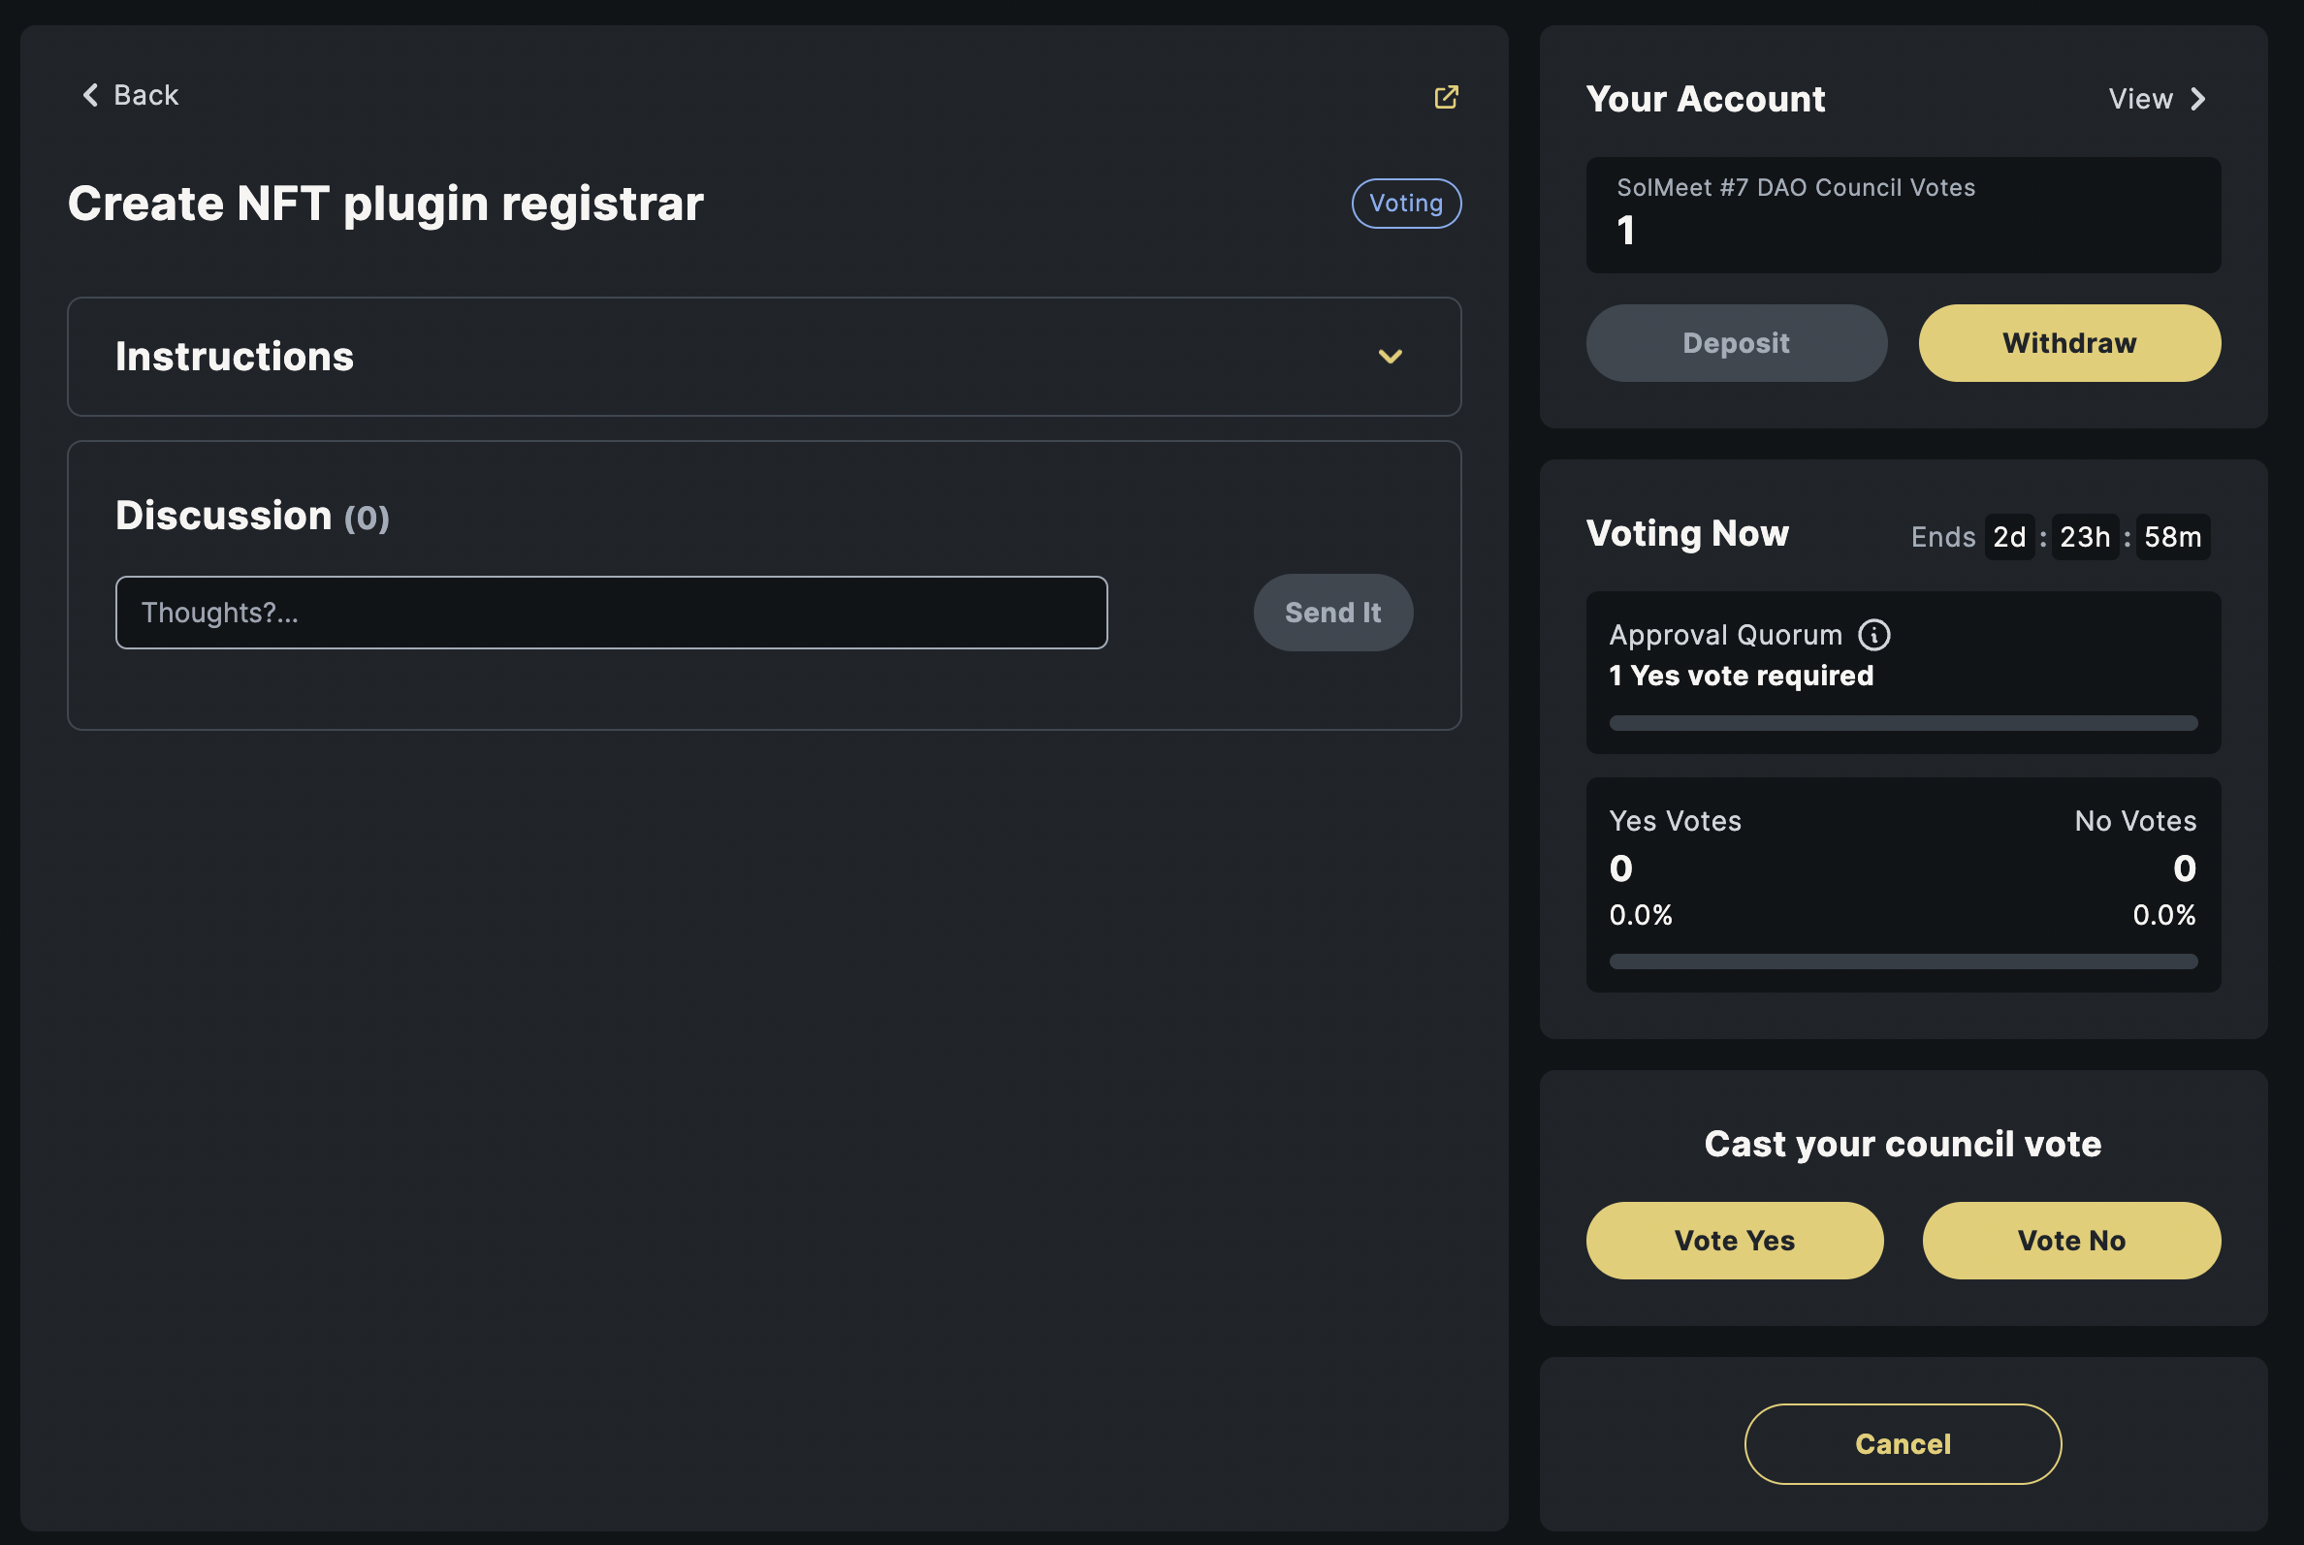
Here, we need to perform two extra actions: Vote and Execute the proposal.
First, click Vote Yes, you should be able to see this page when the transaction is executed:
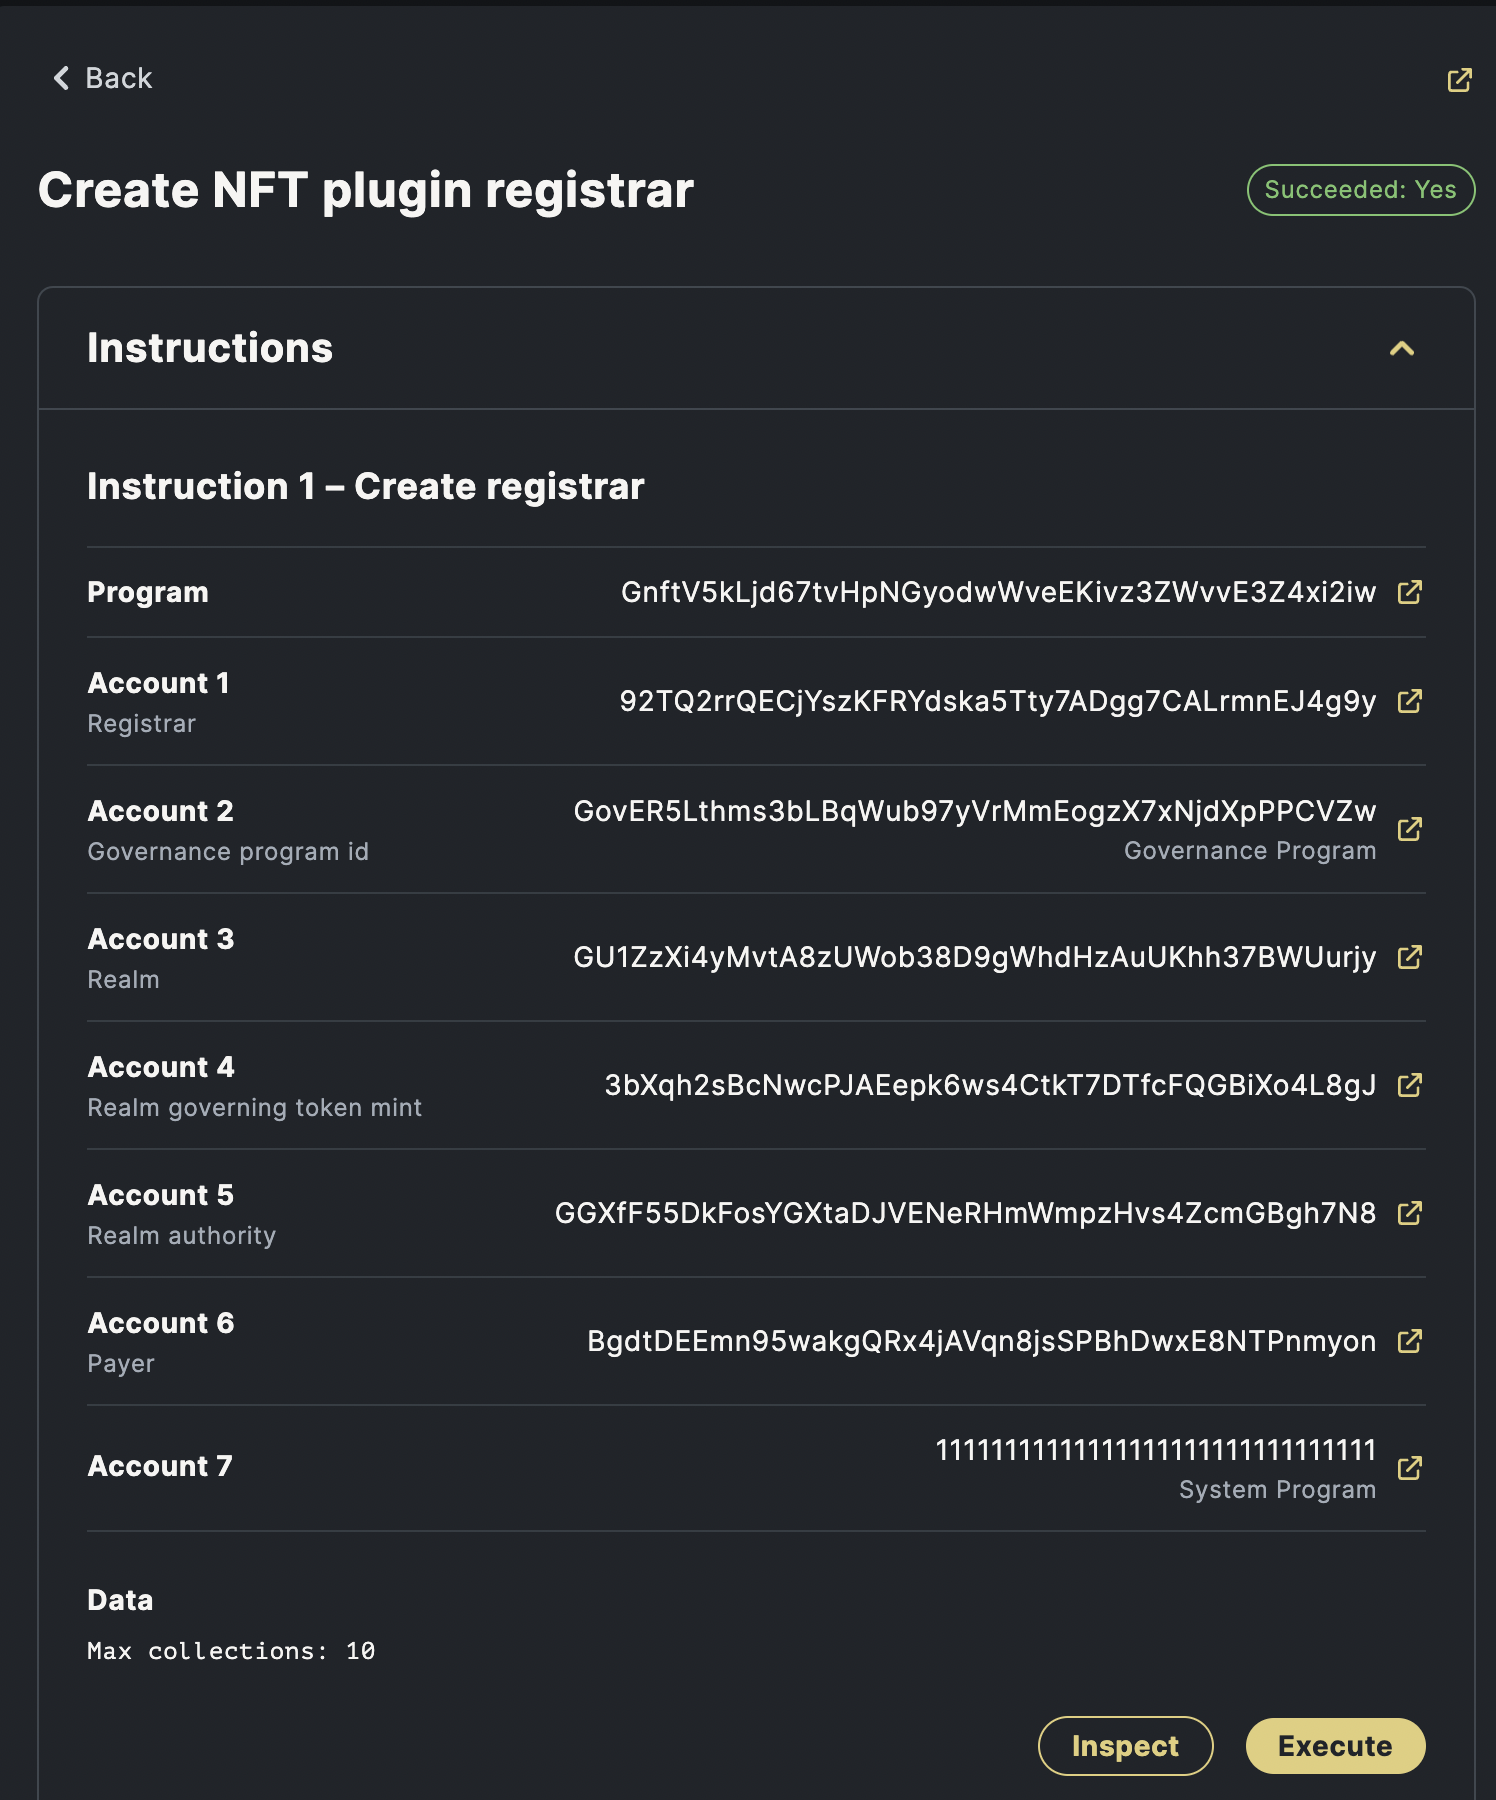
Here, pay attention to the upper right green state Succeeded: Yes, this means that this proposal is ready for execution.
Proposals will enter Succeeded state via satisfying one of the condition:
Votes pass the approval threshold when the voting deadline comes
100% votes approve
In this case, condition 2 is satisfied since there is only one vote can approve this proposal.
Secondly, lets execute the proposal by cliking Execute:
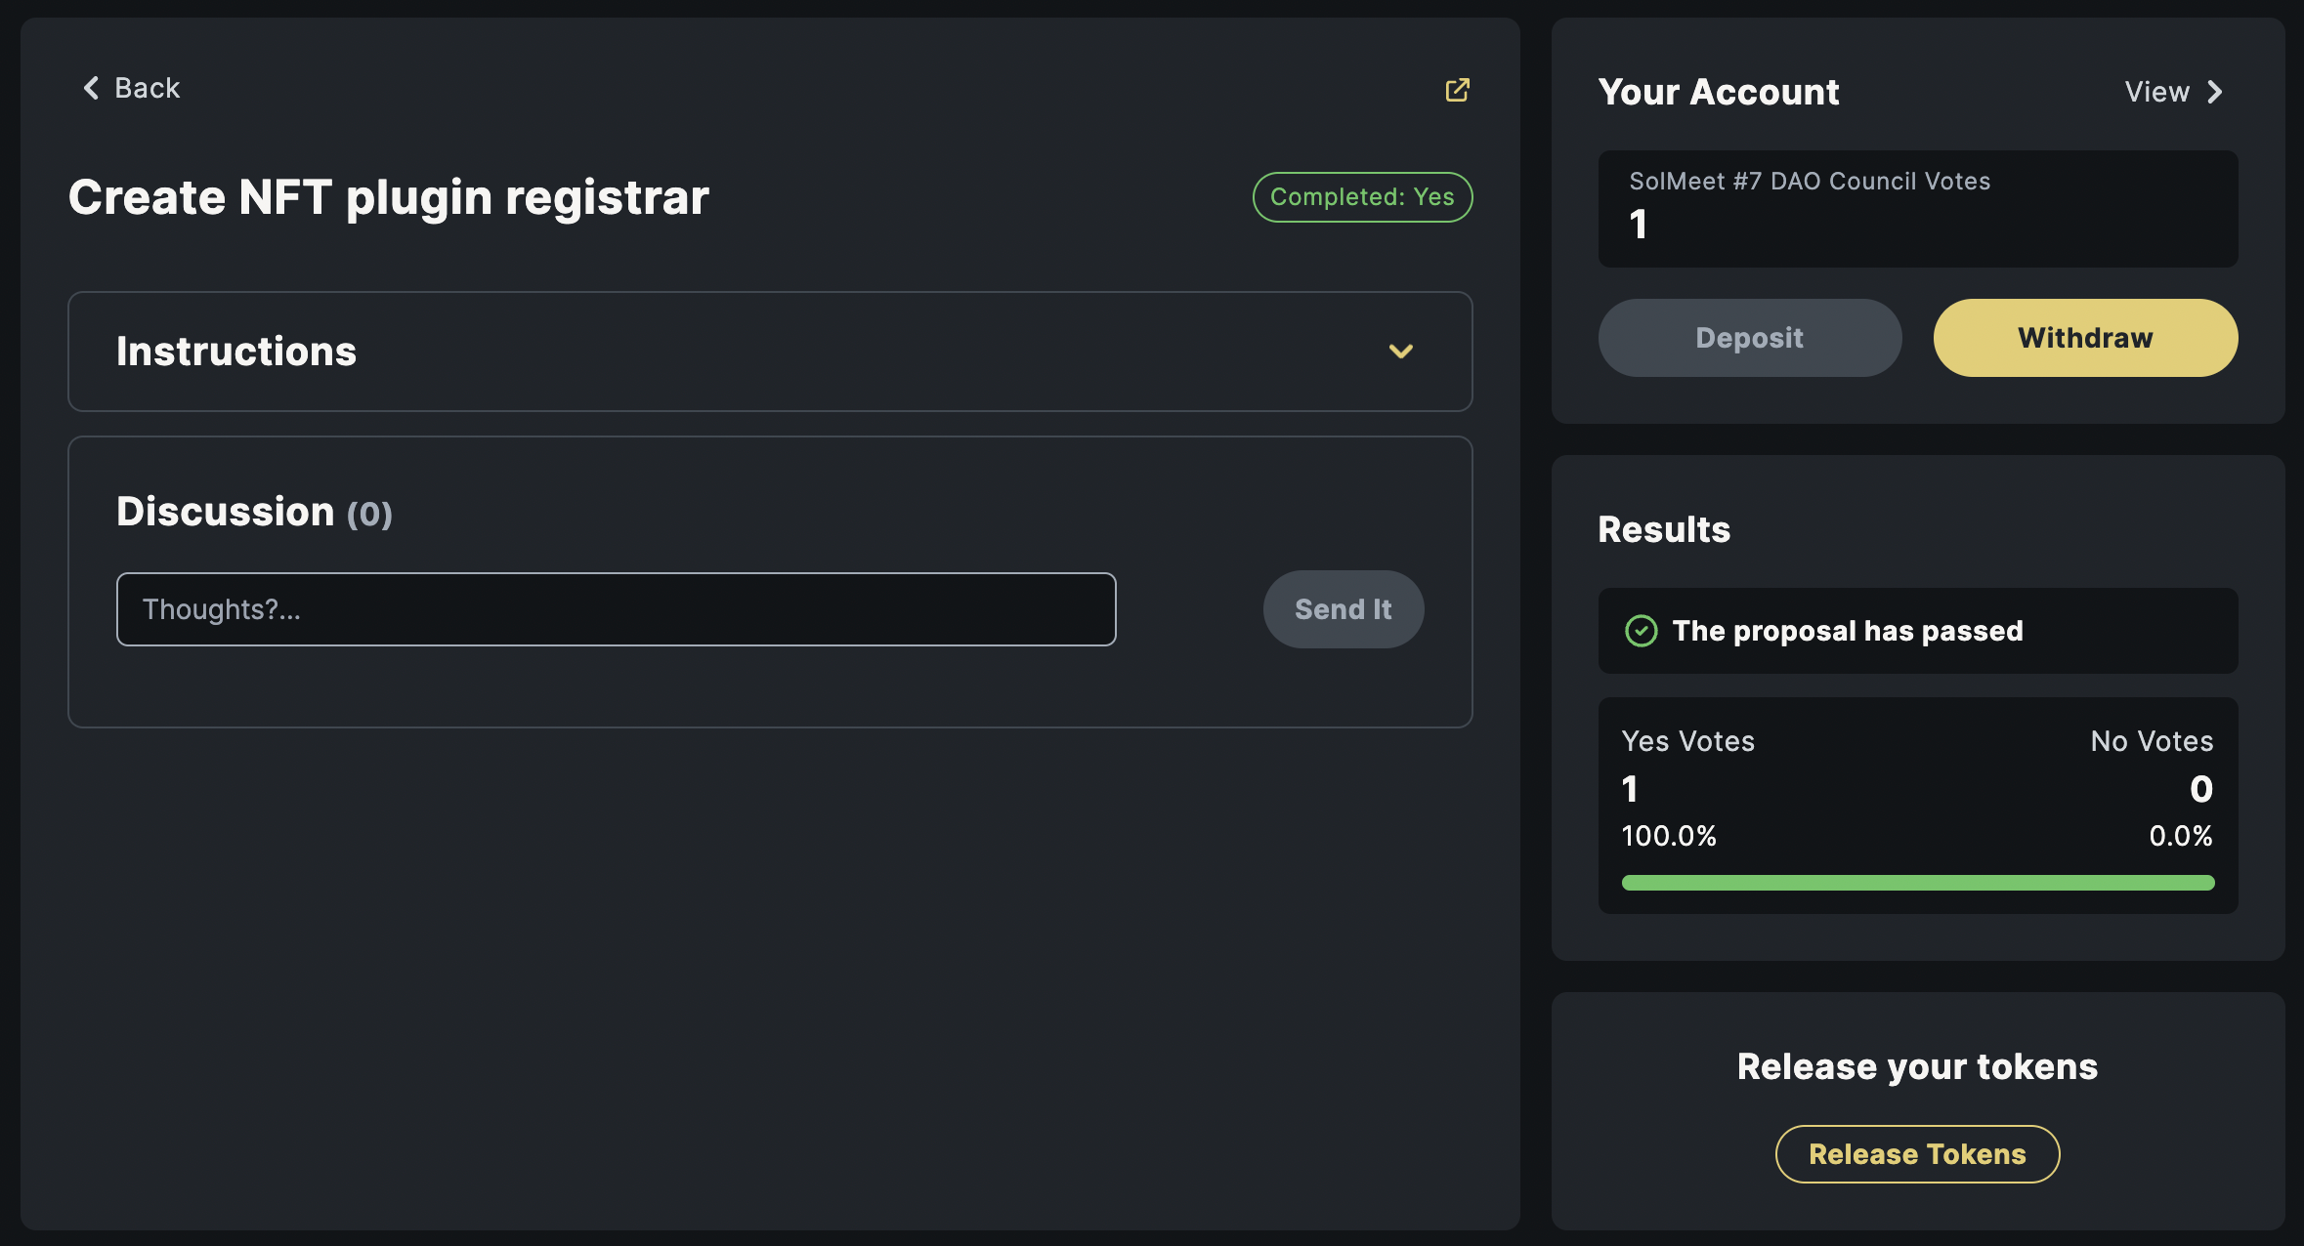
Nice! This means that the first proposal is executed successfully.
Create NFT plugin max voter weight
Next, let's create another proposal:
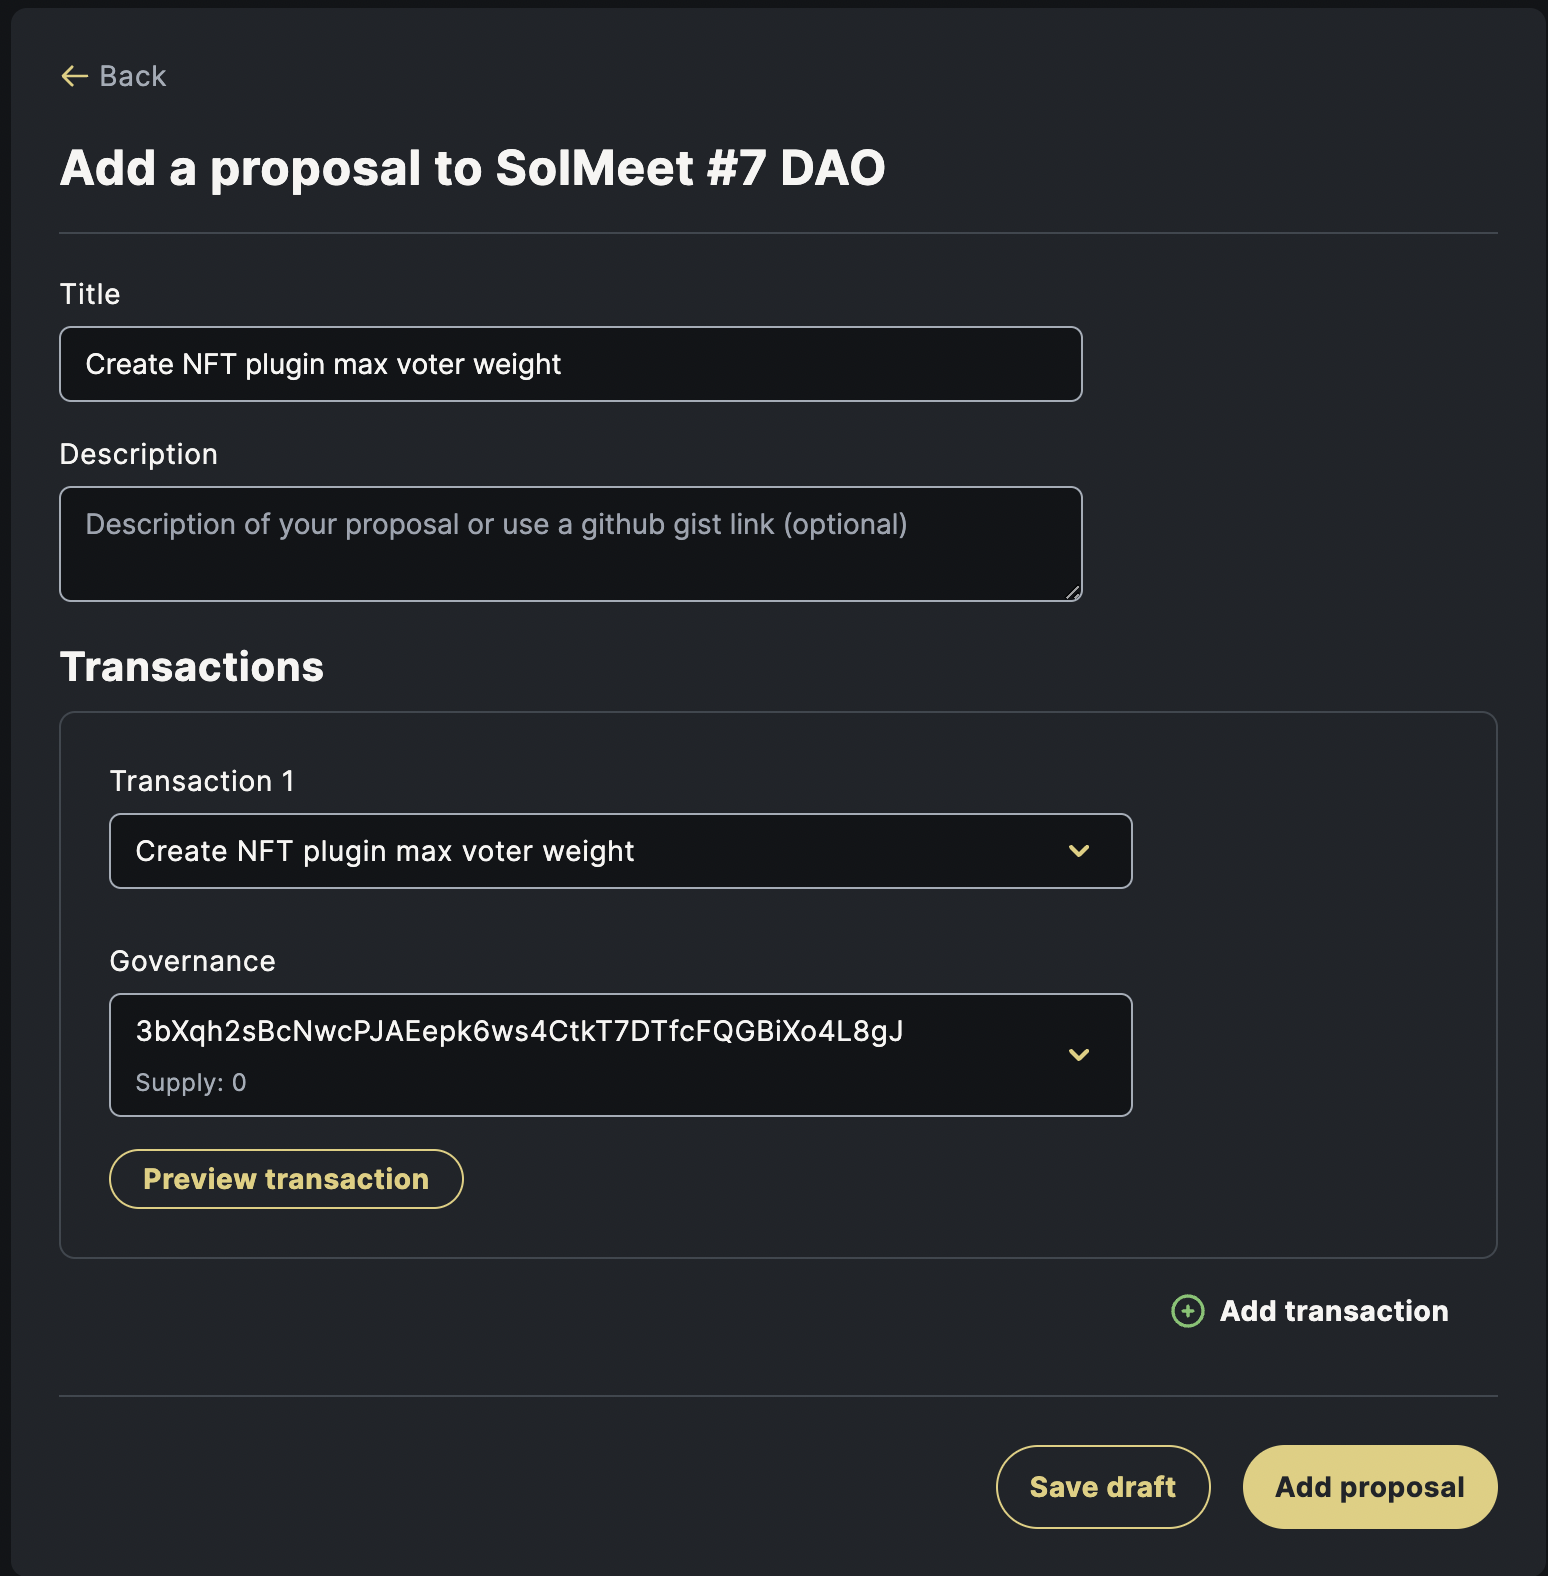
In Add a proposal:
Title: Use your favored name for the title of proposal
Transaction: Select Create NFT plugin max voter weight
Governance: Select the only acccount in the list
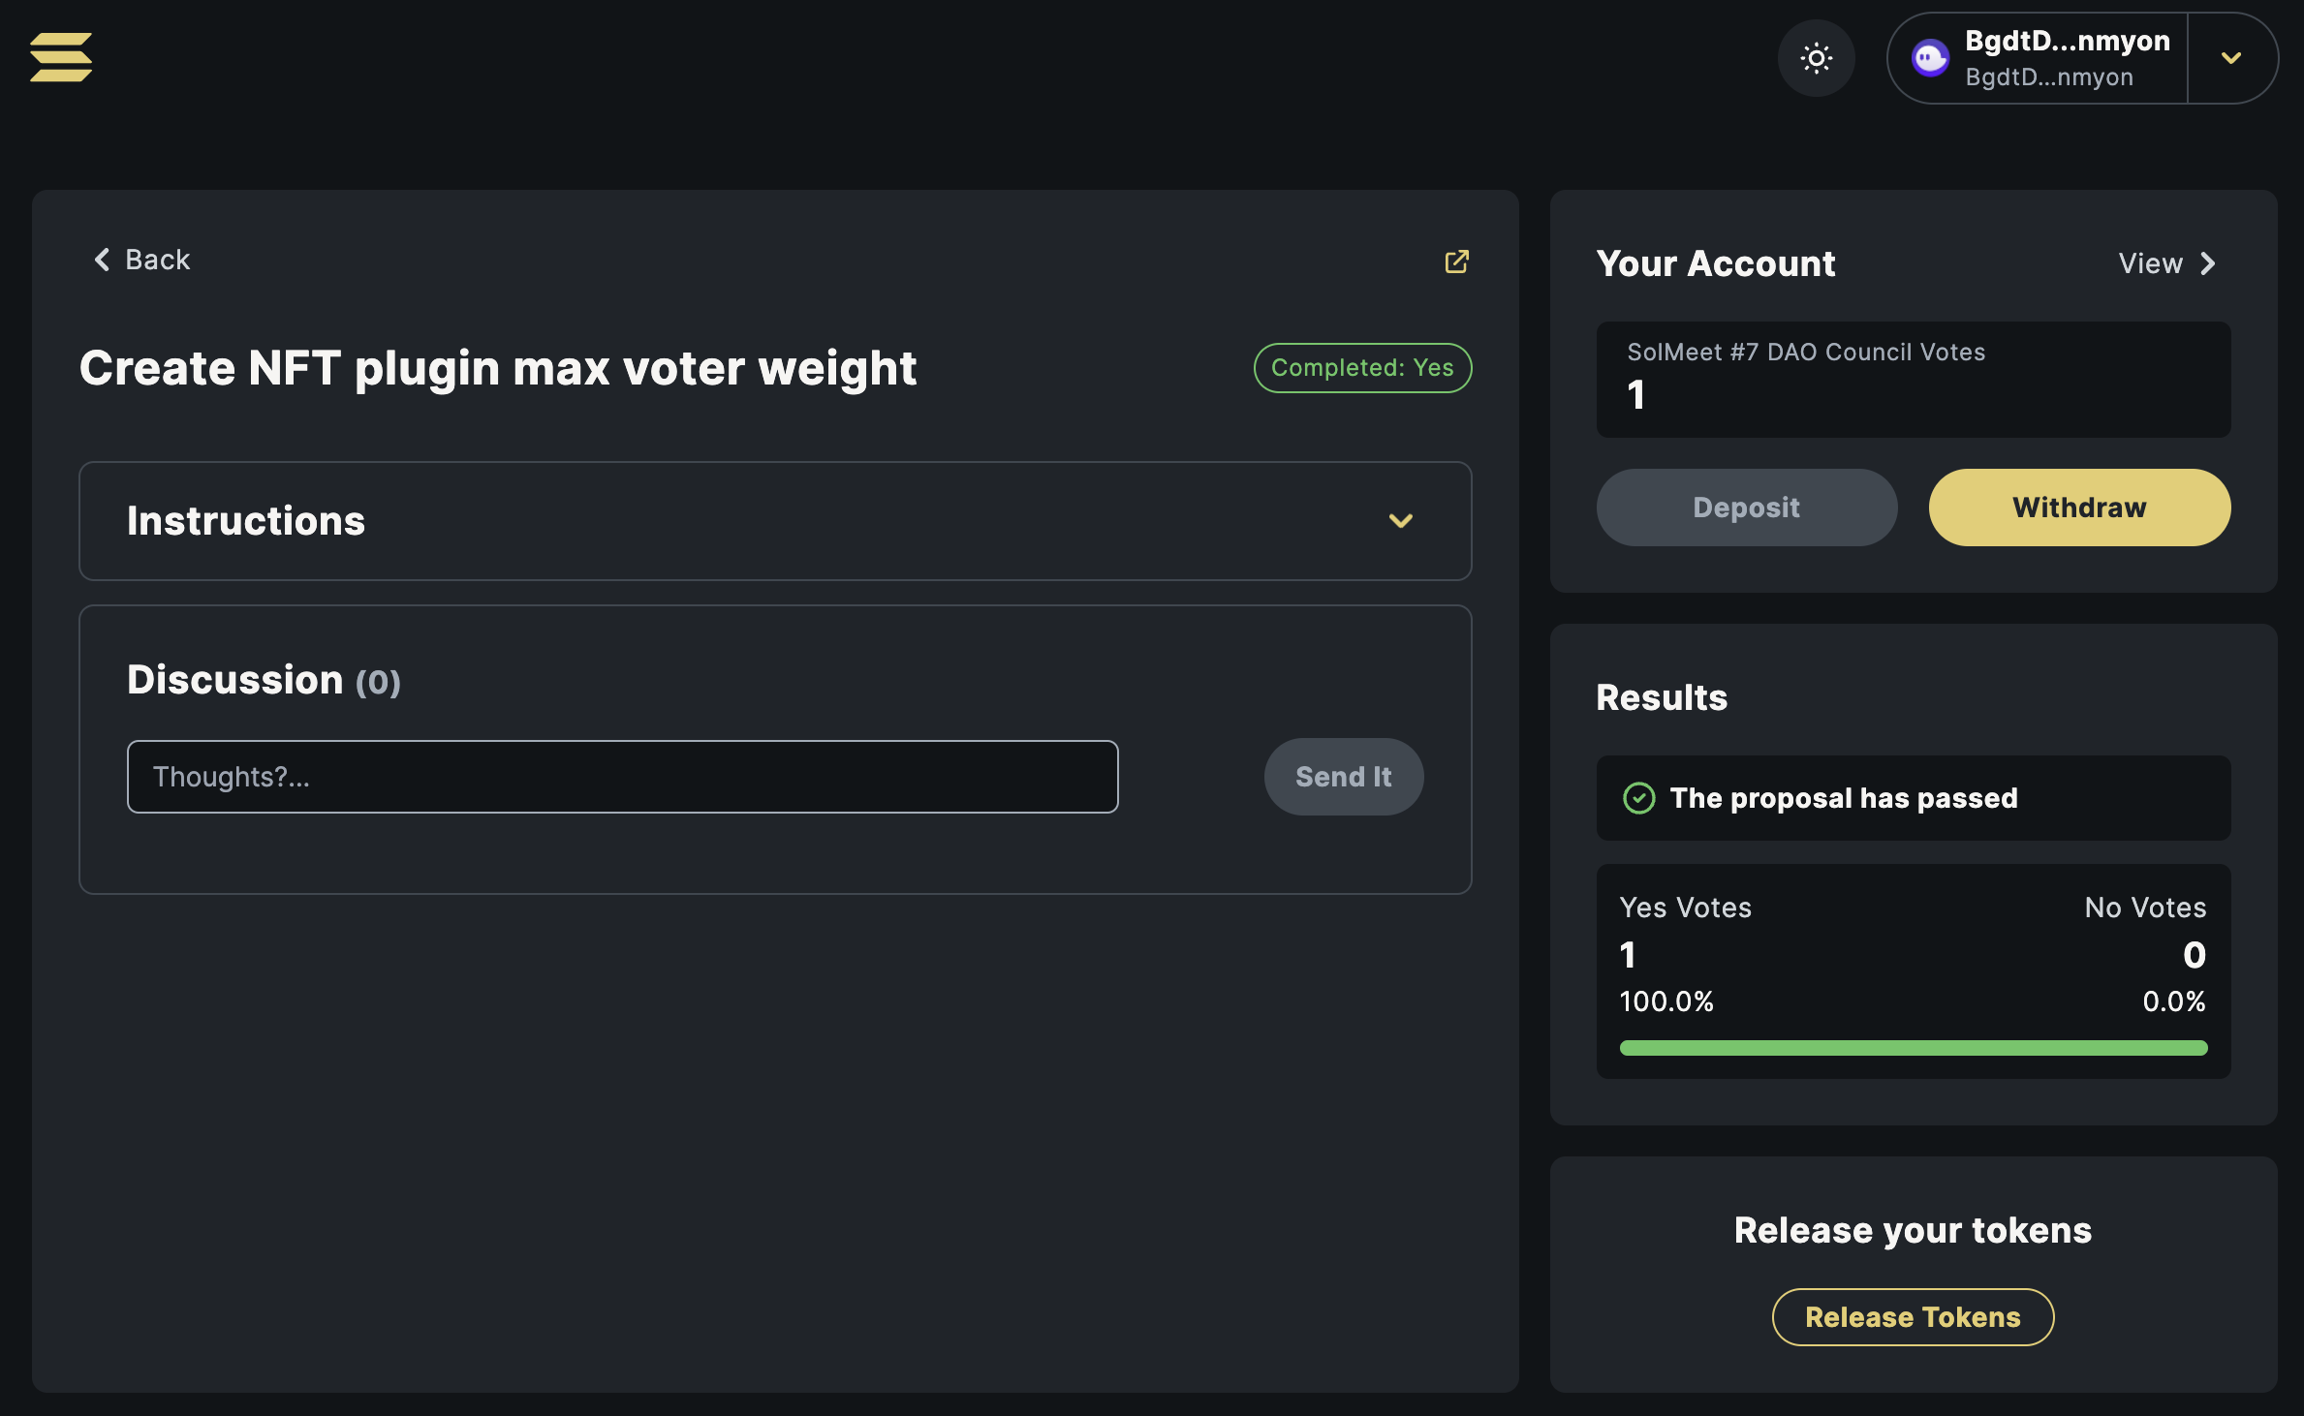
Click Add proposal and then perform Vote and Execute:
Configure NFT plugin collection
Next, let's create another proposal:
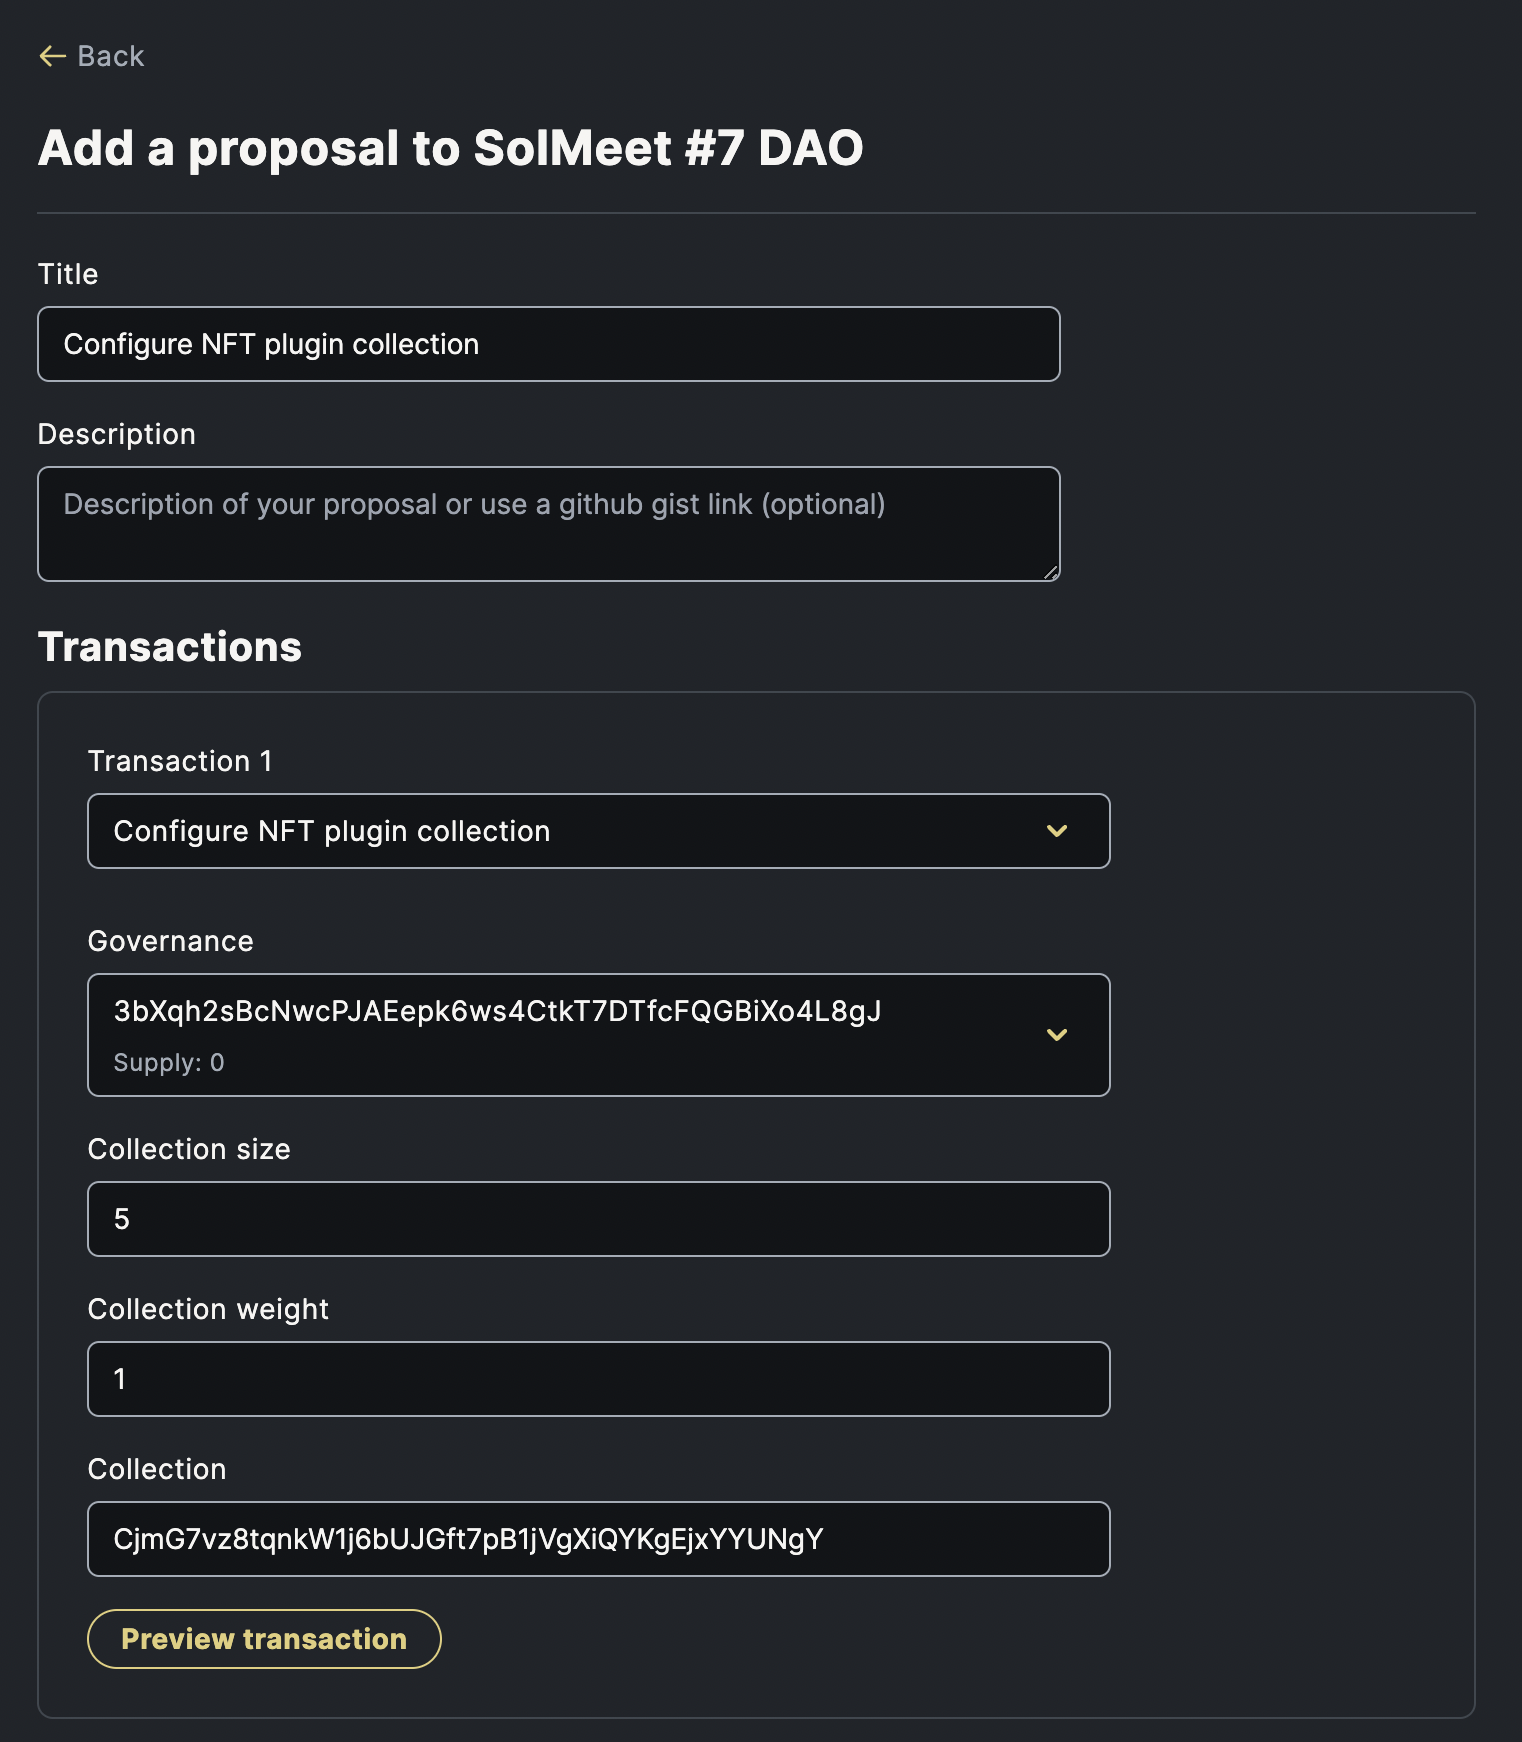
In Add a proposal:
Title: Use your favored name for the title of proposal
Transaction: Select Configure NFT plugin collection
Governance: Select the only acccount in the list
Collection Size: The total collection size of your NFT. Here we set the size to a smaller number just for the demo purpose
Collection Weight: The weighting of each vote. Default is
1.Collection: Use the key of the collection of your NFT
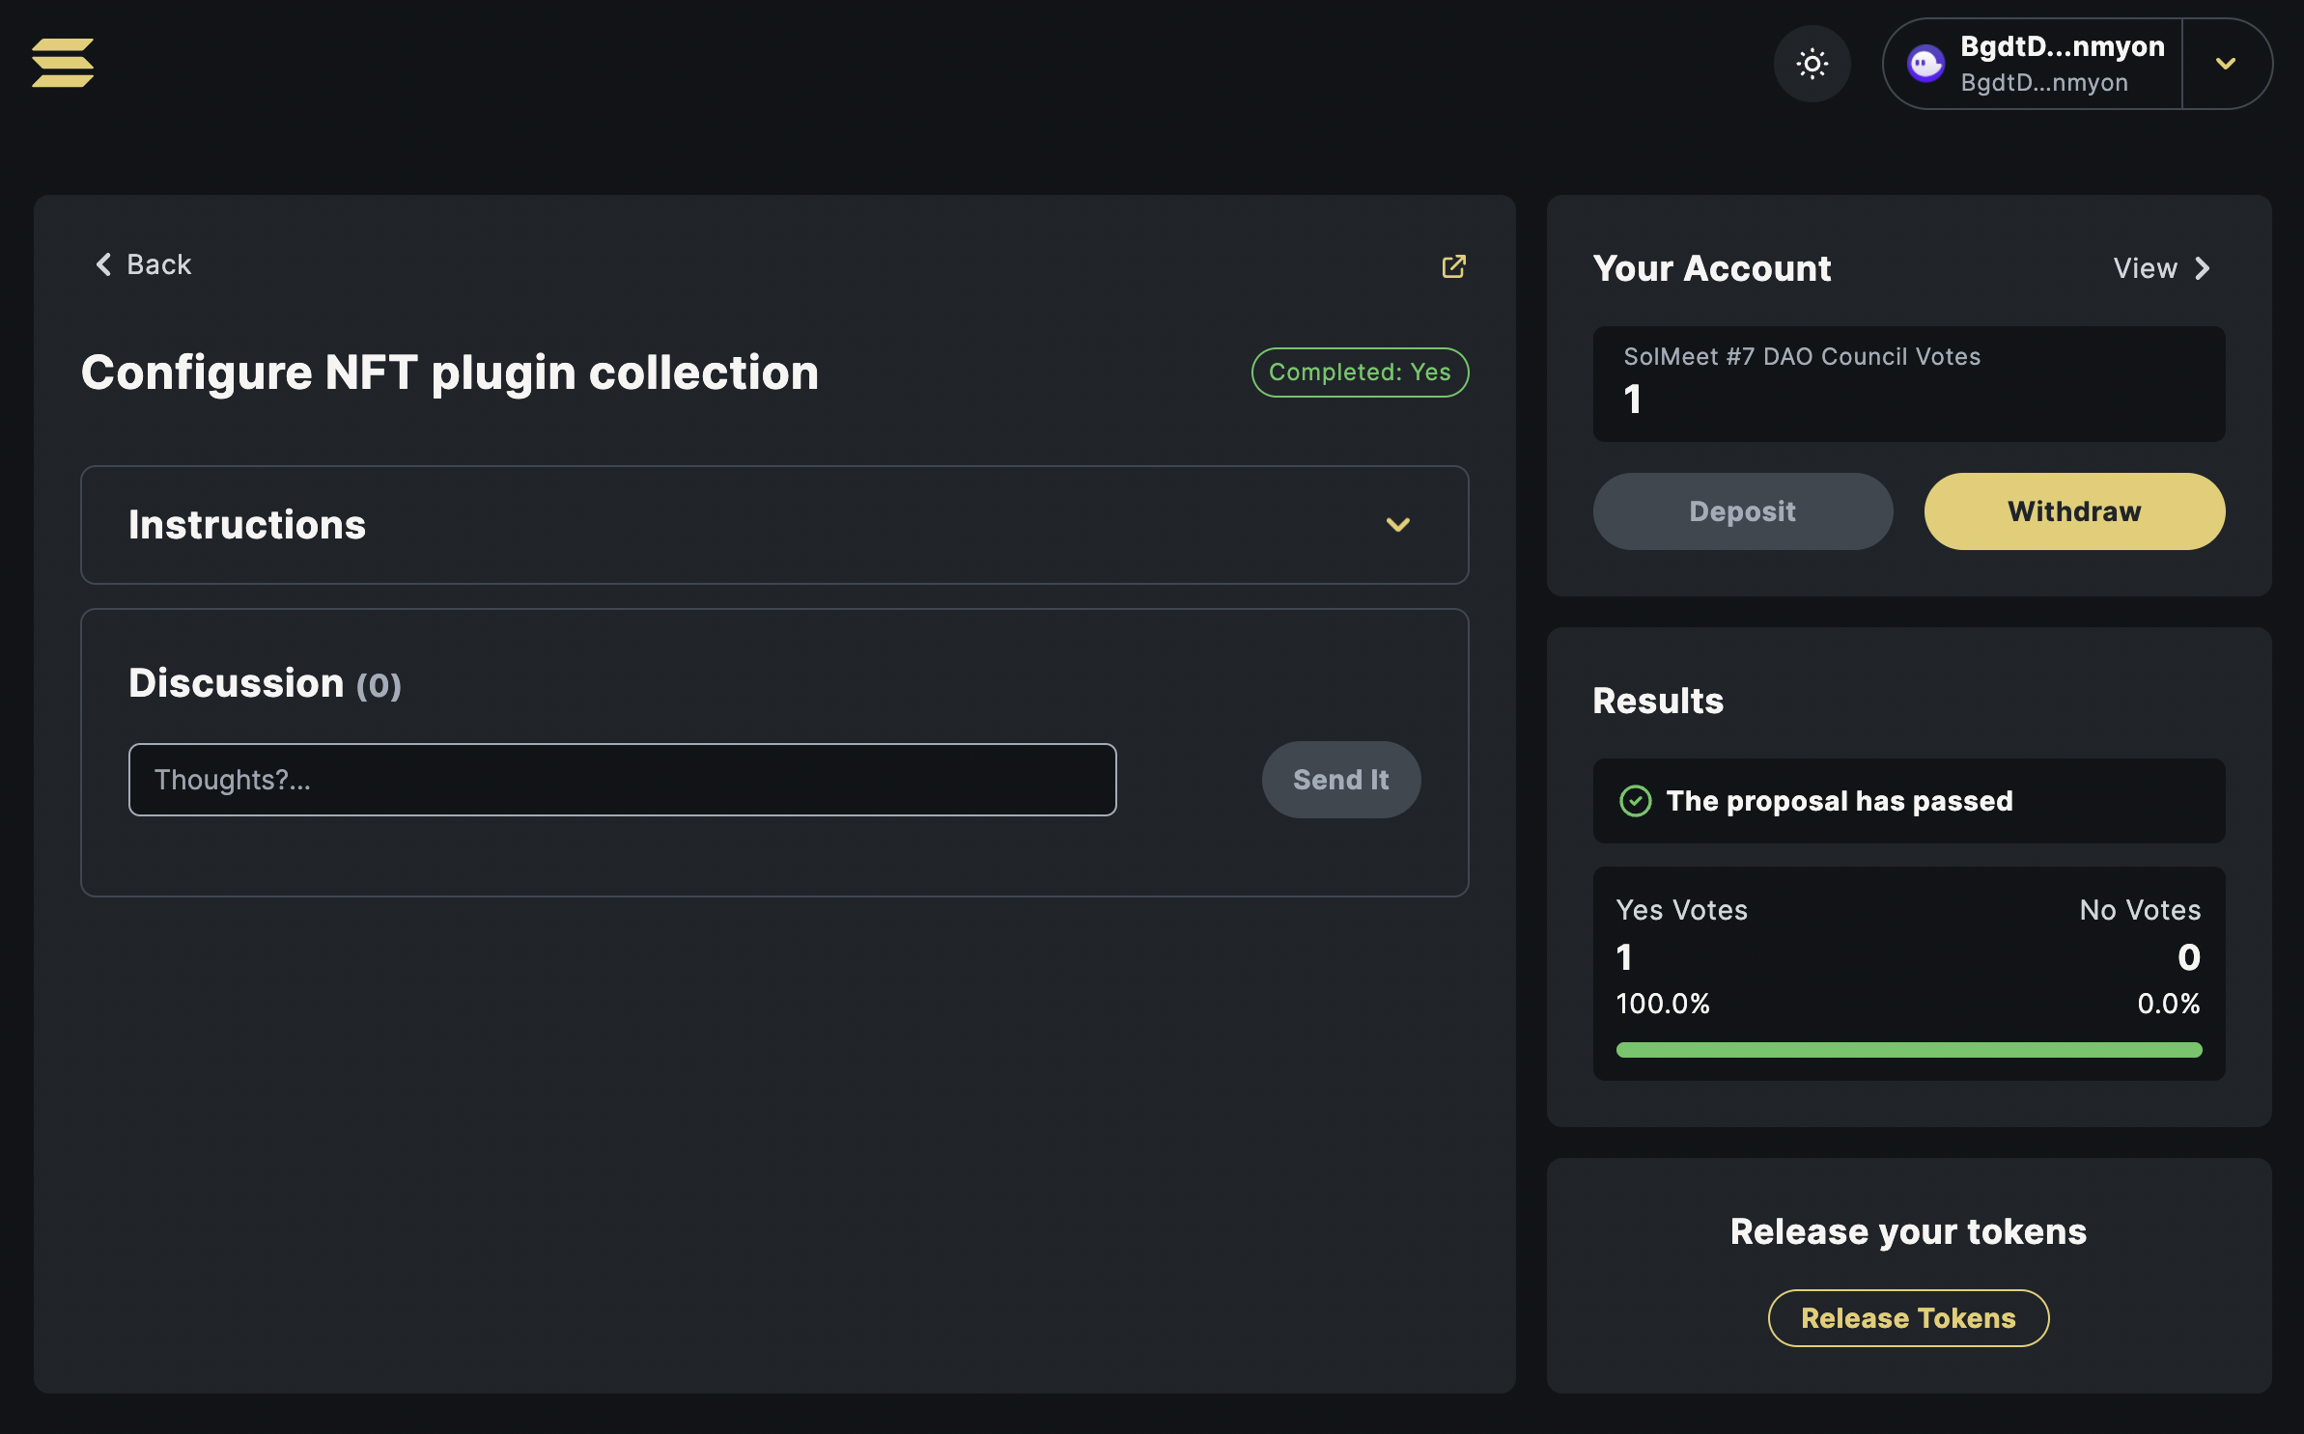
Click Add proposal and then perform Vote and Execute:
Enable NFT Voting Plugin
We only have one final config to enable the NFT DAO feature. Click Params and Change config to open the modal:
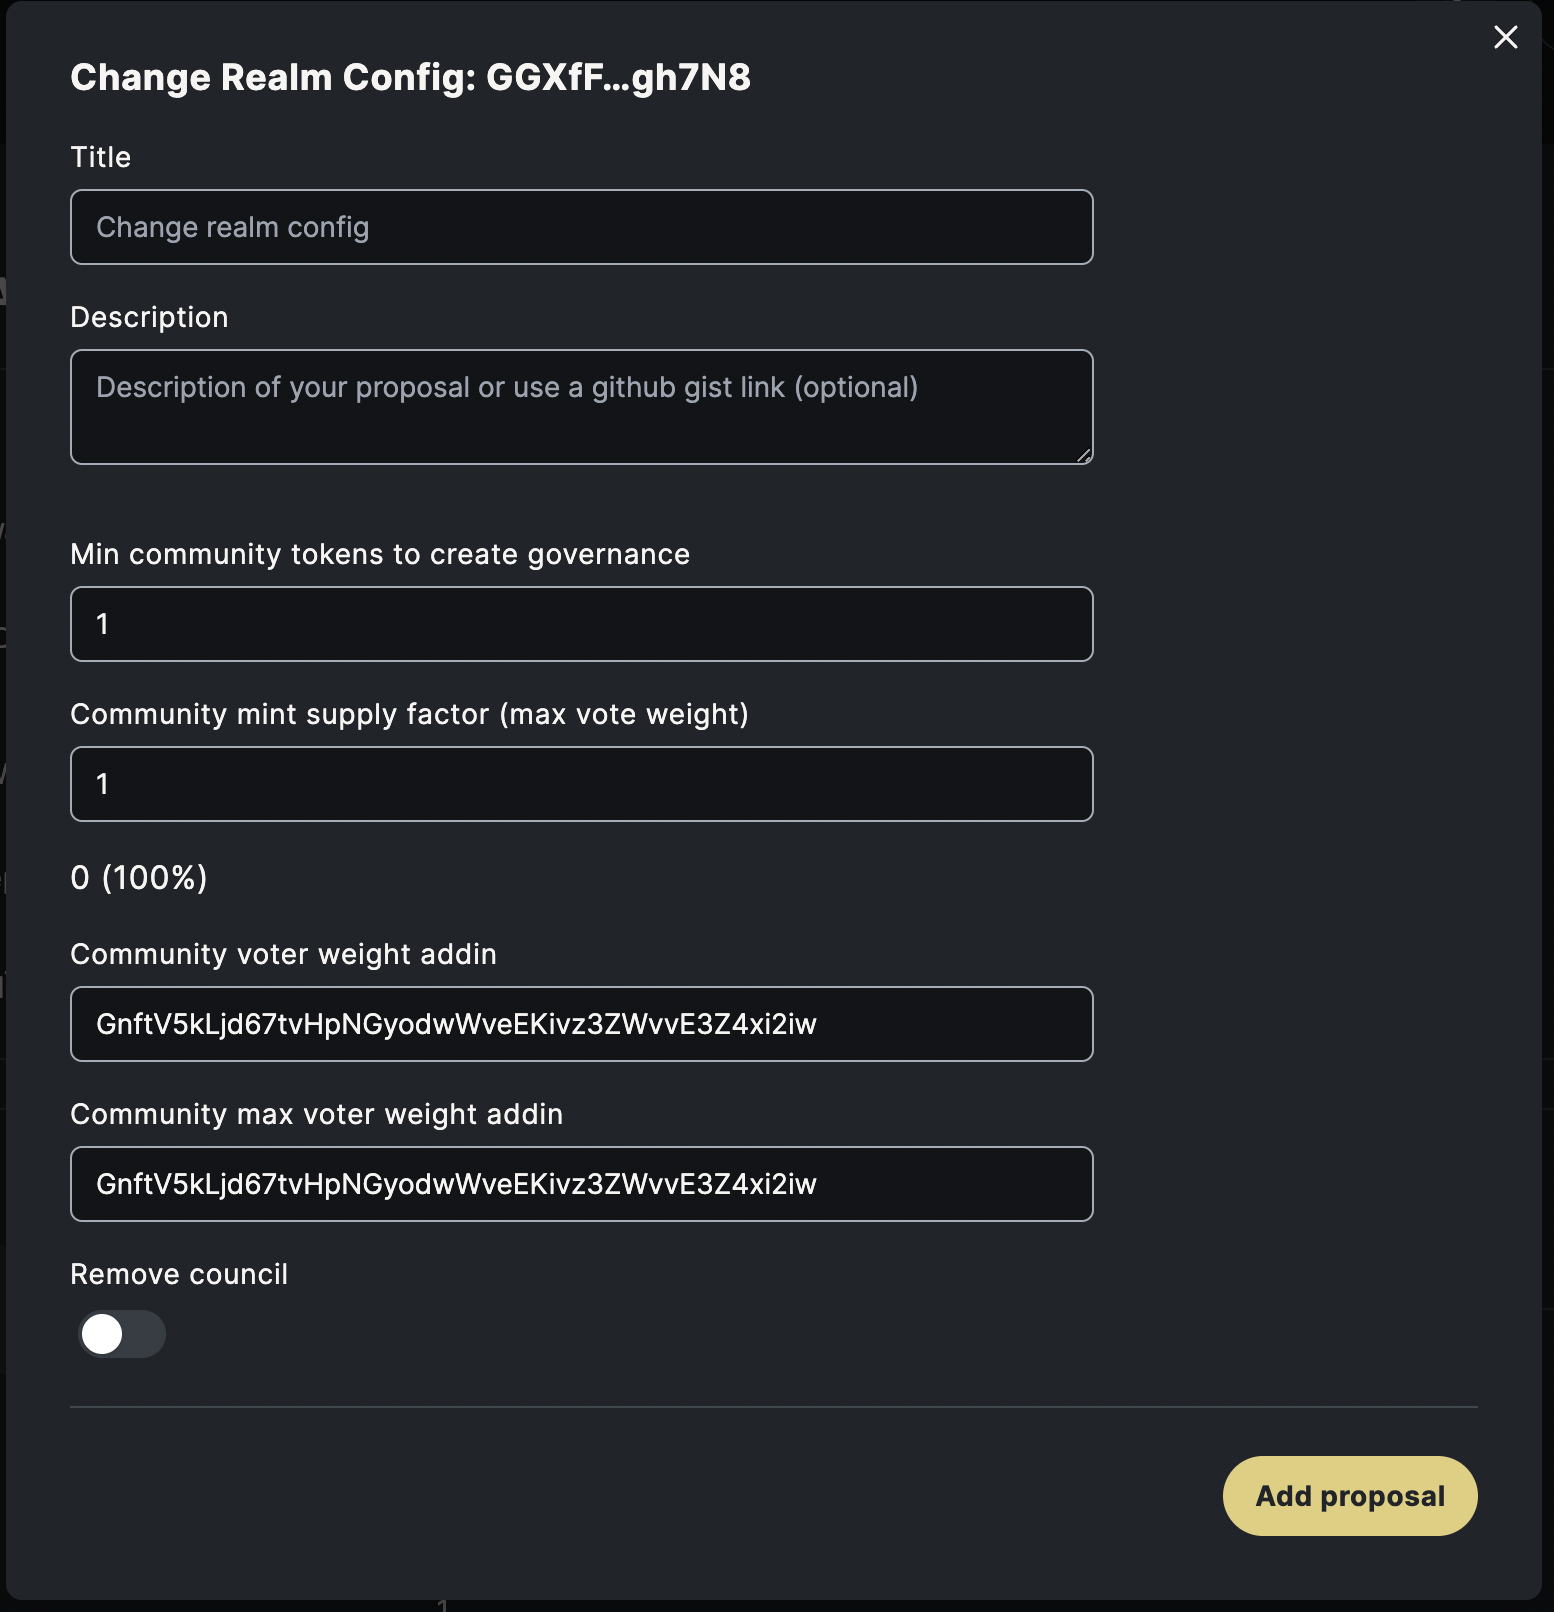
In Change Realm Config:
Community voter weight addin: Use NFT Voting Plugin Program Id
GnftV5kLjd67tvHpNGyodwWveEKivz3ZWvvE3Z4xi2iwCommunity max voter weight addin: Use NFT Voting Plugin Program Id
GnftV5kLjd67tvHpNGyodwWveEKivz3ZWvvE3Z4xi2iw
Click Add proposal and then perform Vote and Execute, then refresh the DAO dashboard:
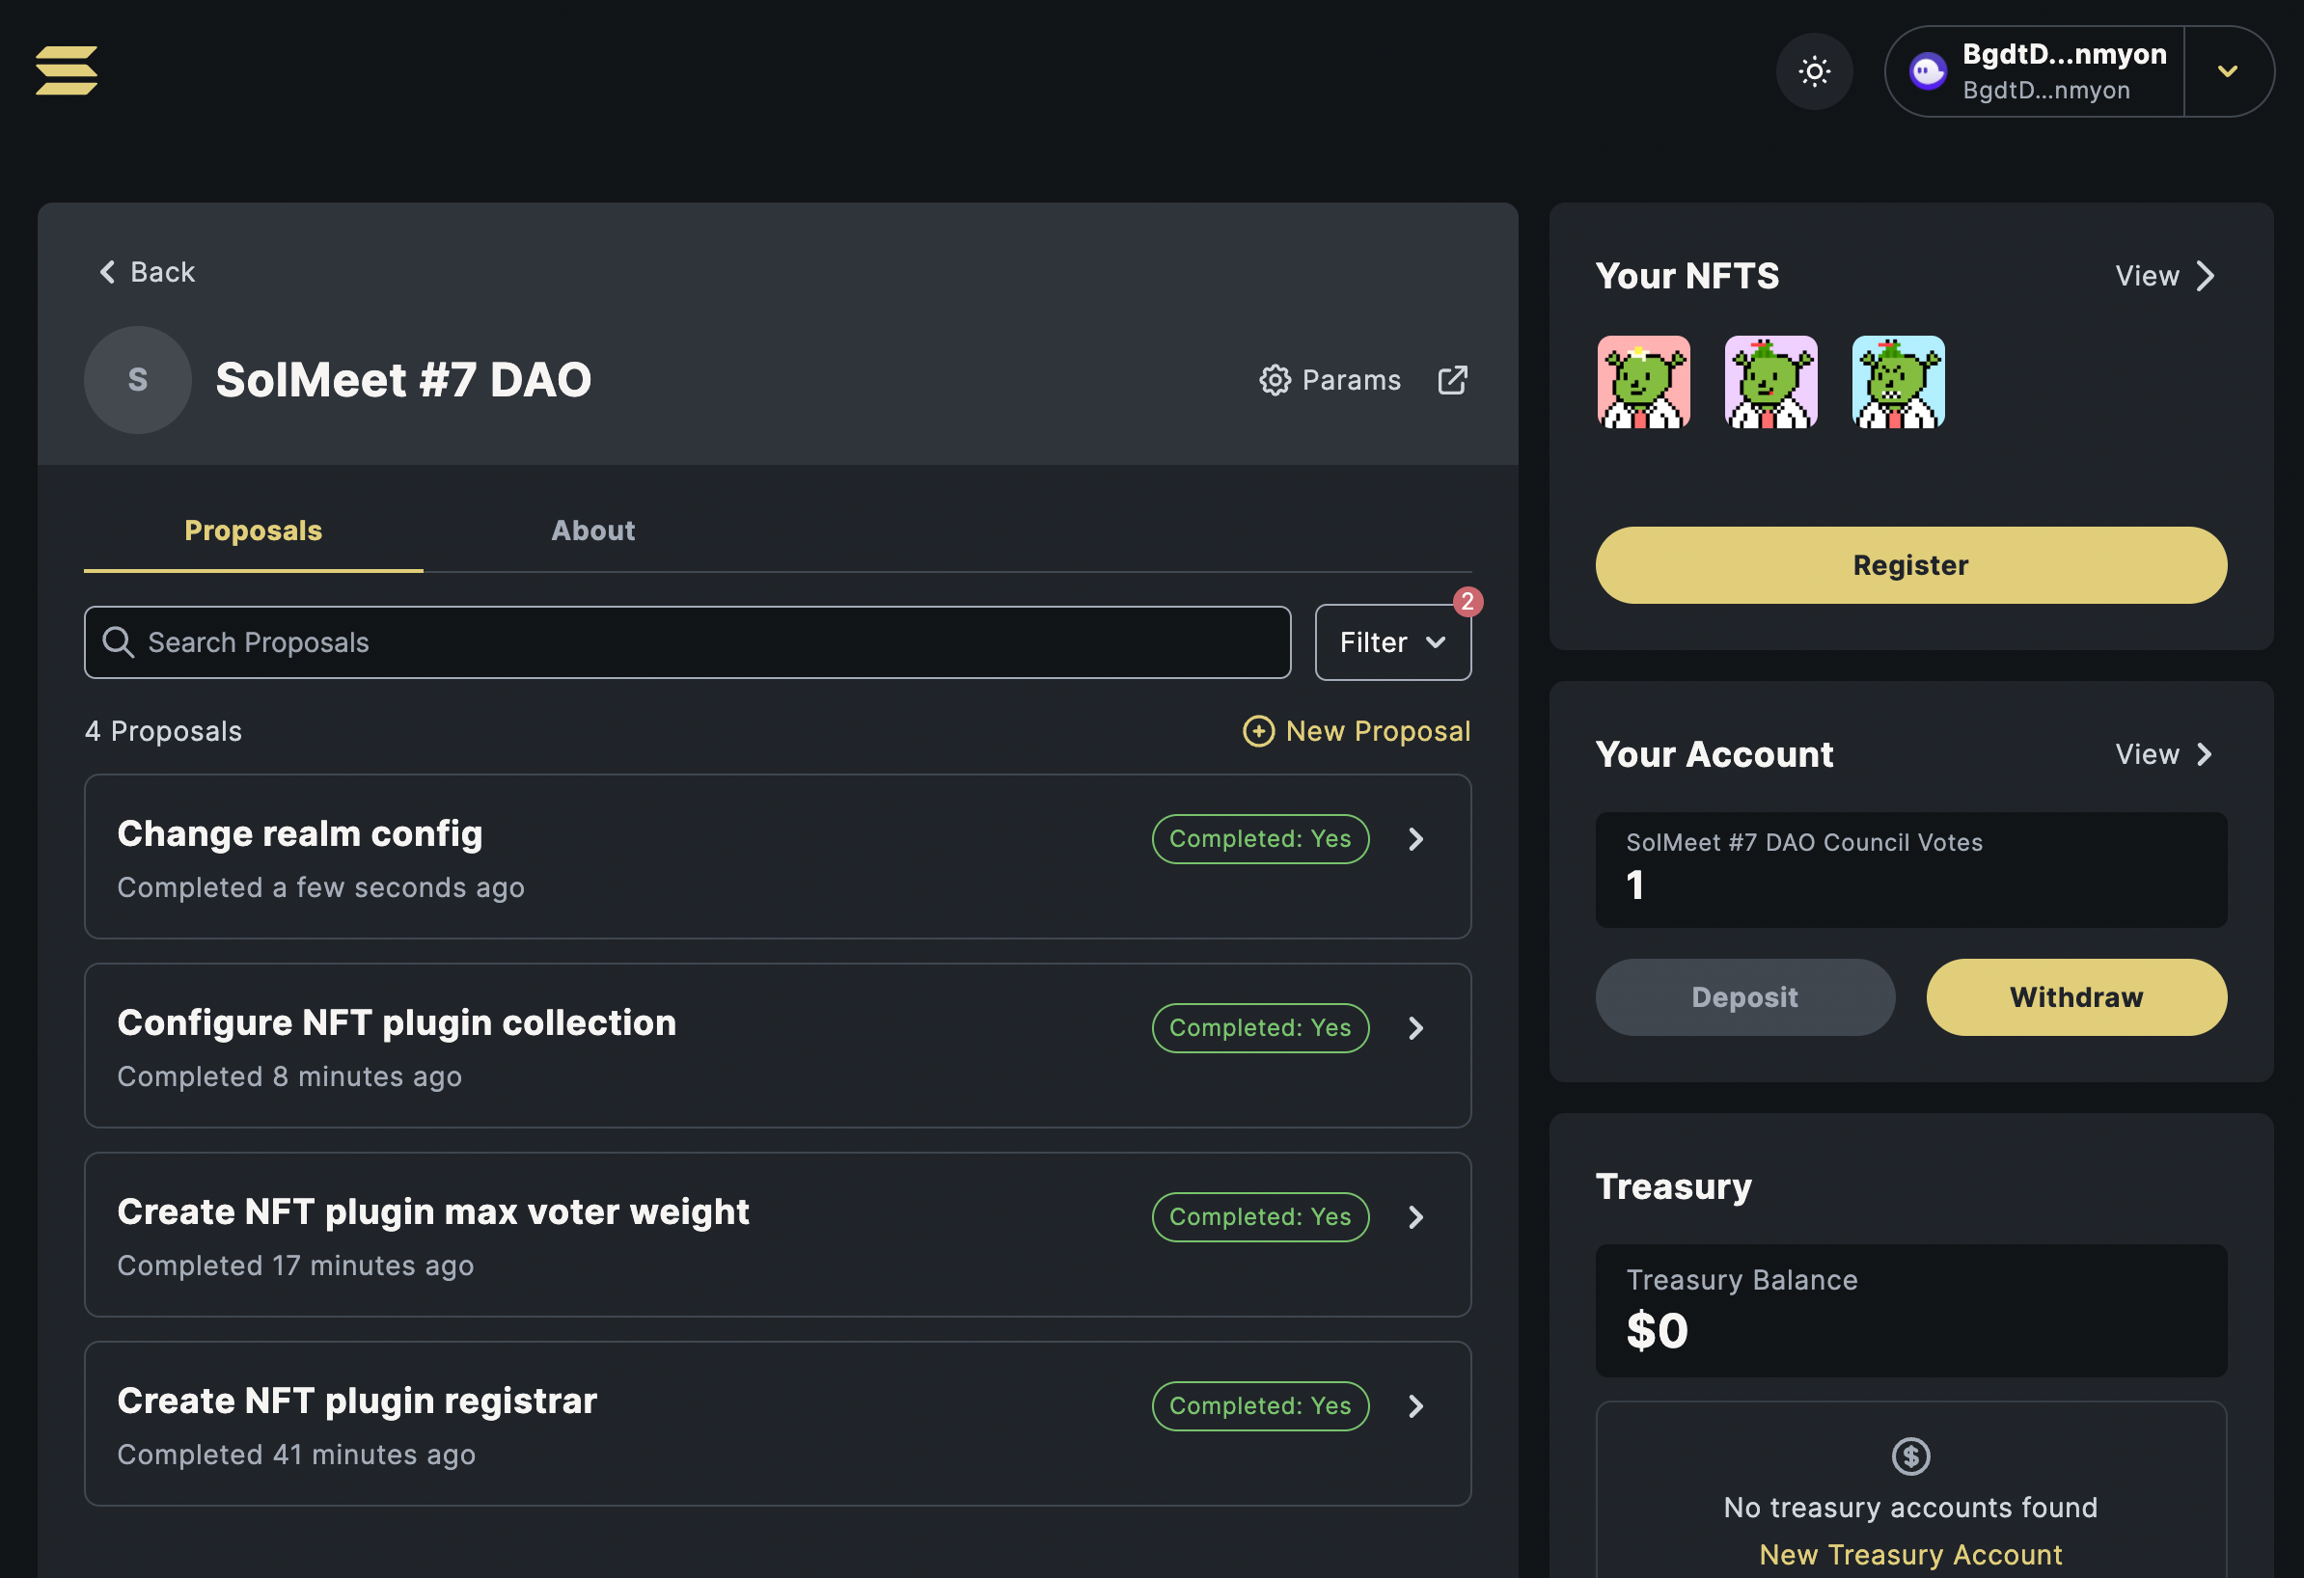
Whoa! Now you should see the NFTs from the configureed collection displaying on the dashboard.
Finally, click Register to use your holding NFTs.
Part 3: Propose and Vote
In this section, we will go through the follwoing operations:
Create treasury for SOL and NFT
Send funds to treasury for SOL and NFT
Propose to transfer funds
Execute the proposal
Be aware of the tx size limit. The proposal will fail if the proposer has more than 3 NFTs.
Create Treasury
Click New Treasury Account:
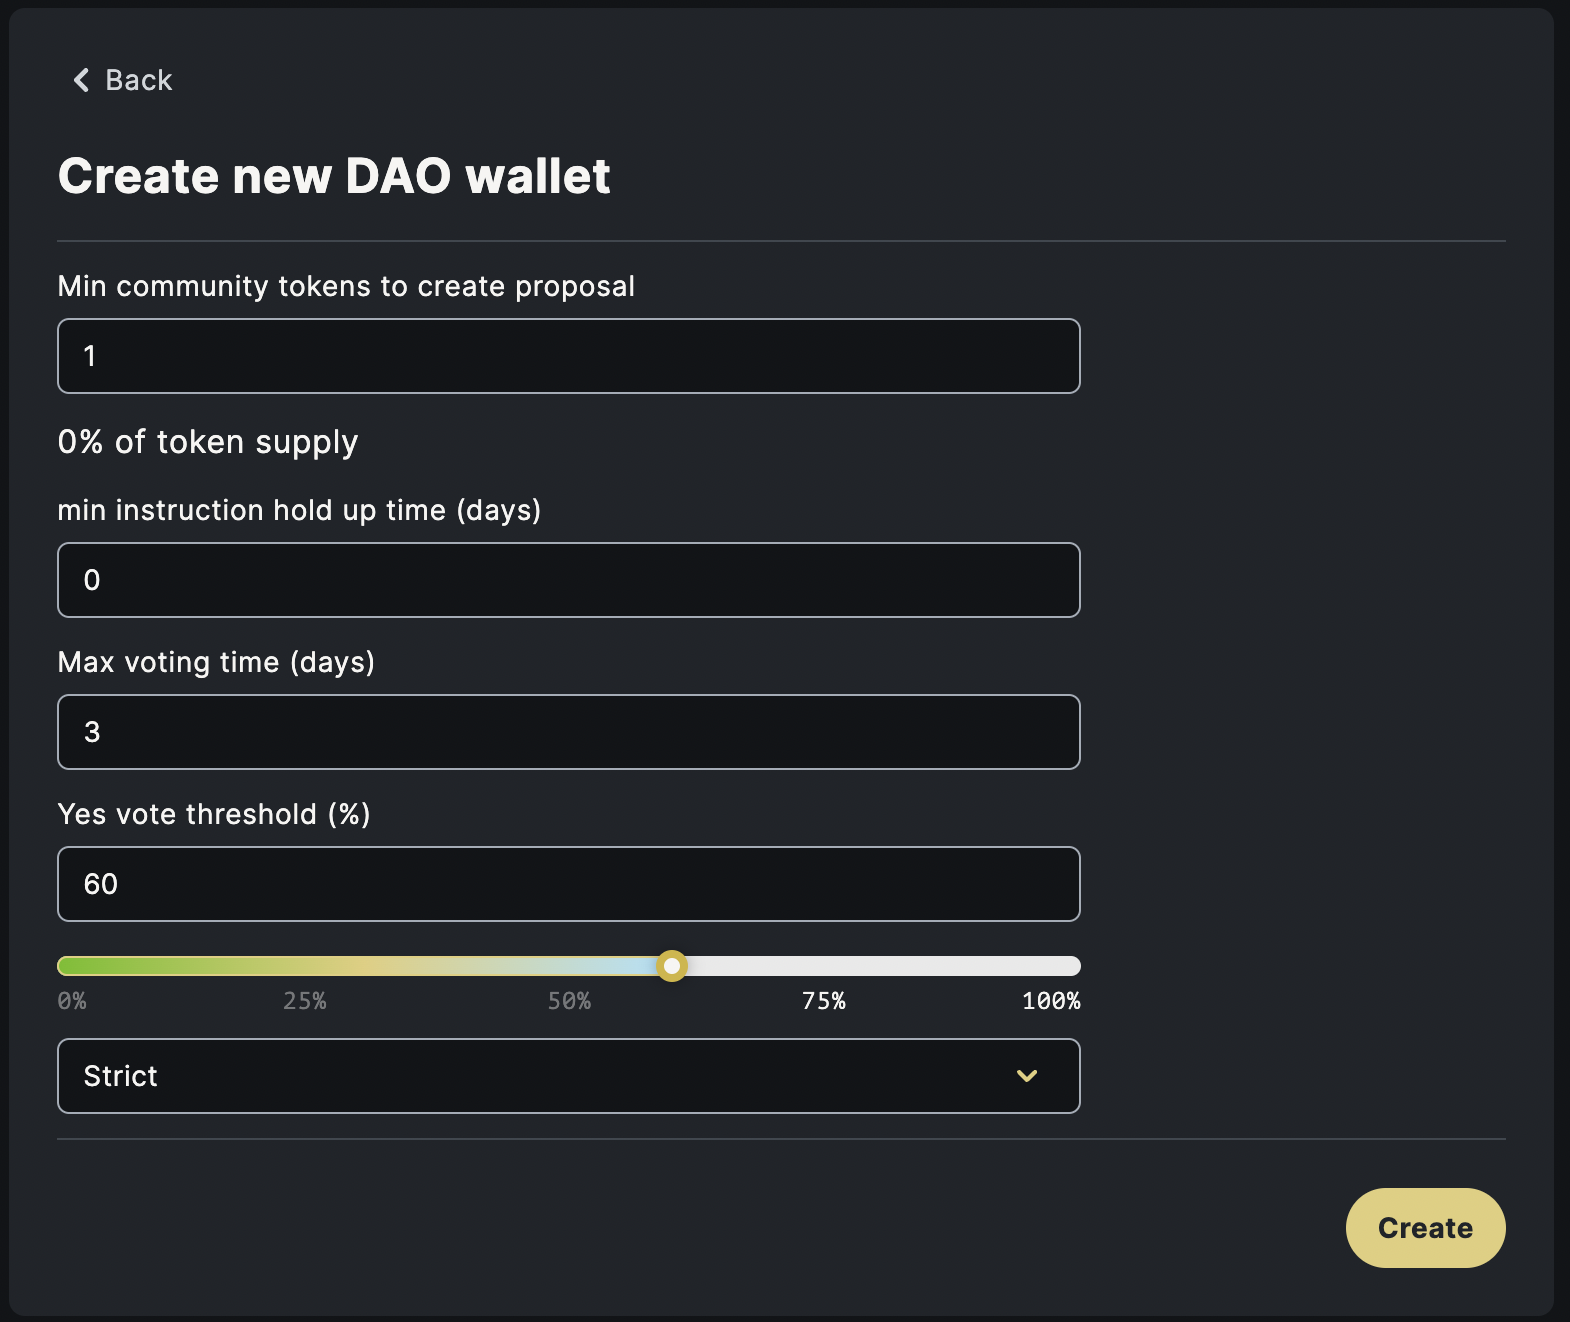
In Create new DAO wallet:
Min community tokens to create proposal: Set to
1to allow NFT holder to propose
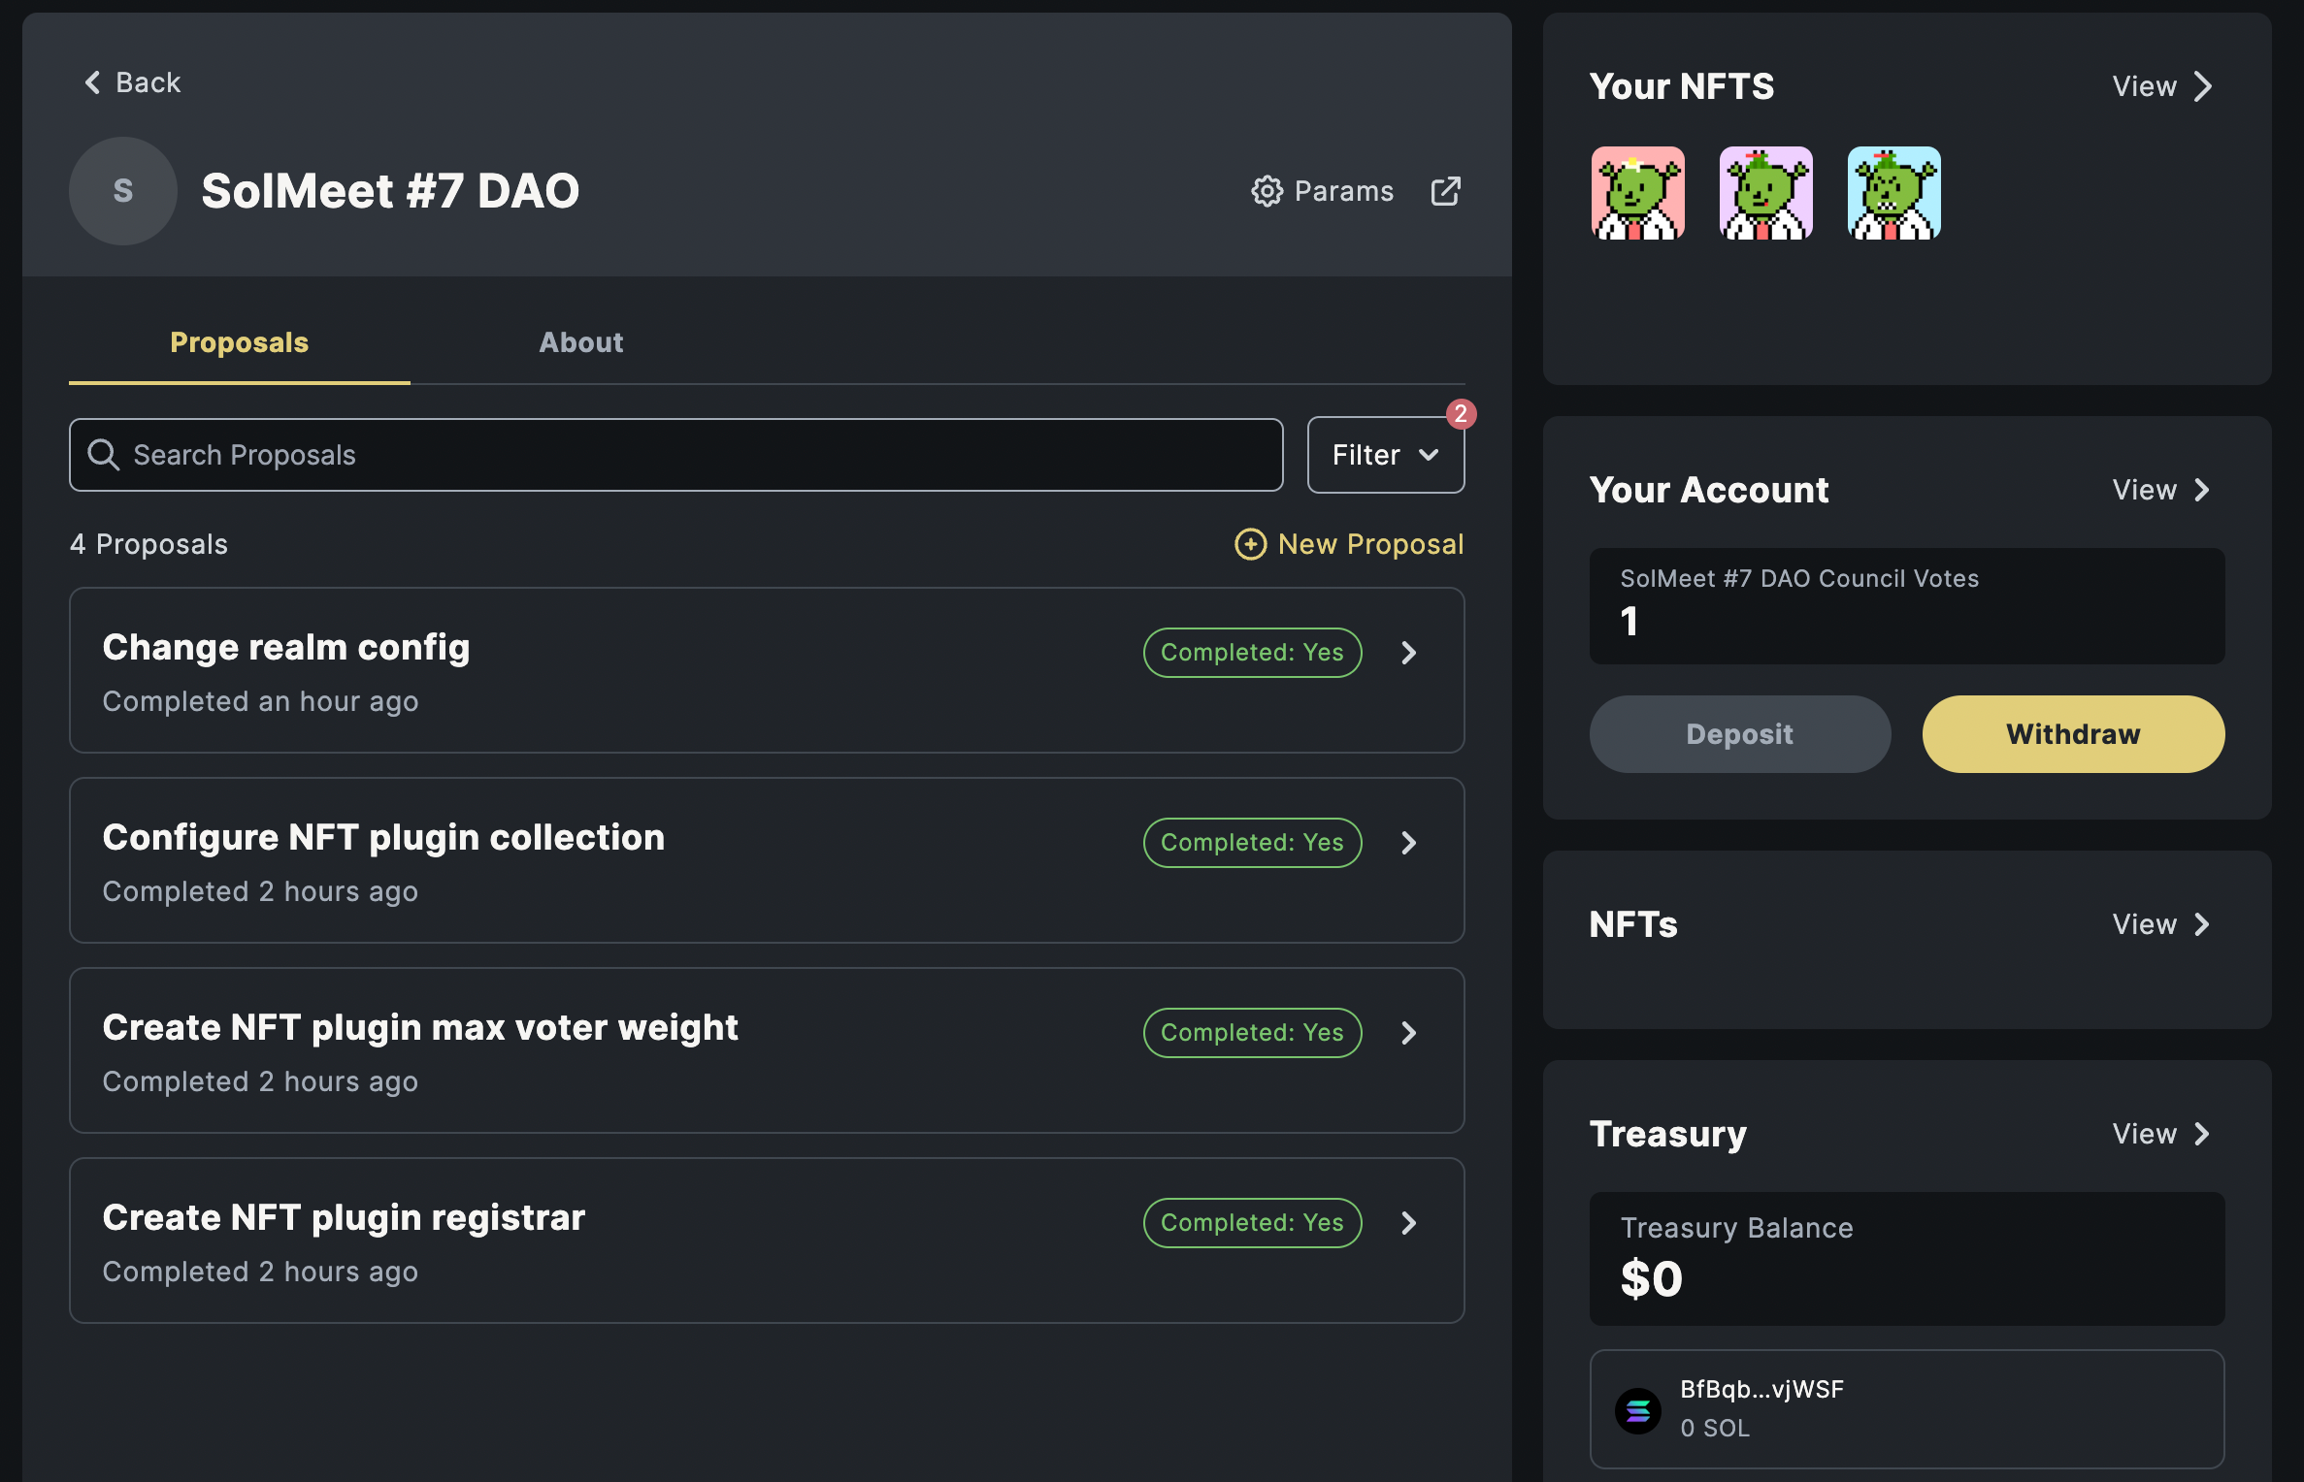
Click Create, you can see a new SOL and NFT treasury appear:
Send Funds to Treasury
SOL Treasury
Click View of SOL treasury:
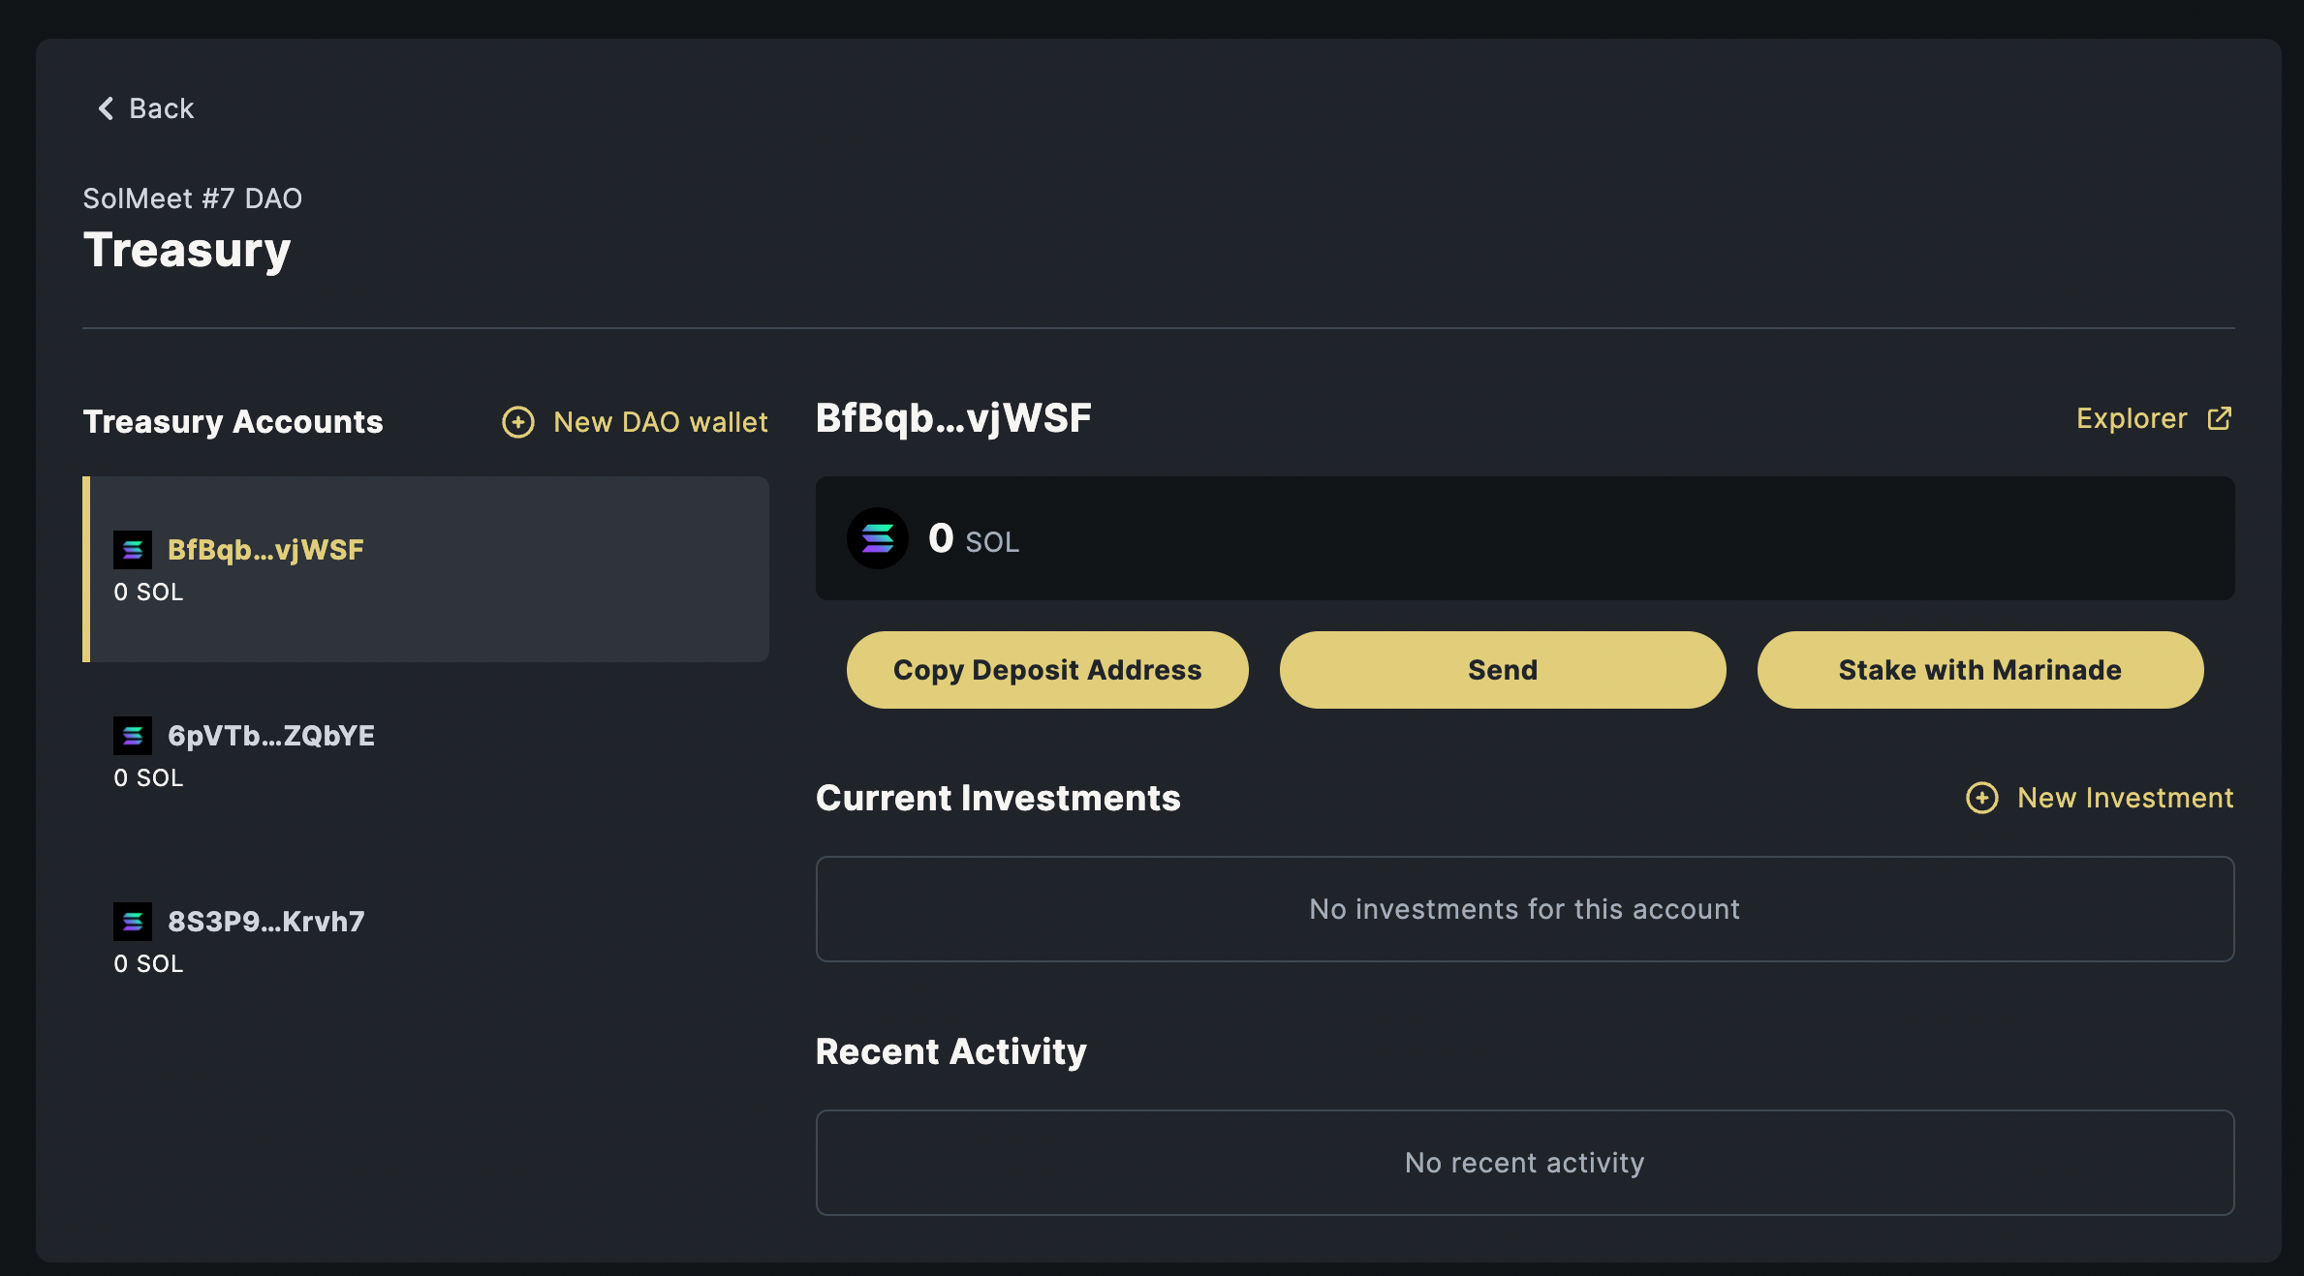
Click Copy Deposit Address to get the address of the treasury. Now, anyone can transfer funds to this address if they wish.
NFT Treasury
Click View of NFTs:
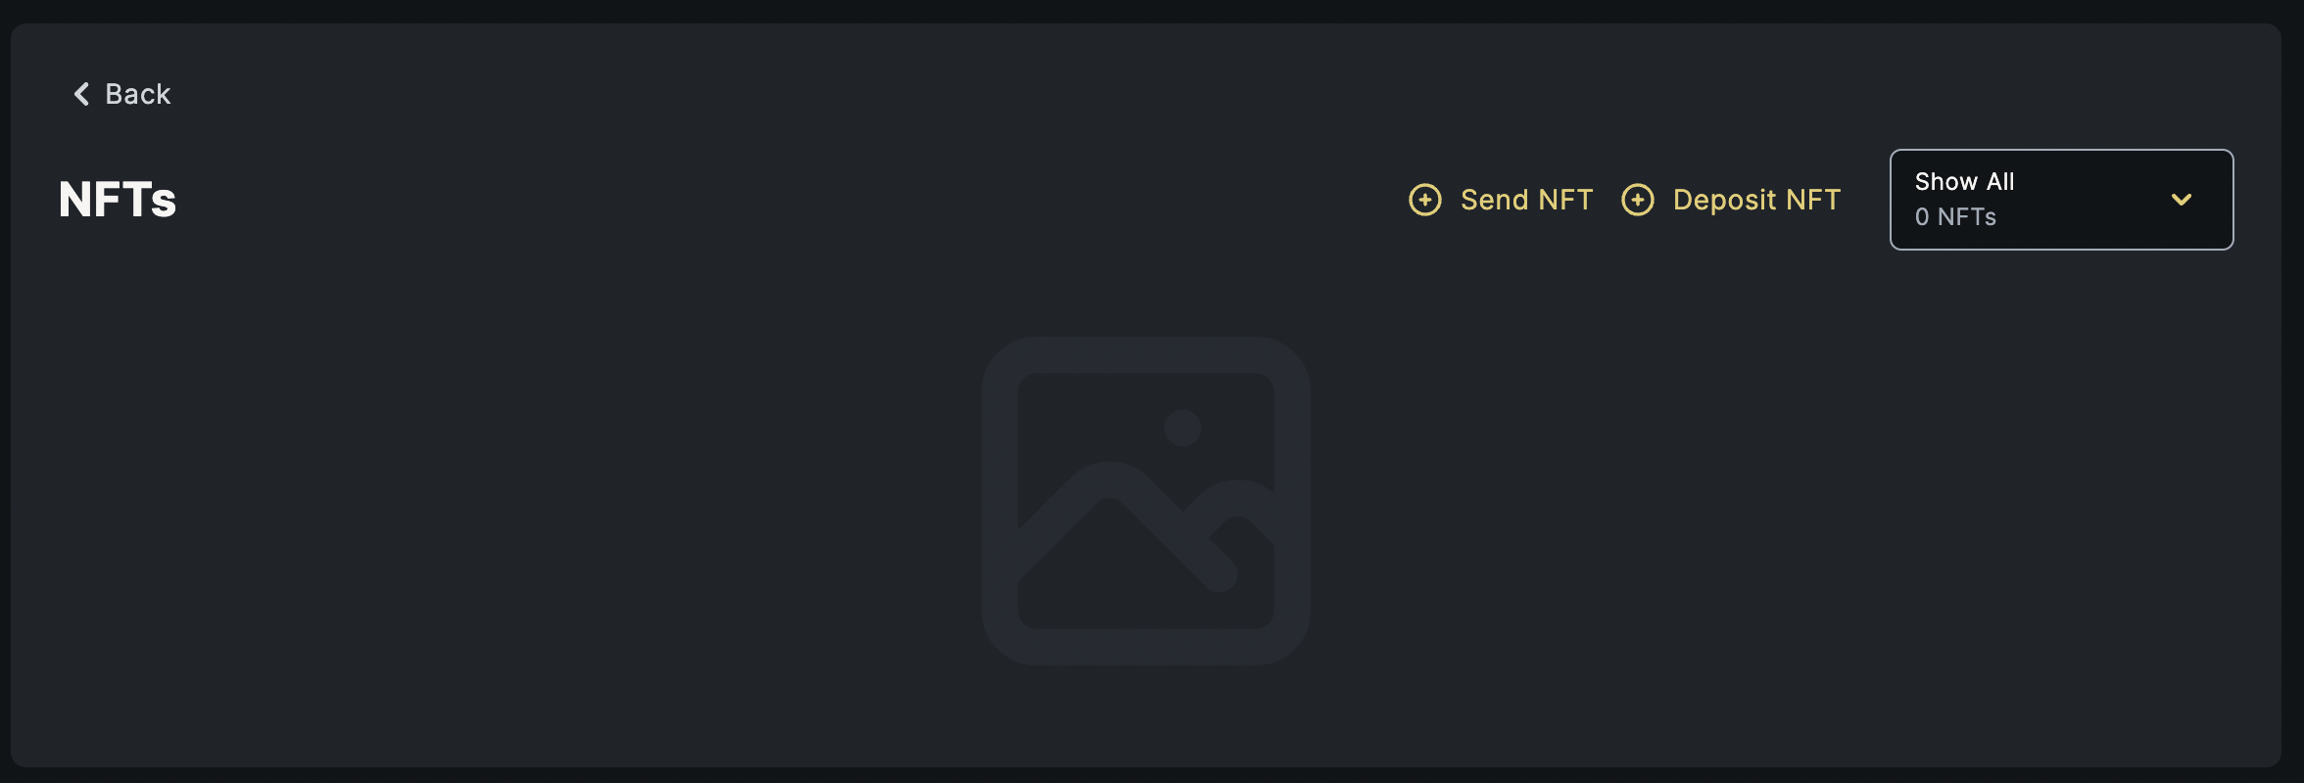
Next, click Deposit NFT and then Deposit NFT to Treasury account address:
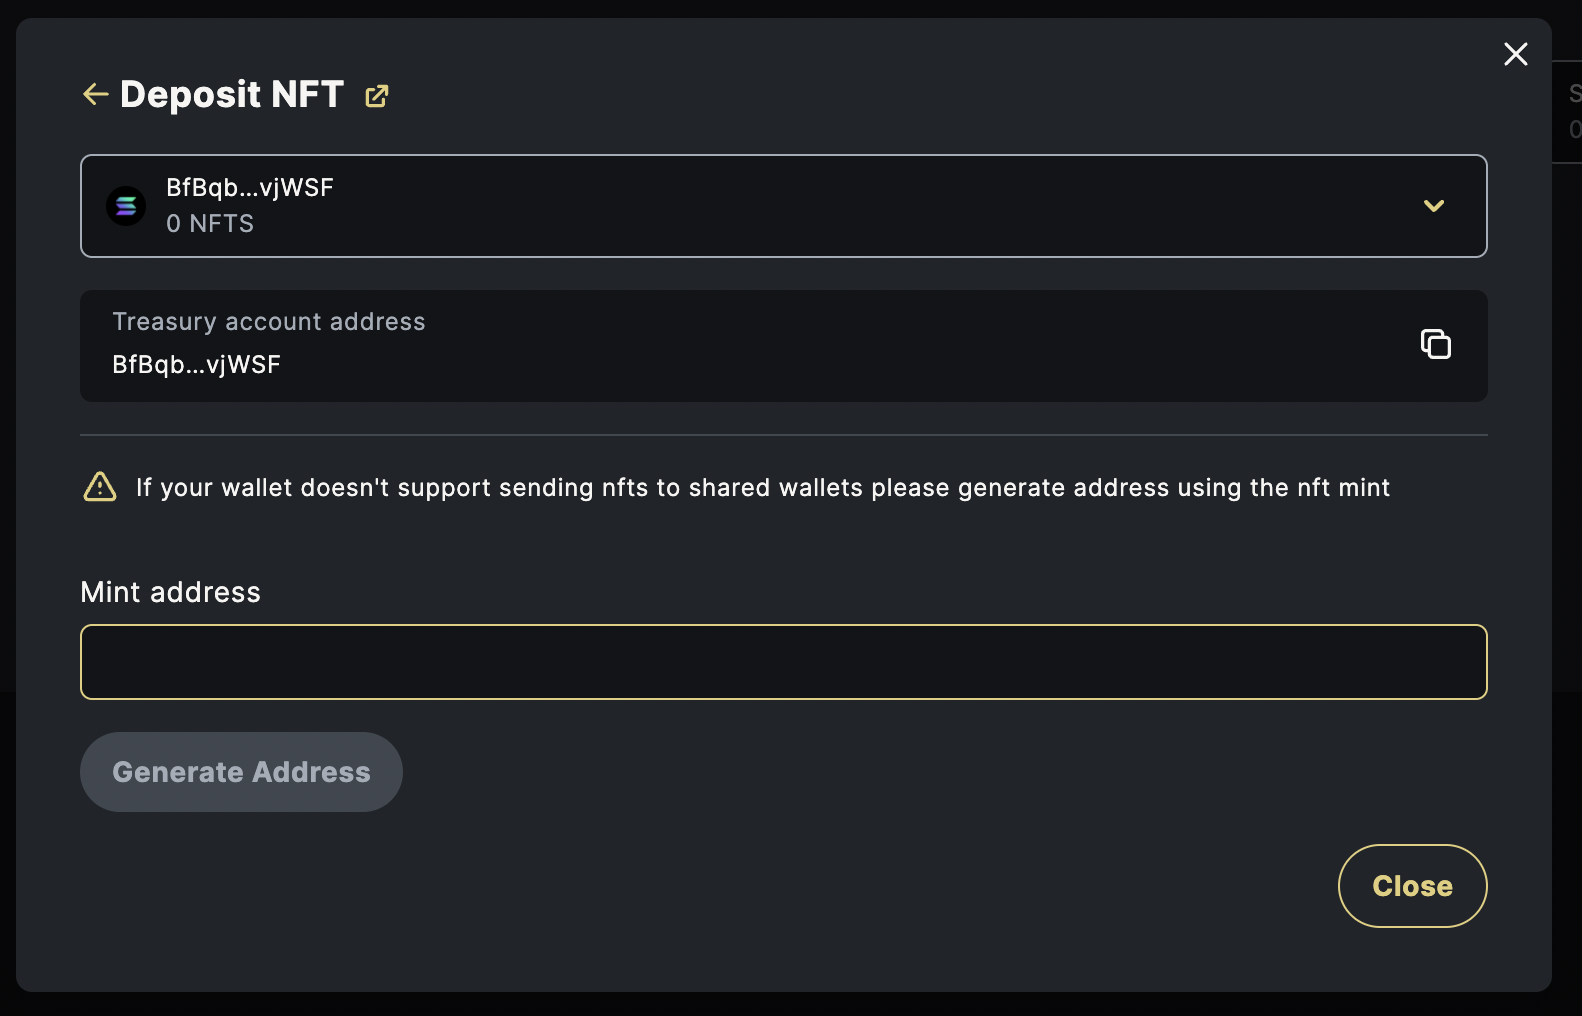
Copy the Treasury account address (the same as the SOL treasury) to get the address of the treasury. Now, anyone can transfer funds to this address if they wish.
Let's check the funds once the transfer is done:

Propose to Transfer Funds
Click View of NFTs and then Send NFT:
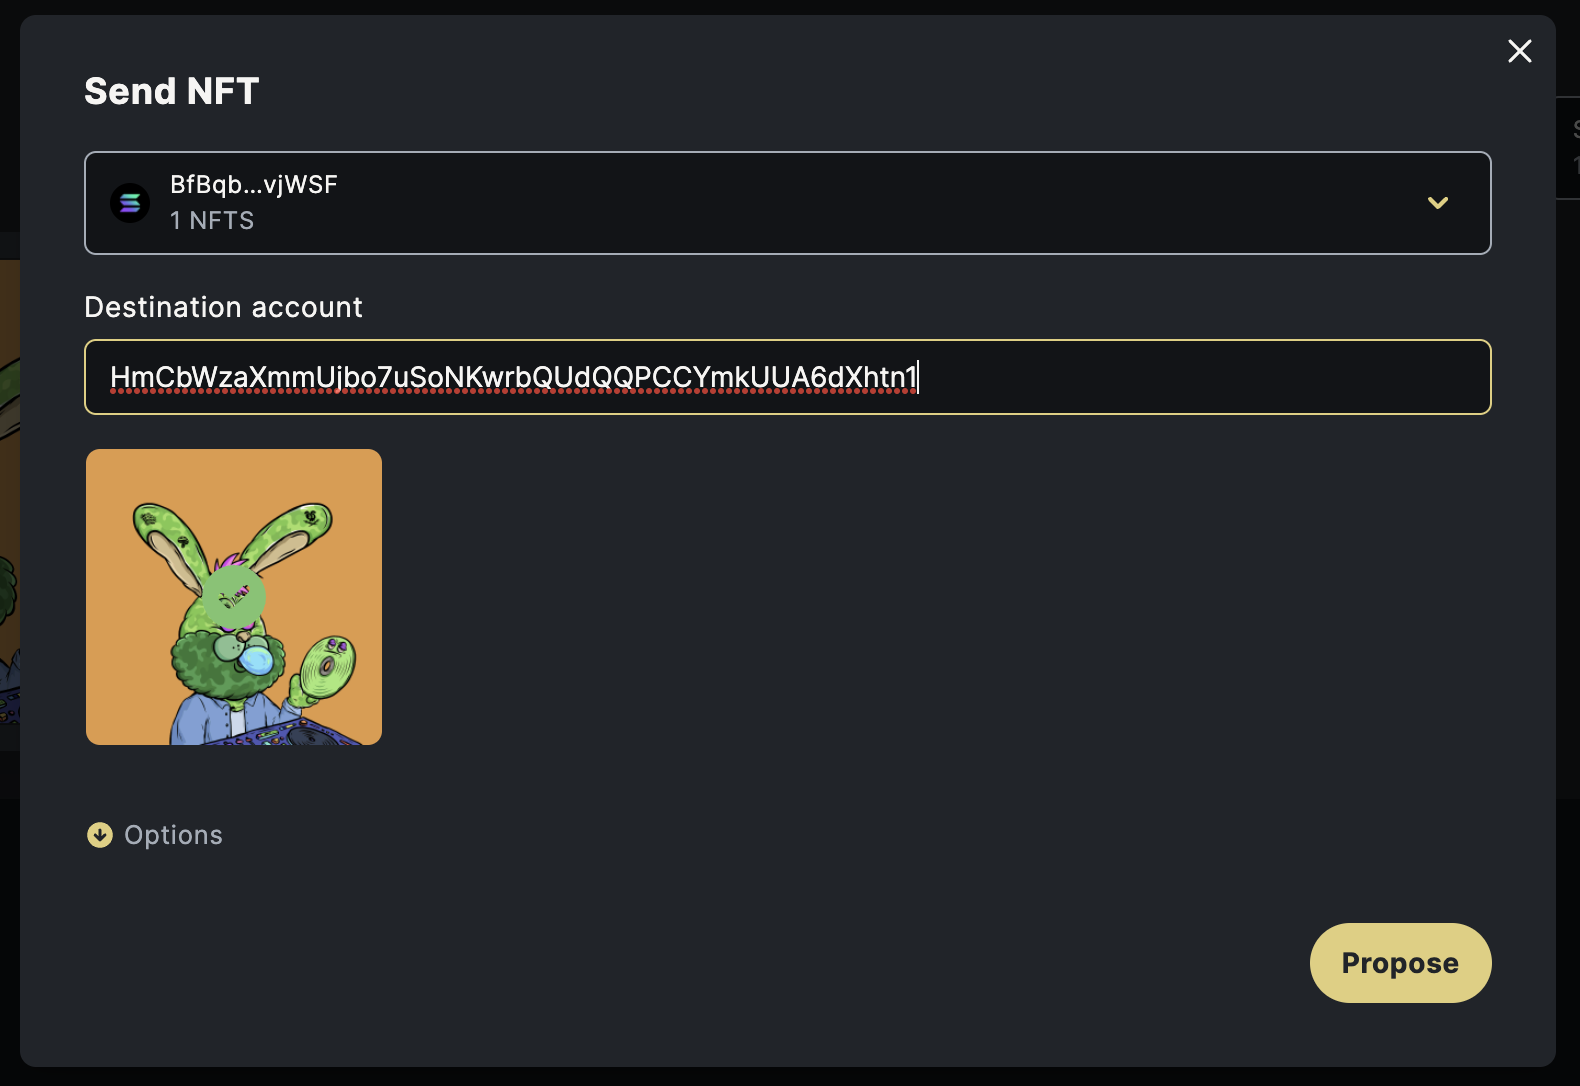
In Send NFT:
Destination account: Receiver of NFT
Click Propose:
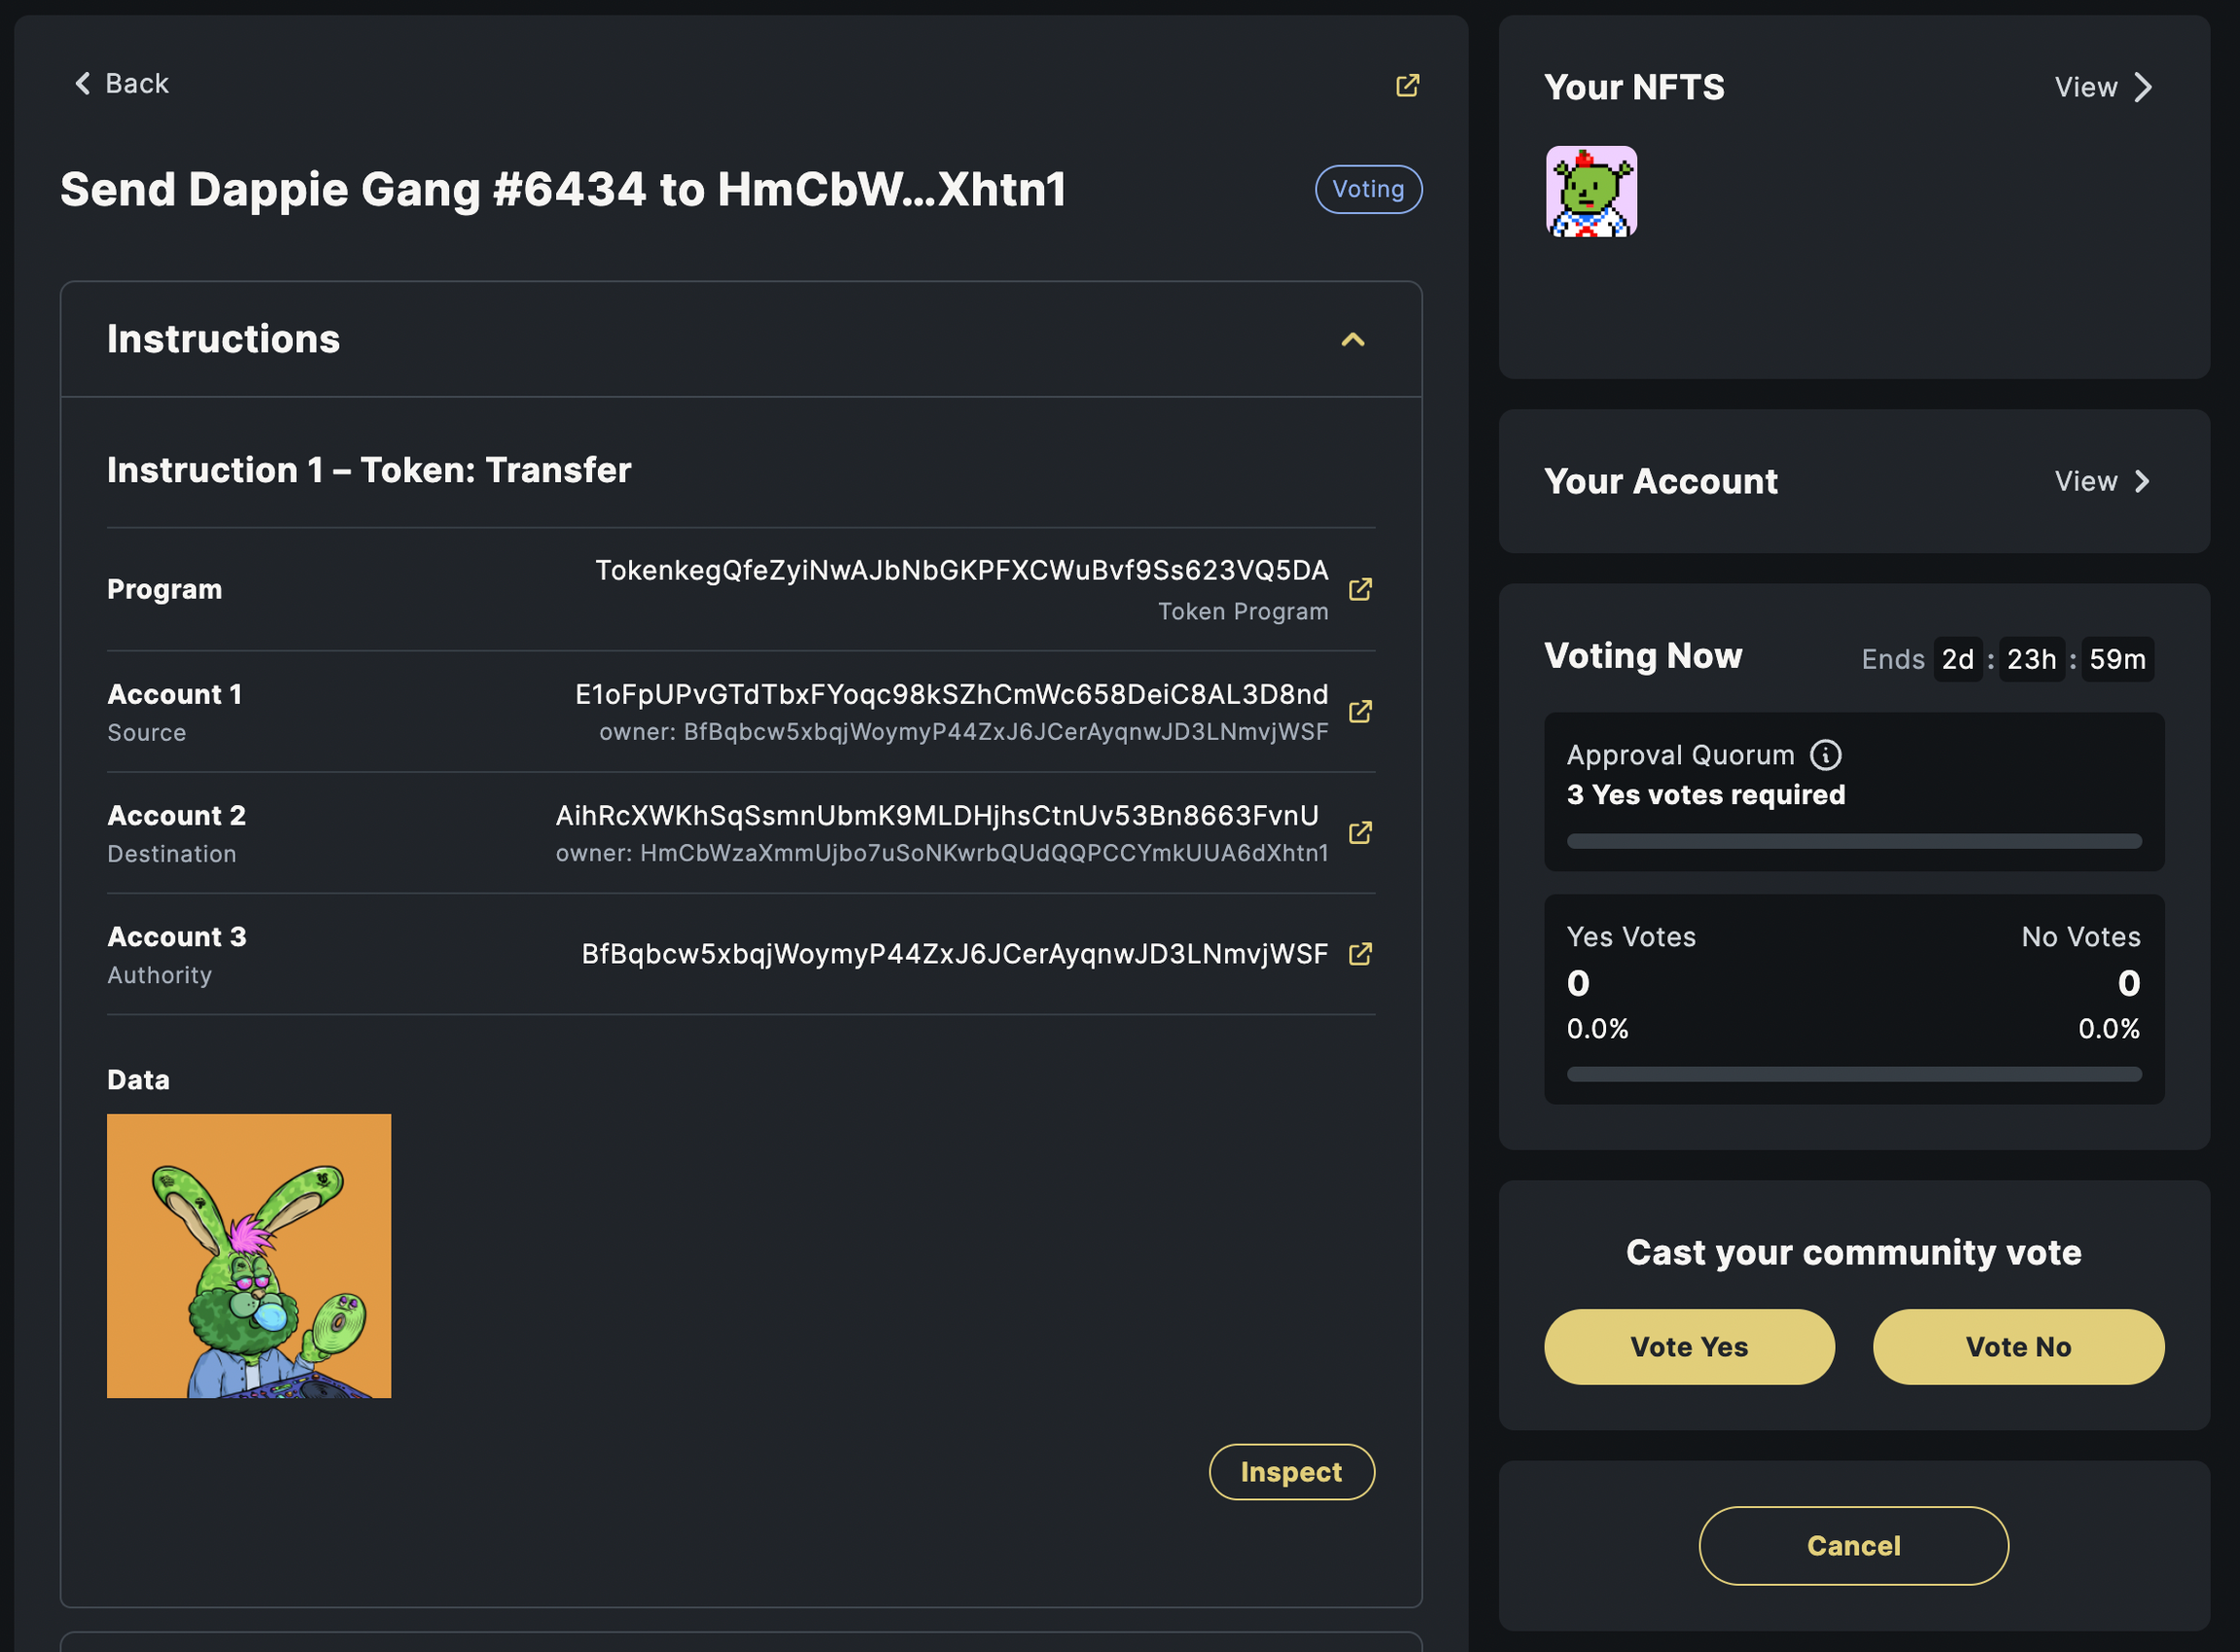
Execute the Proposal
Finally, let's perform Vote and Execute:
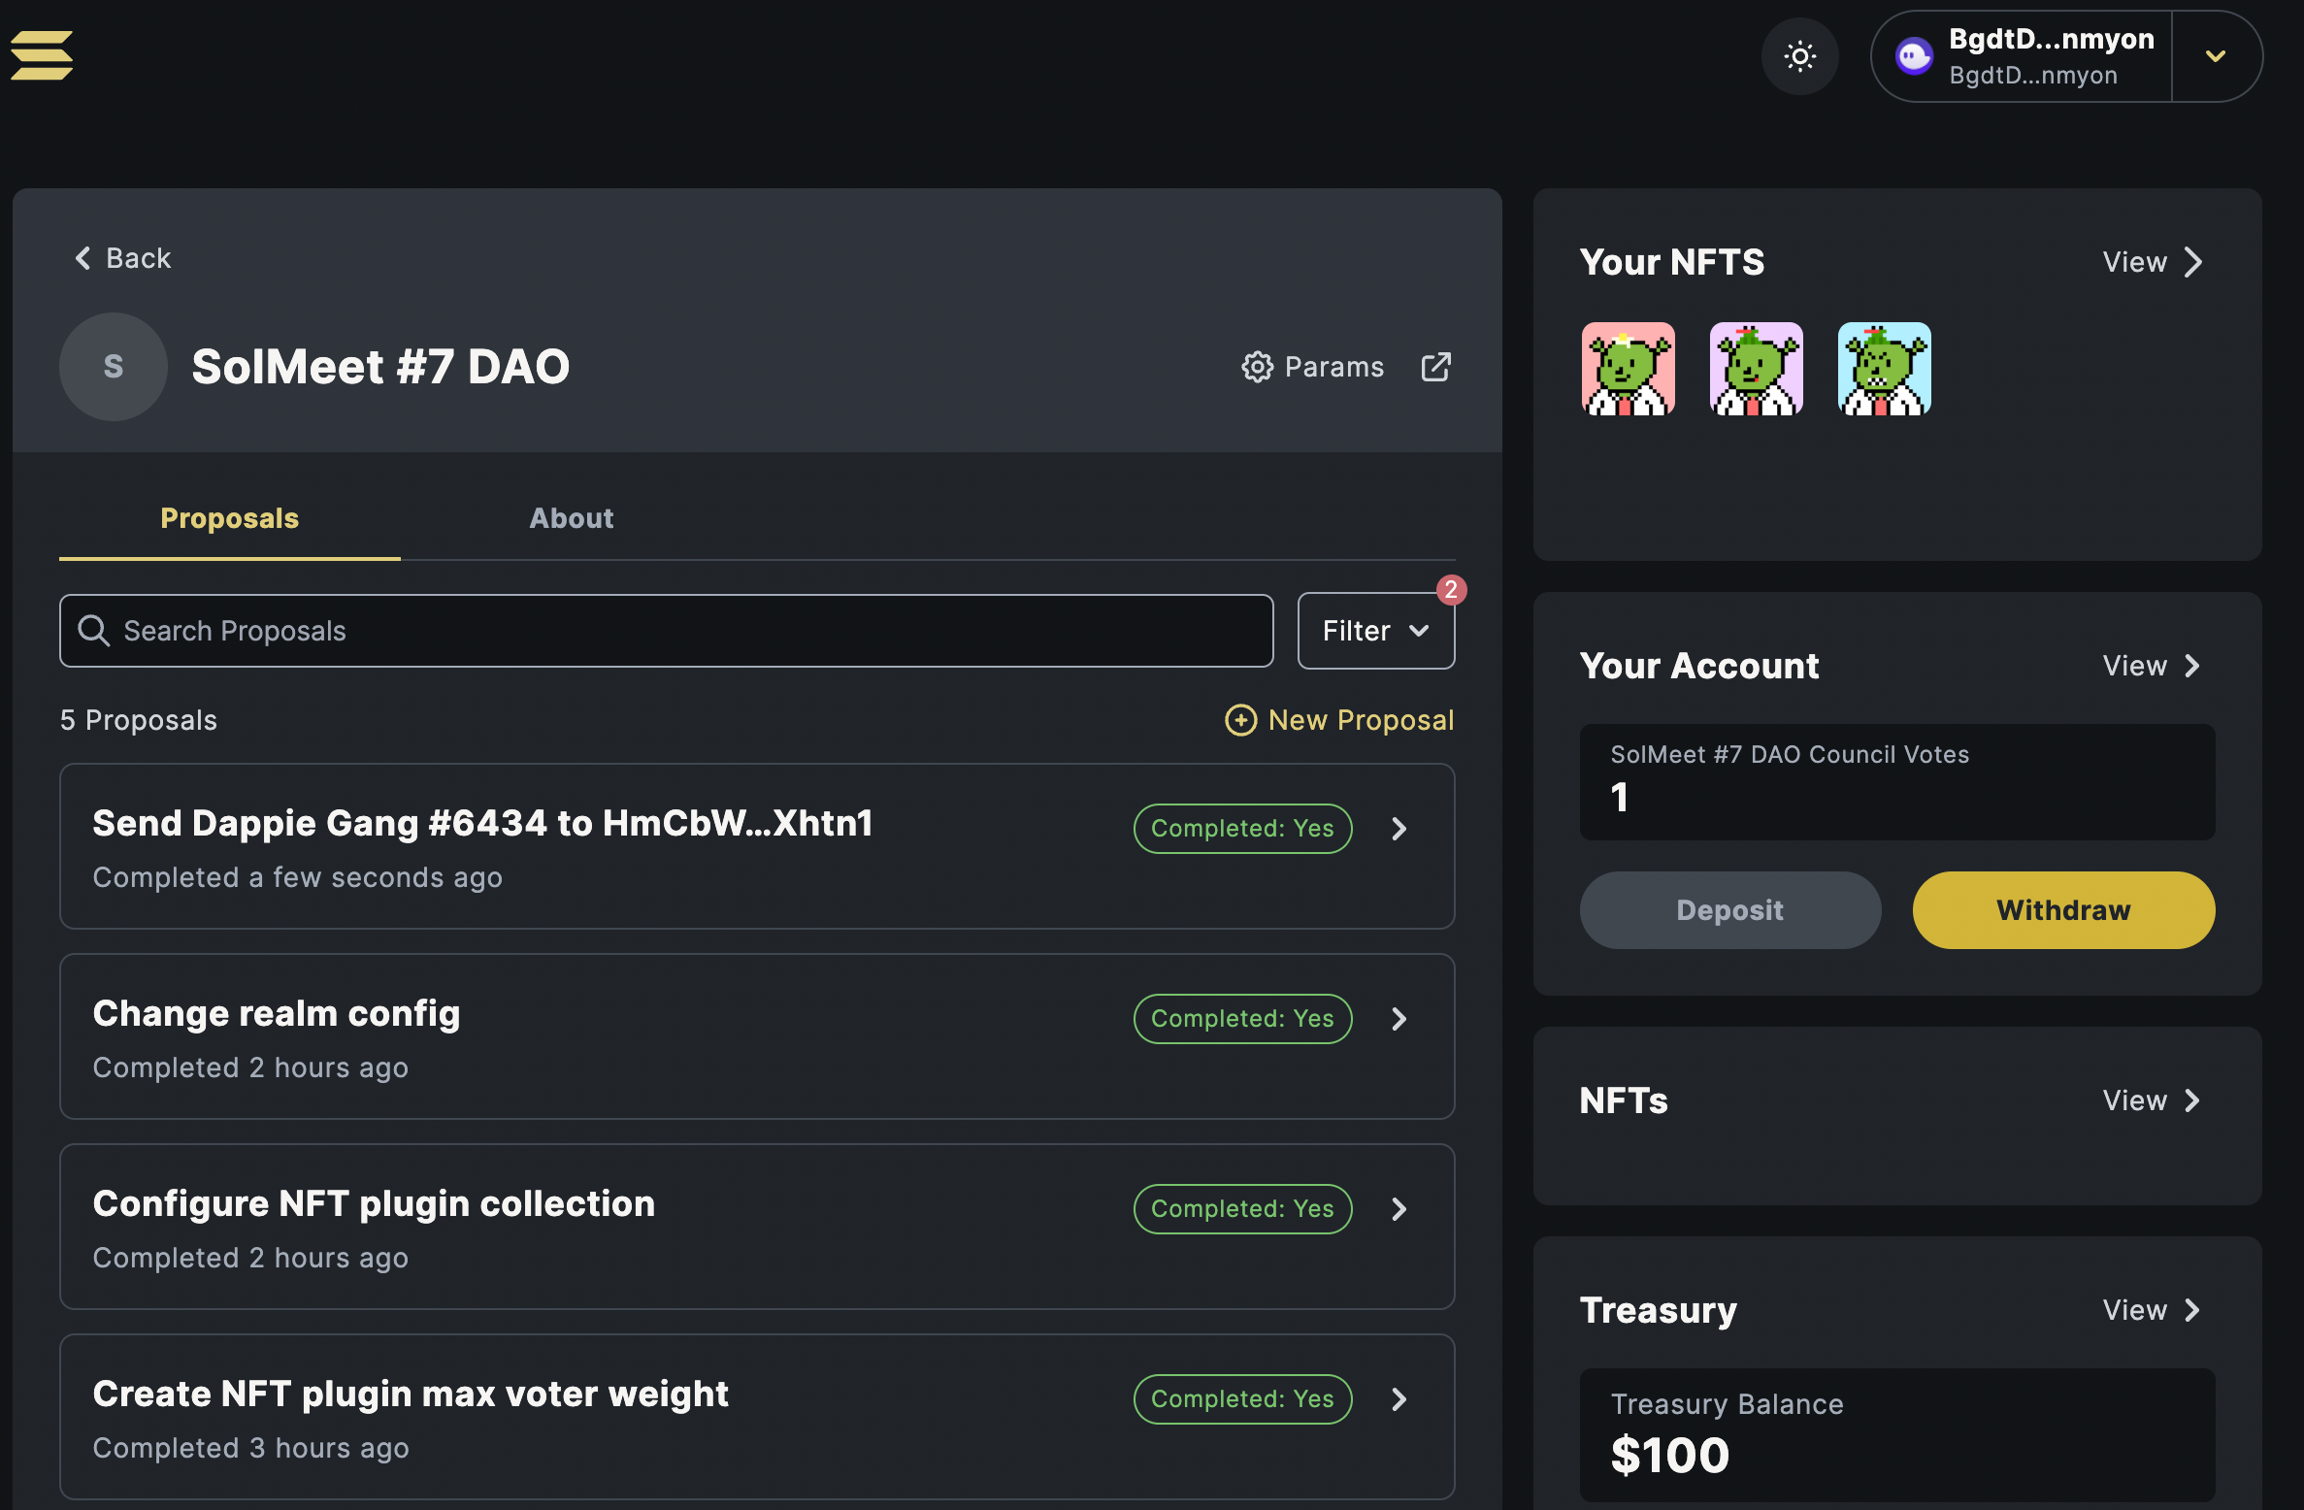
Here, you can see the NFT locked in the NFT treasury is gone. Let's check to the receiver's wallet:
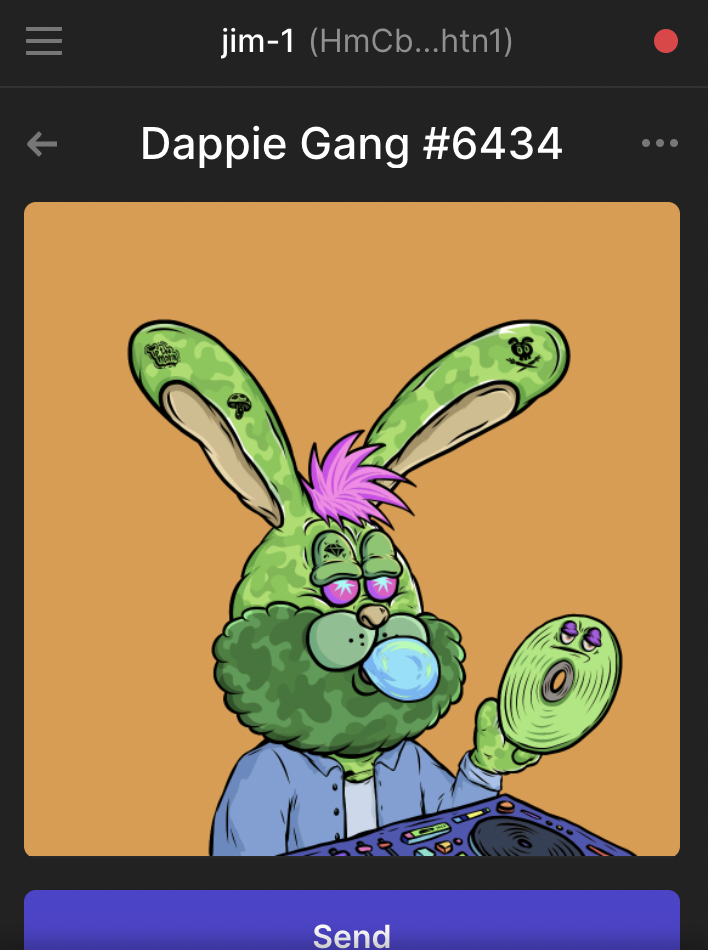
Whoa! The NFT transfer is executed successfully!
Reference
https://en.wikipedia.org/wiki/Decentralized_autonomous_organization
https://docs.realms.today/
https://github.com/solana-labs/solana-program-library/tree/master/governance
https://github.com/solana-labs/governance-ui
https://sinoglobalcap.medium.com/how-to-solana-chapter-5-daos-governance-e41a753ce72a
https://app.squads.so/
https://twitter.com/Sebastian_Bor
https://github.com/solana-labs/governance-program-library/pull/37
https://realms.today/dao/MonkeDAO
https://docs.realms.today/DAO-Management/createing-DAOs/NFT-Community-DAO
https://nation.io/
Last updated